Show Posts

This section allows you to view all posts made by this member. Note that you can only see posts made in areas you currently have access to.


Messages - Jamieg285

Pages: 1 [2] 3 4 ... 174
26
General Banter / Re: I have changed my signature
« on: October 21, 2015, 11:22:34 am »
I just like reading.


Damn, now I've posted   :zip:

27
Projects / Re: '79 Camaro - Major surgery
« on: September 30, 2015, 12:26:12 pm »
I had a half day to work on the car on Monday, so some time was spent on Sunday evening applying some primer to the next set of parts.  The inner brace was first on the list, with the outer wheelhouse and trunk dropp-off being next.


The next morning I made the final adjustments and then welded the inner support in.  I realise a missed a section at the bottom, where it attaches to the outer rocker, but that will be easy to sort out later.


With that done, it was on to cutting panels and spot welds.  I cut a large section of quarter panel out (less than will be required for later) to give me access to the outer wheel house.


I'd bought the outer wheel house as I thought it would save time replacing the whole, rather than trying to patch.  If I'd have realised how many spot welds there were, I may have reconsidered.  There are tons of them, about 1/2 in apart. Here are the first few.


An hour or so later and I've only just started to reach the top of the arch.  Access is getting harder due to the profile of the metal, and that the welds are nearer the curve.  Came up with the idea of cutting most of the panel out, leaving just the flange, which is far easier to access.


Another hour on, and I'm still only 3/4 of the way round.  Hopefully I will get this out in the next session.

28
Projects / Re: '79 Camaro - Major surgery
« on: September 23, 2015, 12:59:37 pm »
Not a lot of progress lately, due to family holidays and birthdays.

Good news is the latest shimpment has arrived in the UK and been collected.  Pics will have to wait for another time, as they are all squirelled away in the garage, but good bits include:  100% quarter skins for both sides, trunk drop offs for both sides, outer wheel house (drivers),full tail panel, cowl panel, wheel adapters (with lip this time, yay!), and brake parts to allow fitting of the new system.  I really hope that is the last of the large orders.

As for movement on the car itself, I've been concentrating on the inner door jamb suppport on the drivers side.  Firstly cutting the bottom of the quarter up higher to give access, then making/re-using the template from the other side.  The rot has gone a bit further this side, but nothing to bad, maybe an inch bigger on the replacement piece.

The shape was then cut from flat sheet, and out with the hammers, resulting in this:


Next up will be some more primering.  I need to prepare this piece, which is next to be welded in, but at the same time I will put it on the outer wheel house, inner faces of the quarters, trunk drop offs and tail panel, so they are all ready to be fitted as soon as I am ready to fit them.

29
Projects / Re: '79 Camaro - Major surgery
« on: August 14, 2015, 12:44:25 pm »
Another couple of evenings work has resulted in some morale boost.  Putting some primer on things really can make a big difference to how the project looks, and as a result I will look at getting more stuff primered soon.

It started off because I had a couple of small items that needed to be primered, but I need more to be able to use up all the mix.  Not sure why I chose it, but I started digging into the passenger side inner wheelhouse, checking for the damage along the edges.  A bit of a blast with the wire brush on the angle grinder and I've found a few spots of rust/holes that need attention, but I think I can do it in two parts rather than one long one this time.


With most of the panel being OK, I decided to continue cleaning it up, and leave the repairs till later.  First up was grinding/cleaning up the welds from the patch put in last year. I started trying the flap disc for this too, and was impressed with the results and will definitely use it more.


I then used the wire brush to clean up all of the inner panel, readying it for primer.


I then repeated the exercise on the drivers side.  My hands were buzzing after that, definitely a job/tool to use in short stints.


I also cleaned up the edge of the seat back section, adding a small patch and then smoothing off.


Epoxy primer was then mixed and applied.  I'm really happy with the difference it has made to the inner arches.


The next evening I was able to continue preparing the drivers inner panel preperation.  First off setting it up and marking where the spot welds need to be.


These were then drilled and cleaned ready for the zinc primer.


The zinc primer has now been applied to the patch and the mating surfaces on the car, and it's all ready for welding, but I've stopped there for now.

I took a late decision to scrap the full outer wheelhouse on the drivers side.  There was going to be a lot of repair work required on the lower section where it meets the rocker (as already done on the other side), but also a lot of the lip is bad.  I'd recently read that the AMD piece is good quality, and also found a local hot rod shop that will get in individual pieces at decent prices.  With luck it will be here in a couple of weeks, about the same time as the big shippment coming in the container.

With the outer wheelhouse being removed, I didn't want to start welding around this area until all the new panels are available for lining up.  This means the next jobs will be another change of focus - but I haven't worked out what that will be yet.  Tail panel, floor pans or something else? 

30
Projects / Re: '79 Camaro - Major surgery
« on: August 05, 2015, 12:47:14 pm »
With the kids off school and at their grandparents during the day, I'm getting more time to myself in the late afternoons.  Weather permitting, I'll be able to get more done in the next few weeks.

Over the last couple of days I've done a bit more on the rear corner.  The fabbed up side piece for the floor pan patch has been attached:


The rear few inches were left hanging at this point, as the edge of the pan had been a bit mangled during removal and I wanted to make sure the new profile matched that of the inner quarter, before I did the final welding.

I've put two screws into the inner quarter, one from the cab going into the outer wheelhouse and then one from the outside going into the seat back (seen in pic below).  This gives me the panel alignment I needed to do some final trimming.  As always, I've gone a bit wrong and am left with a wide gap in a few places, but overall it's not too bad.


I need to primer the other side of this panel before I start welding it in. There's not enough area on it to use up all of the paint from a single mix, so I will have to do some prep work elsewhere so that I can use up the pot at the same time.  I figure I can extend the prep on the body side where the inner quarter will be welded out a bit, so will be able to coat the inner wheelhouse, maybe some of the outer too, but also some of the seat back.


31
Projects / Re: '79 Camaro - Major surgery
« on: July 31, 2015, 01:10:43 pm »
Another couple of long days on the car, getting full afernoon/evenings in.

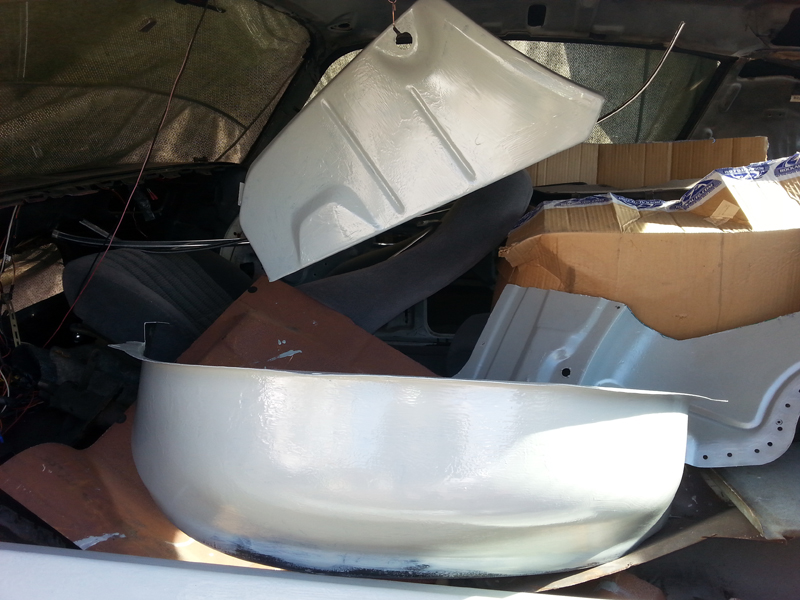
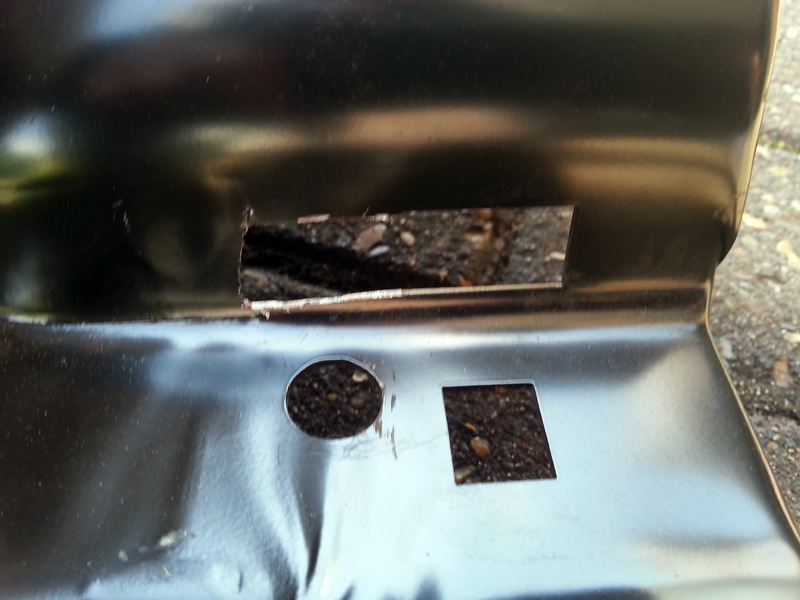
First off, as promised, the missing picture showing the start of the primer going onto the back of the rear seat panels. Can't go any lower yet as the floor needs cleaning first (keep putting this one off)


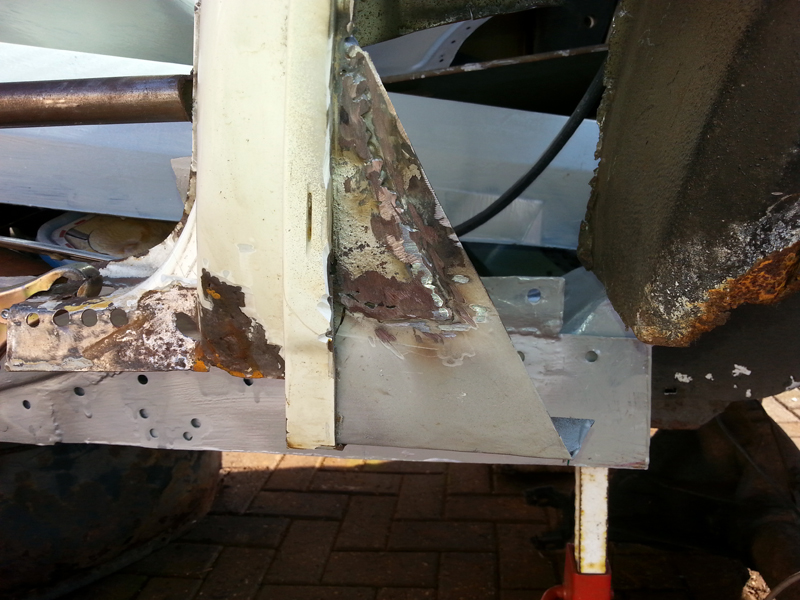
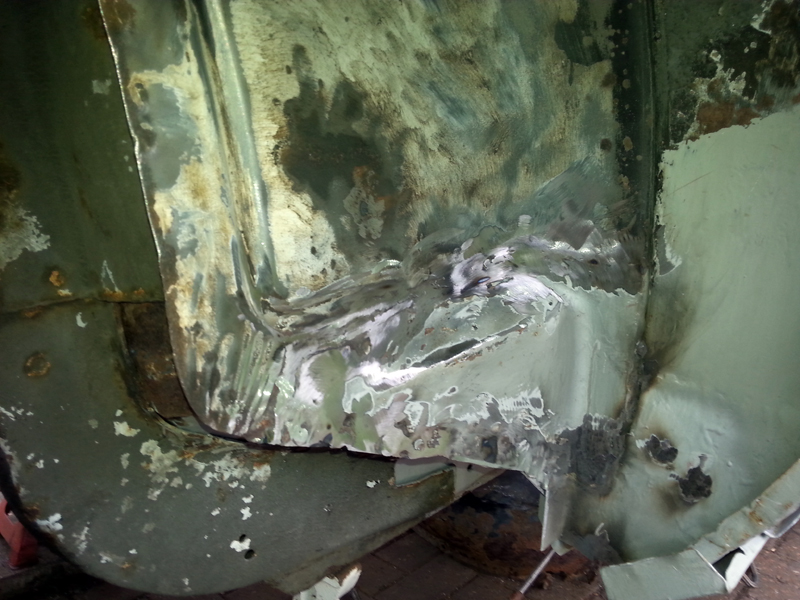
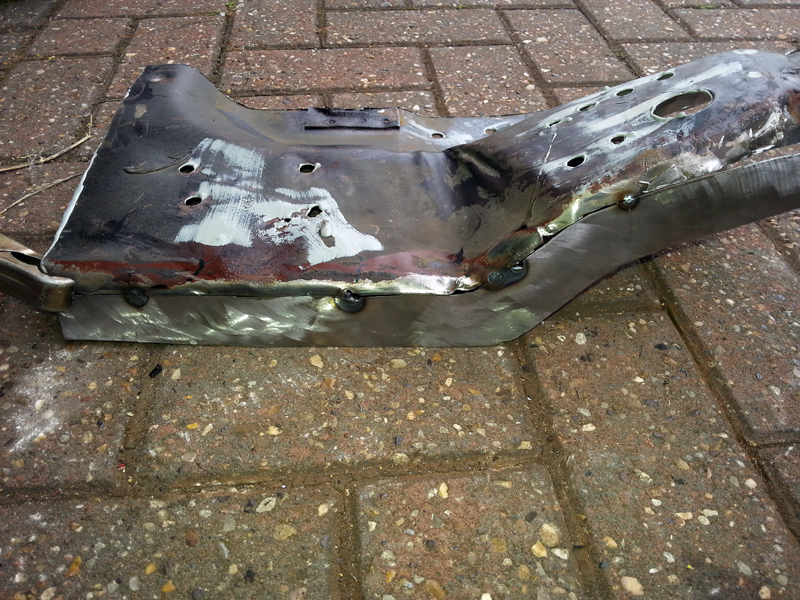
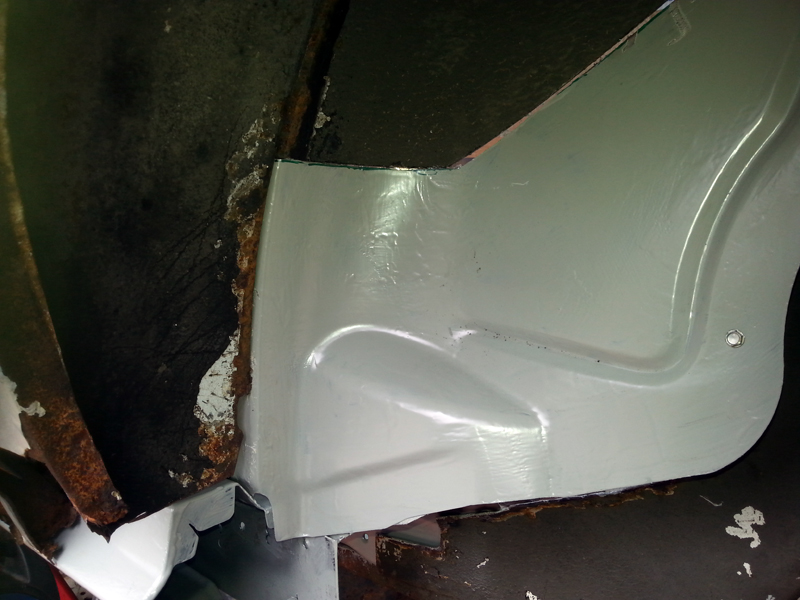
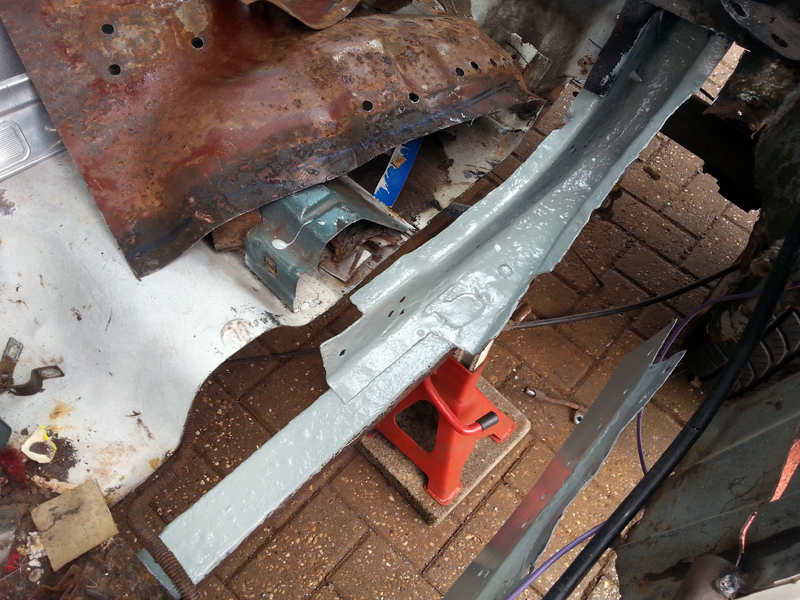
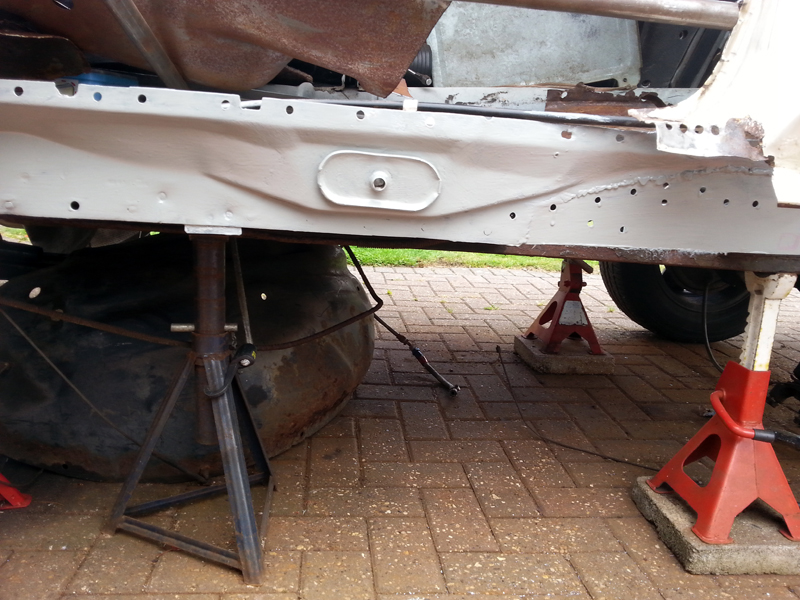
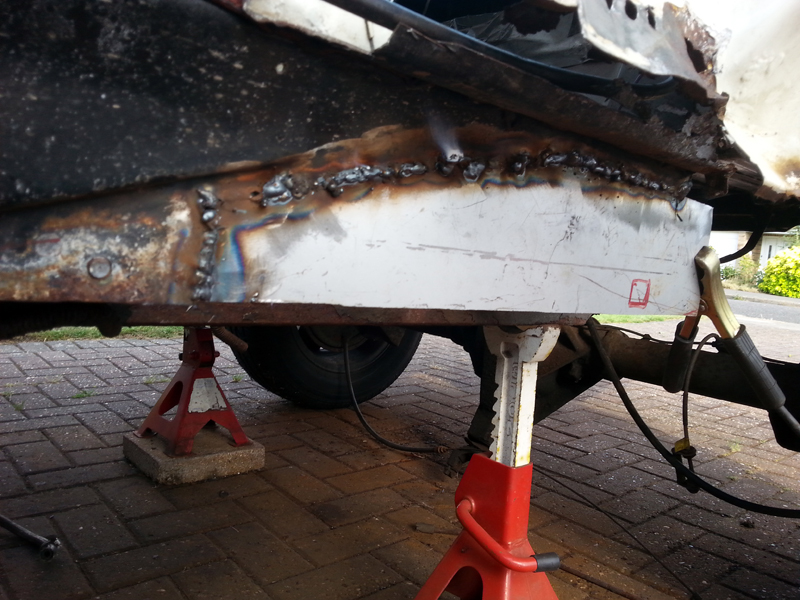
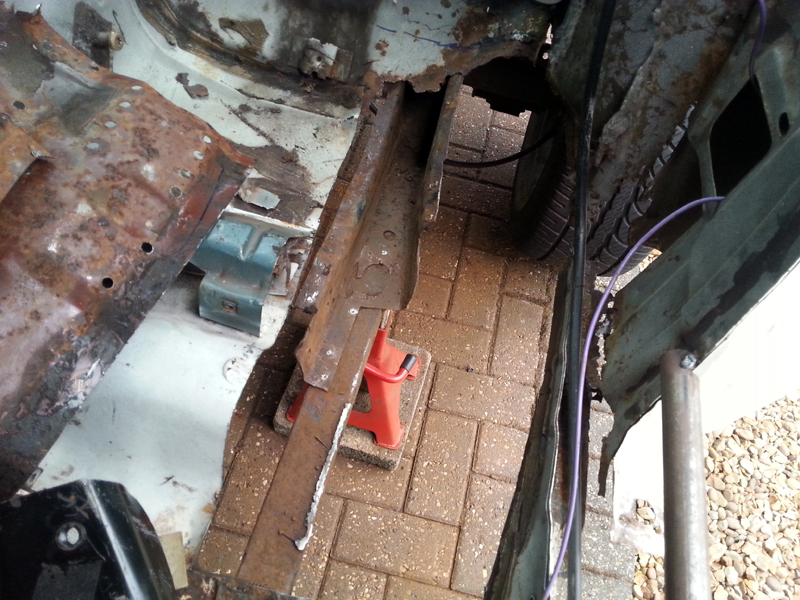
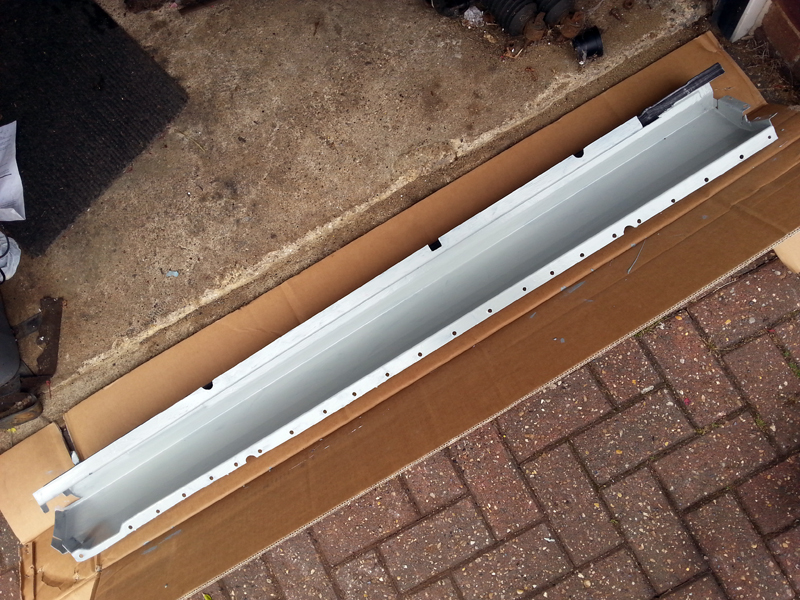
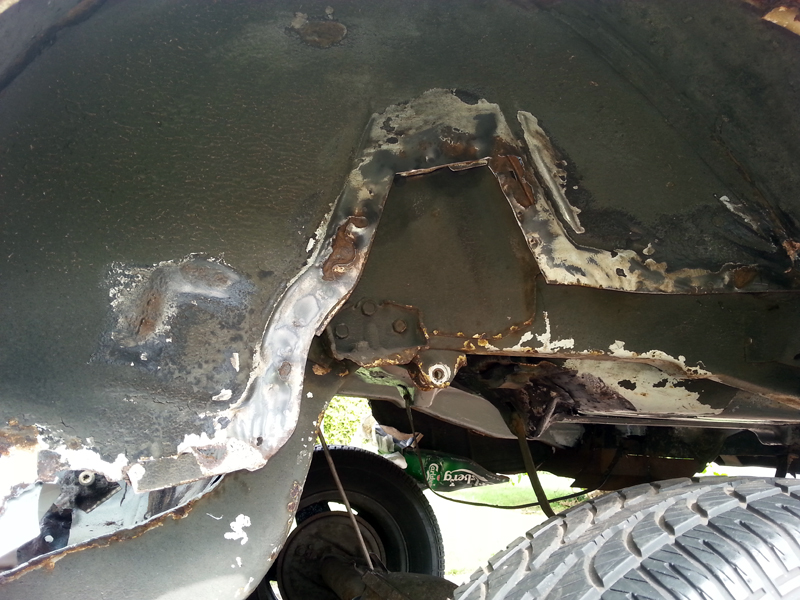
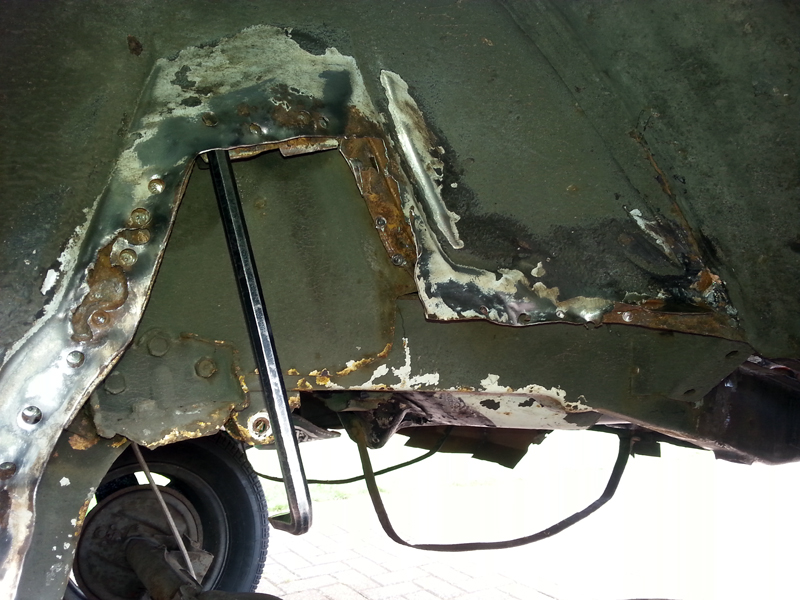
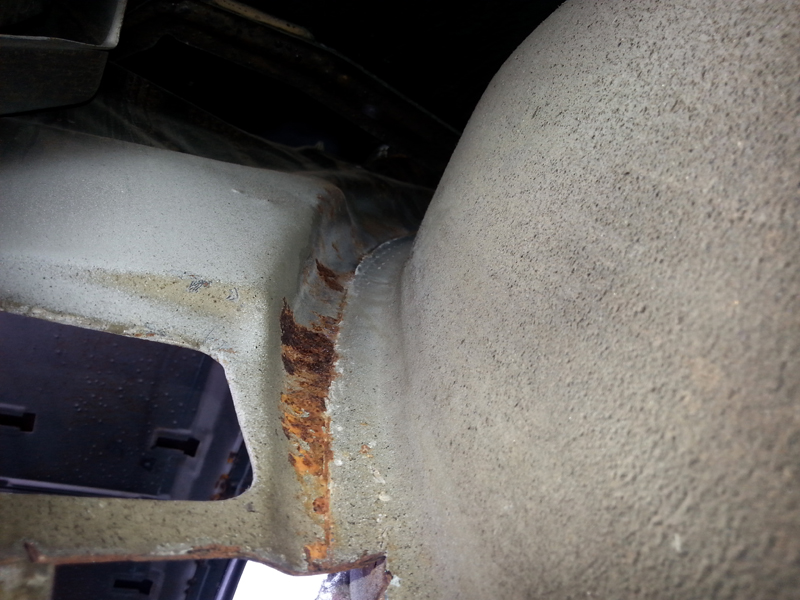
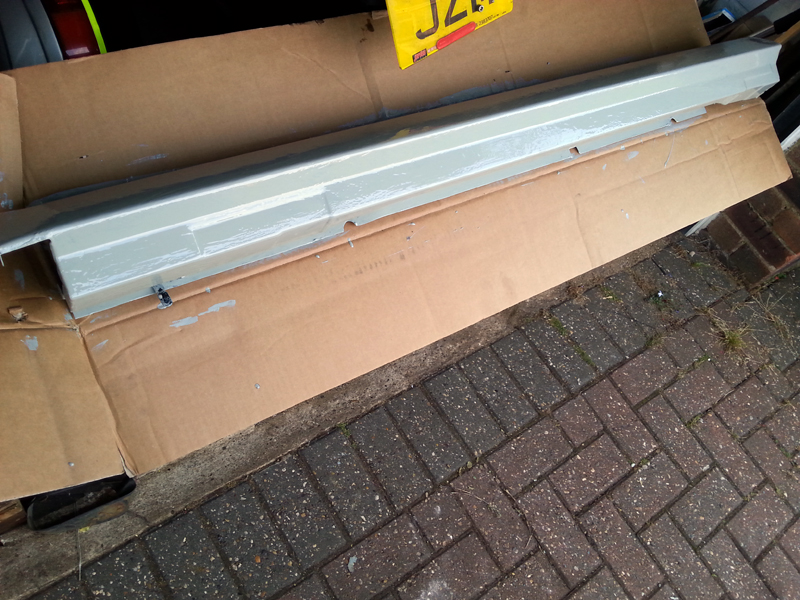
Onto the first days work...  With the primer on the rail and torque box now dry, the two pieces were prepped, cleaning the areas to be welded and weld-through primer applied. Then it was out with the welder and start hitting it.  It went in really well, the welds being better than the other side - I must be improving as I go!


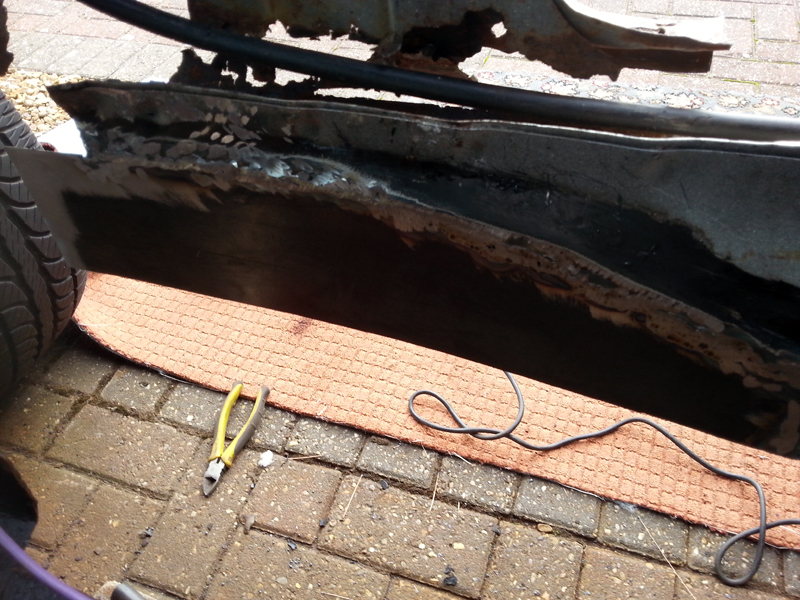
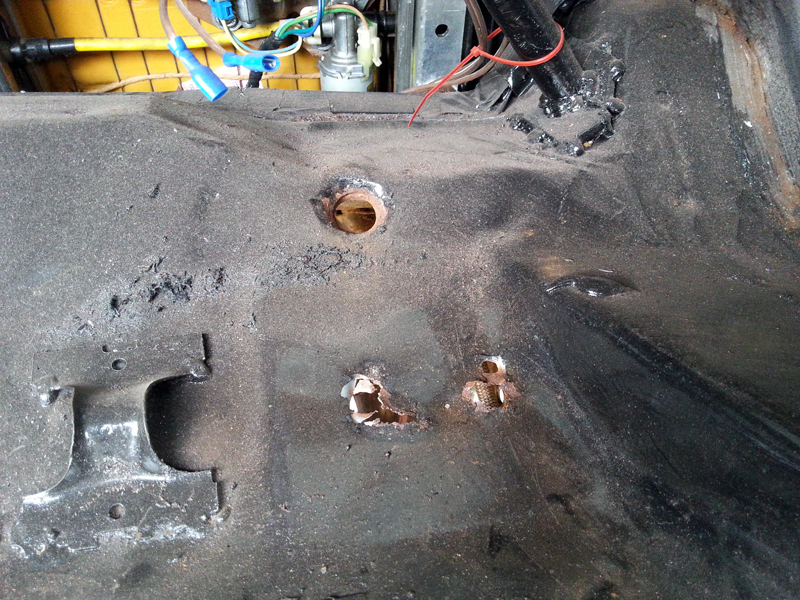
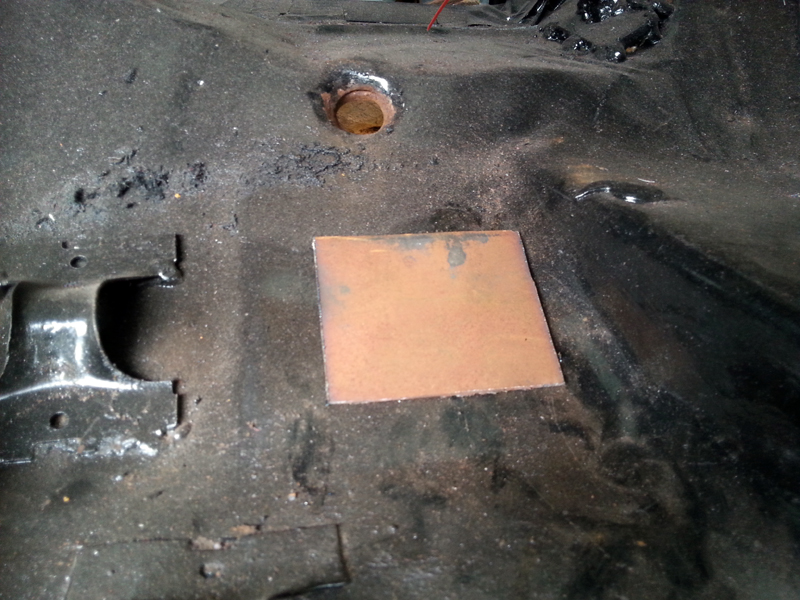
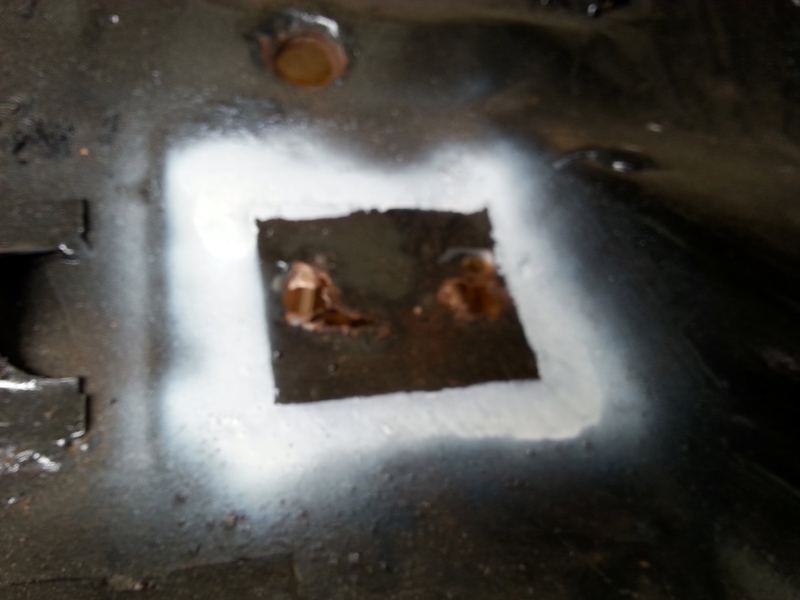
A lot of the rest of the day was spent sanding and cleaning up parts for primer.  The one slightly intersting bit was starting to make a side patch for the floor patch.


I was hoping to weld it on, but the pan needed some rust treatment first, so it will have to wait until later.


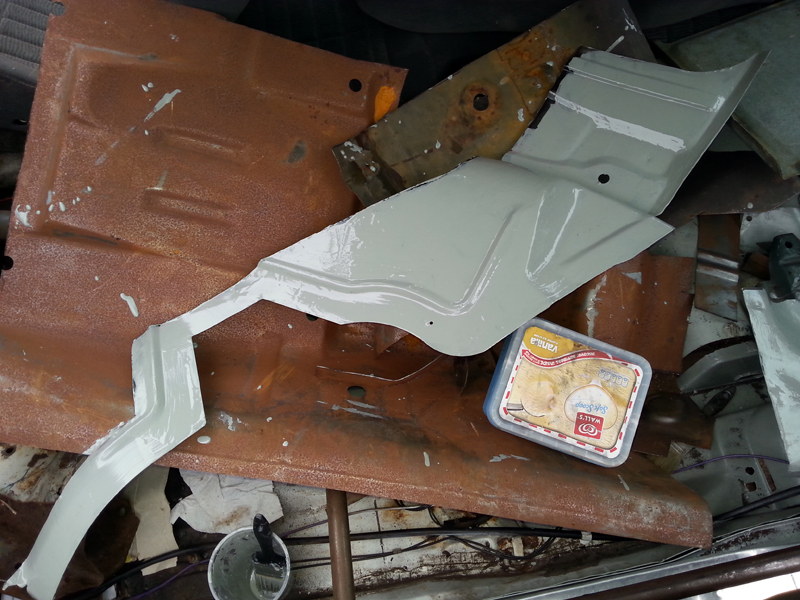
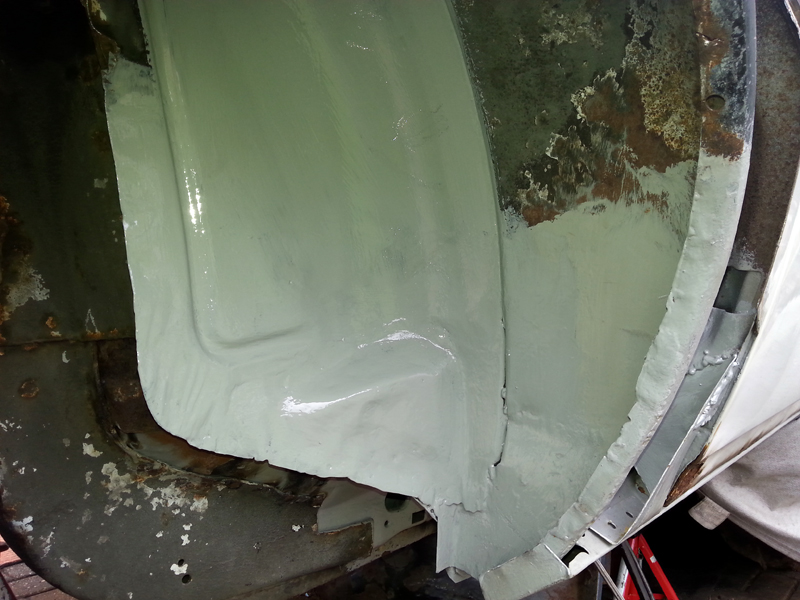
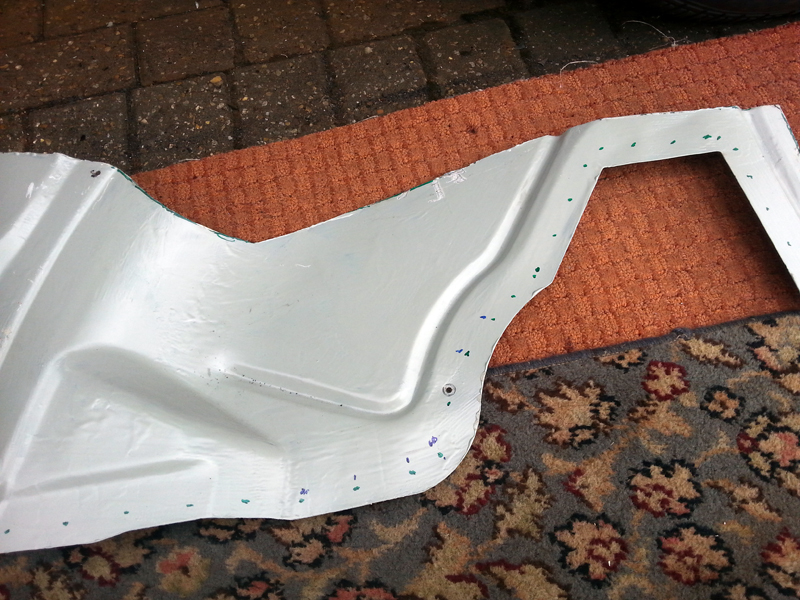
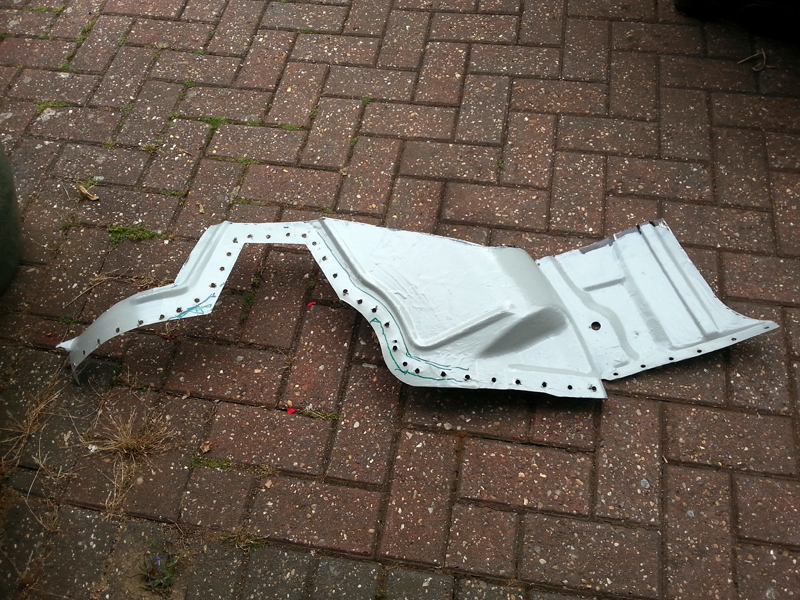
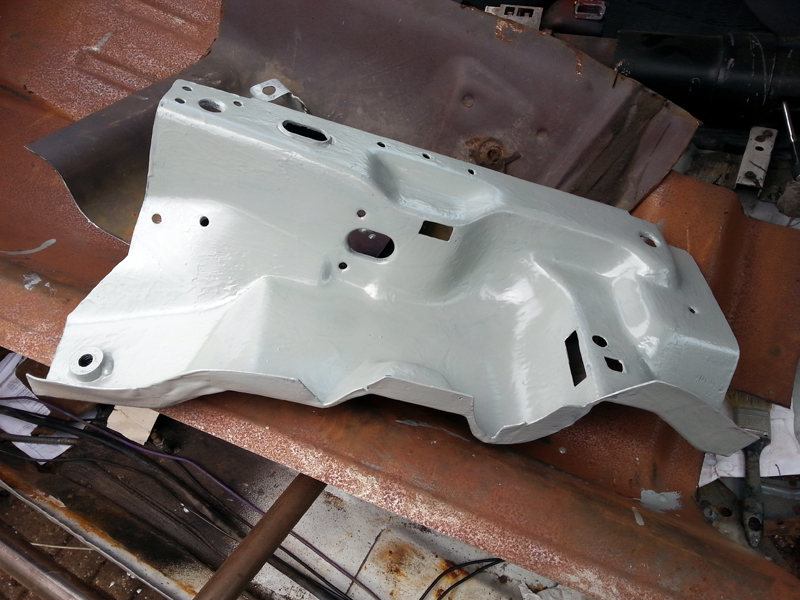
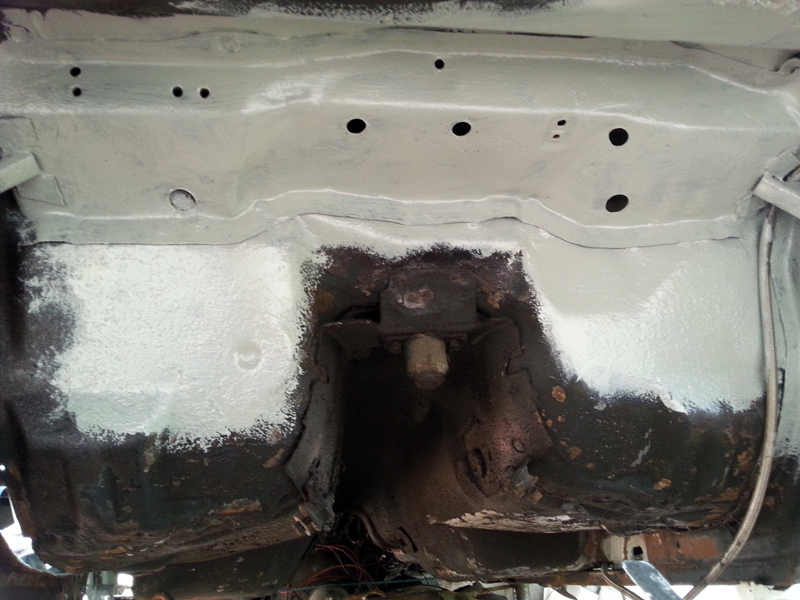
So, by the end of the day, primer had been applied to the inside of the outer rocker, the seat back patches, the topside of the torque box, and to finish up the pot, some on the trunk floor/rail section.


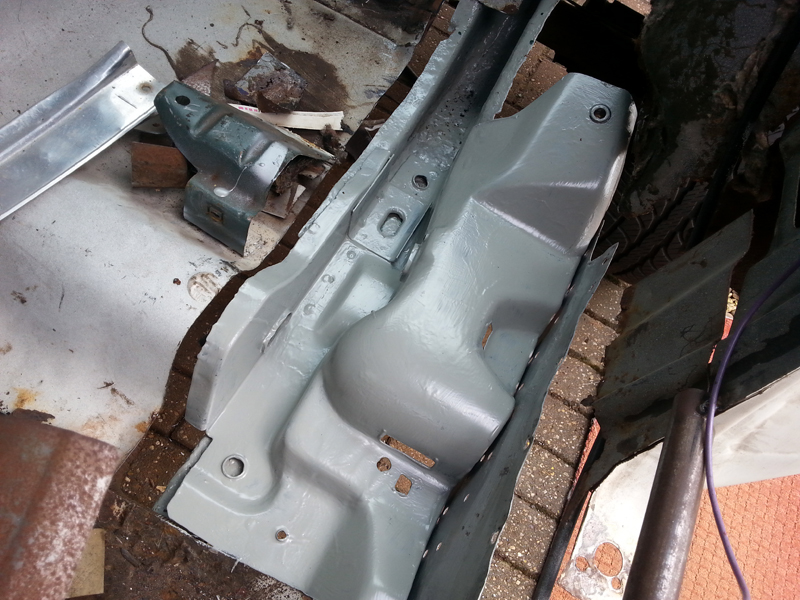
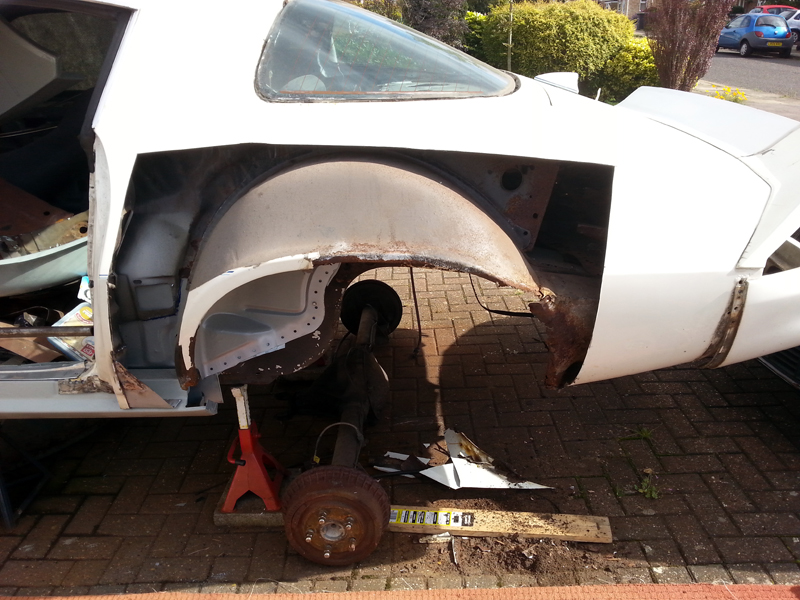
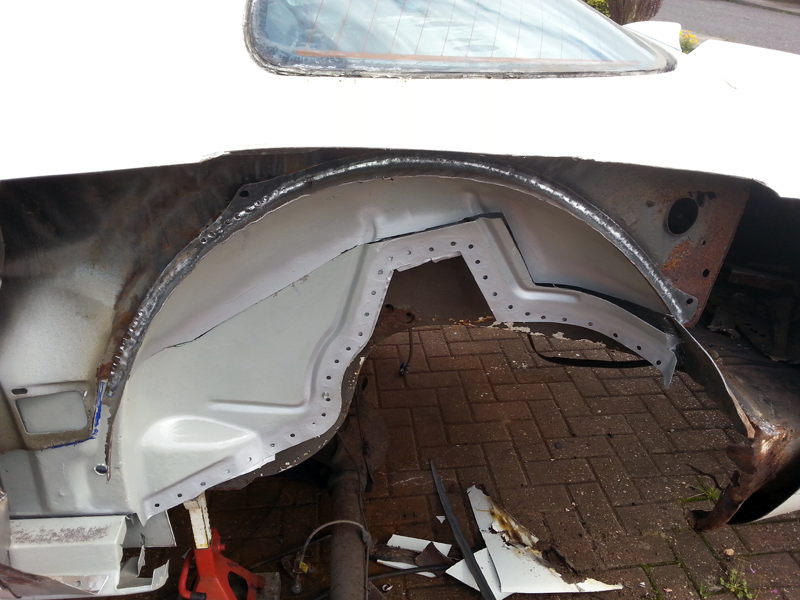
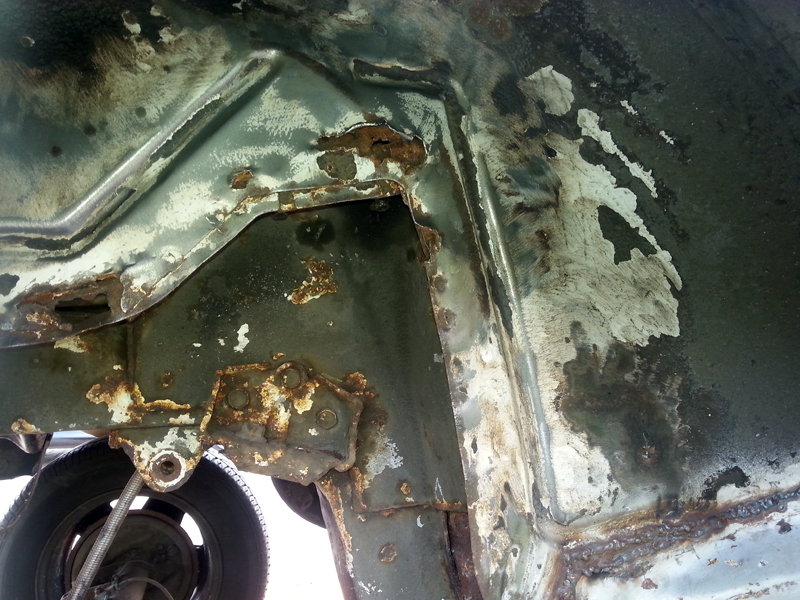
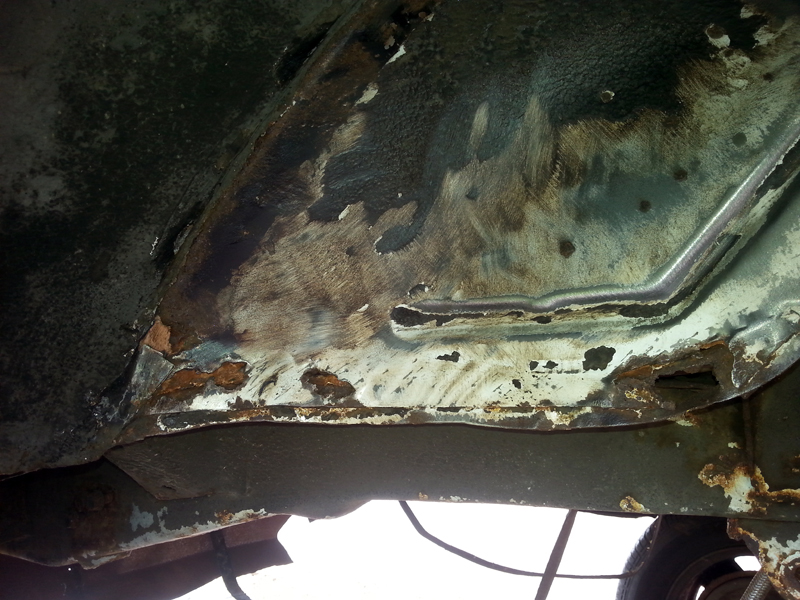
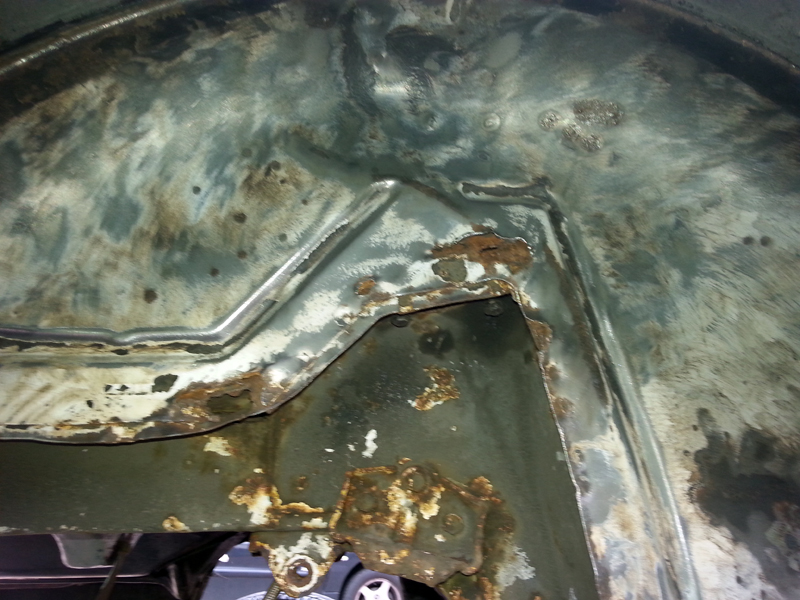
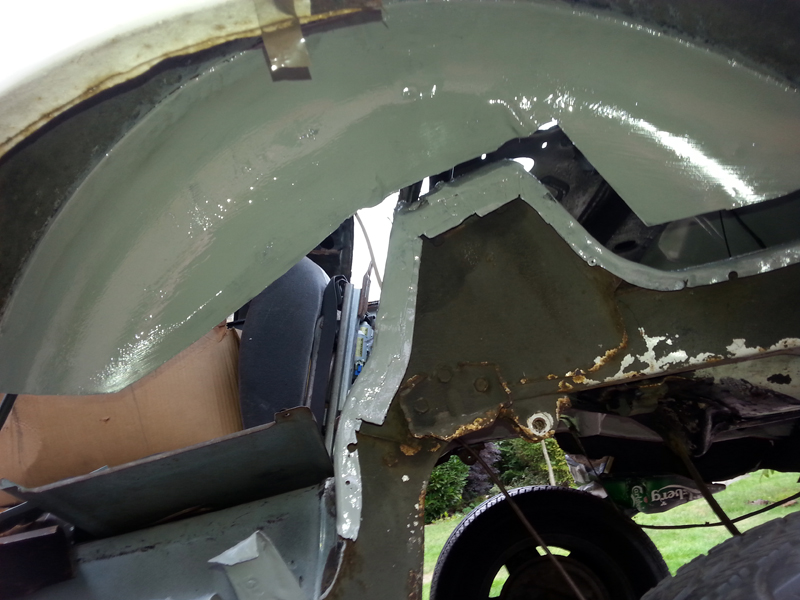
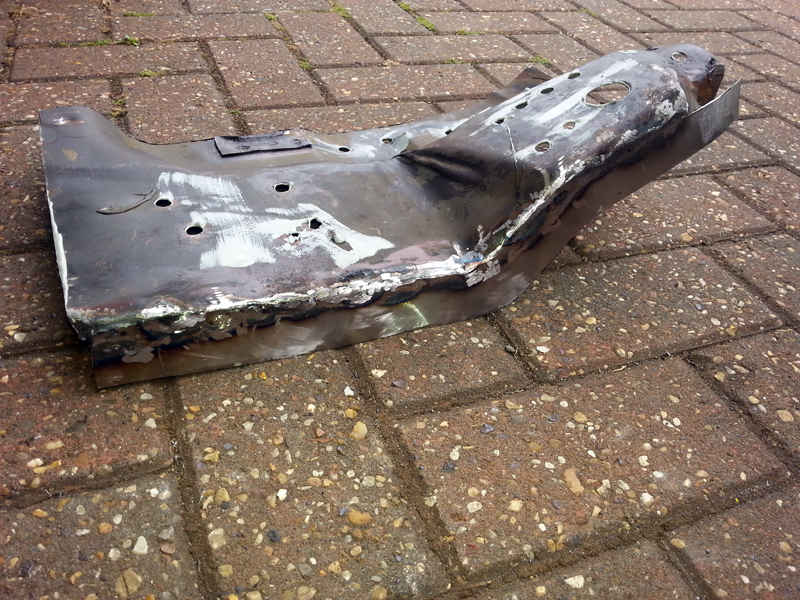
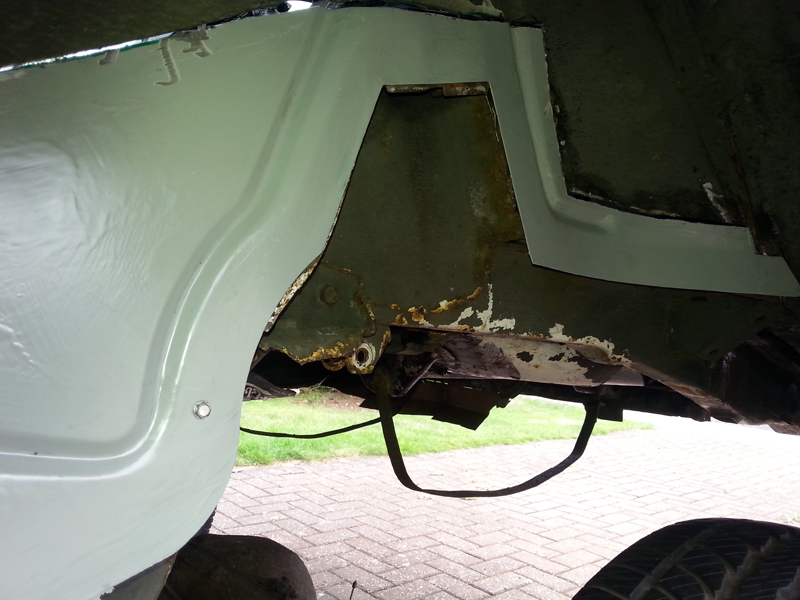
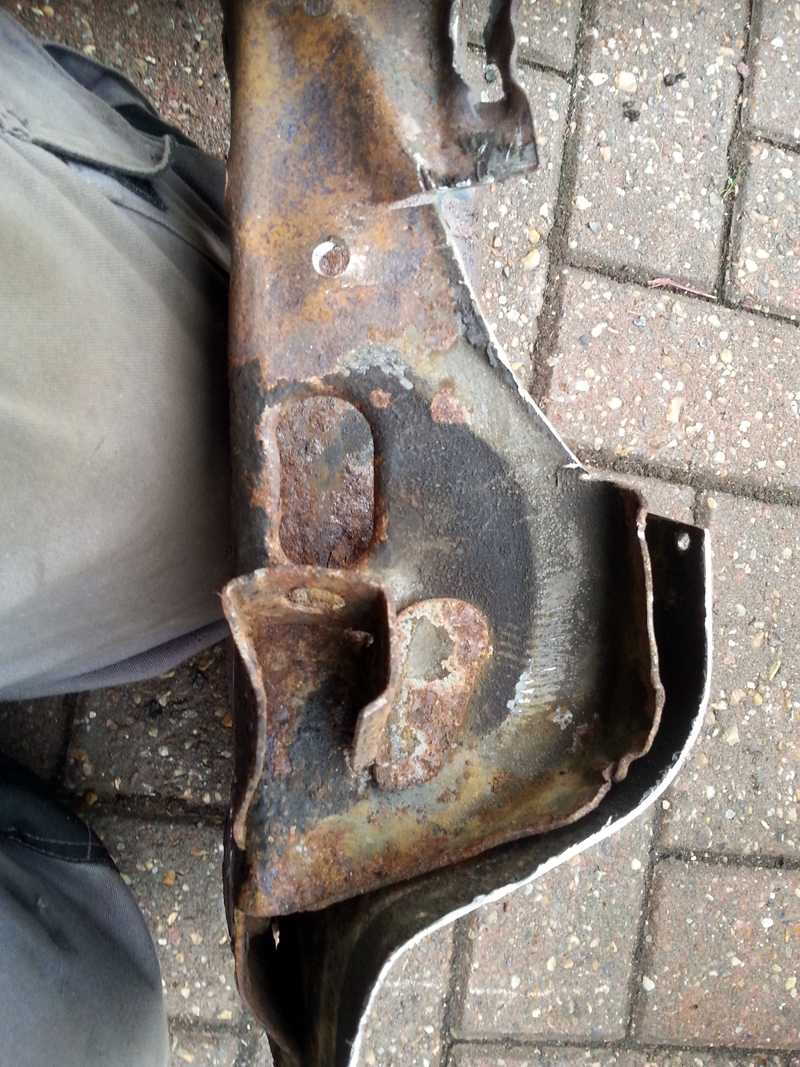
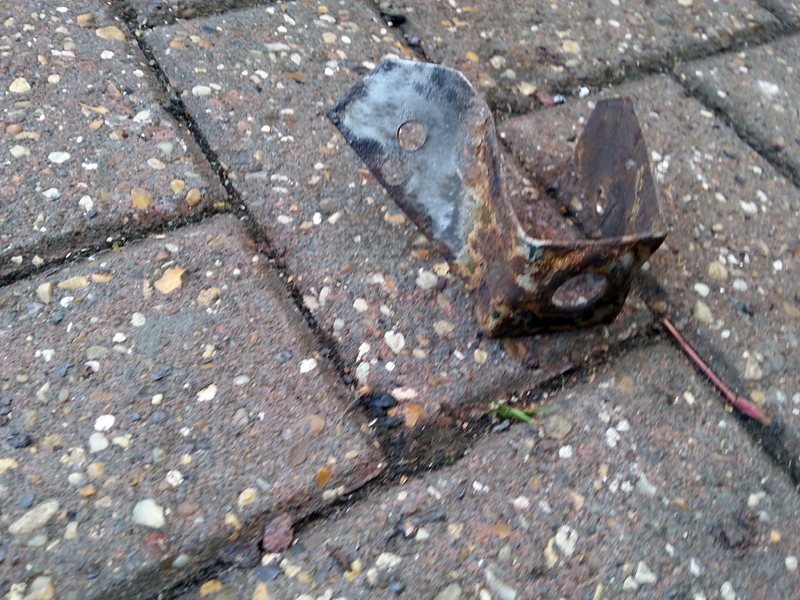
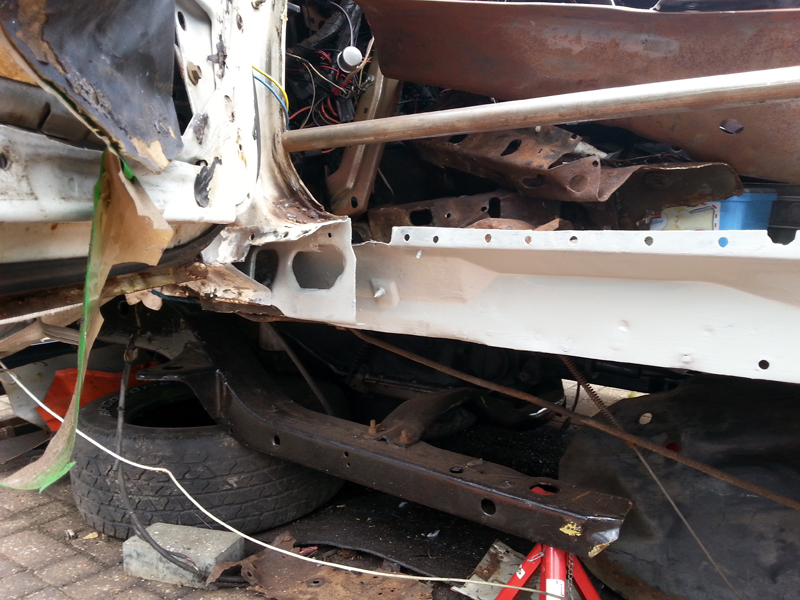
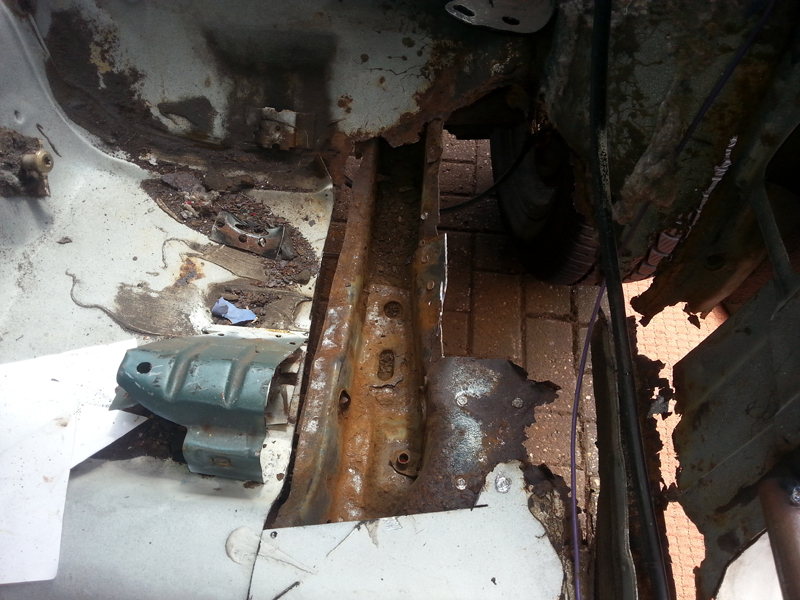
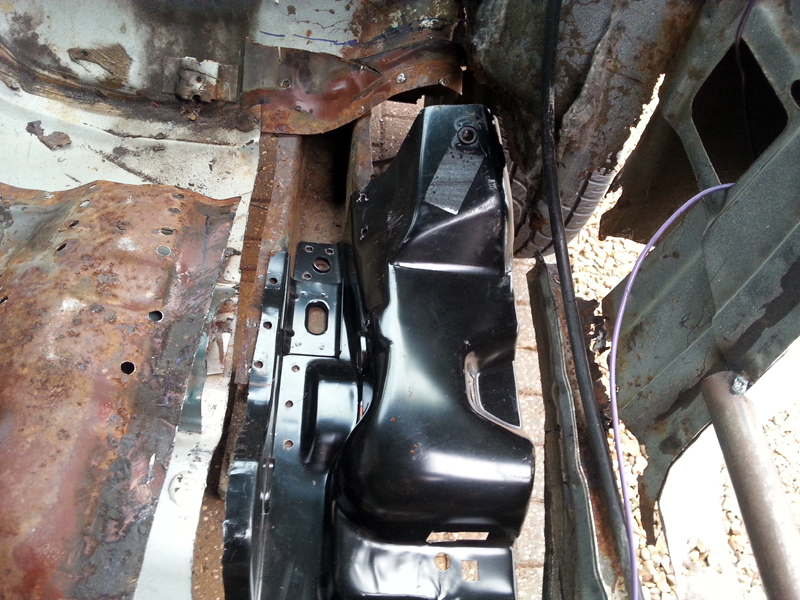
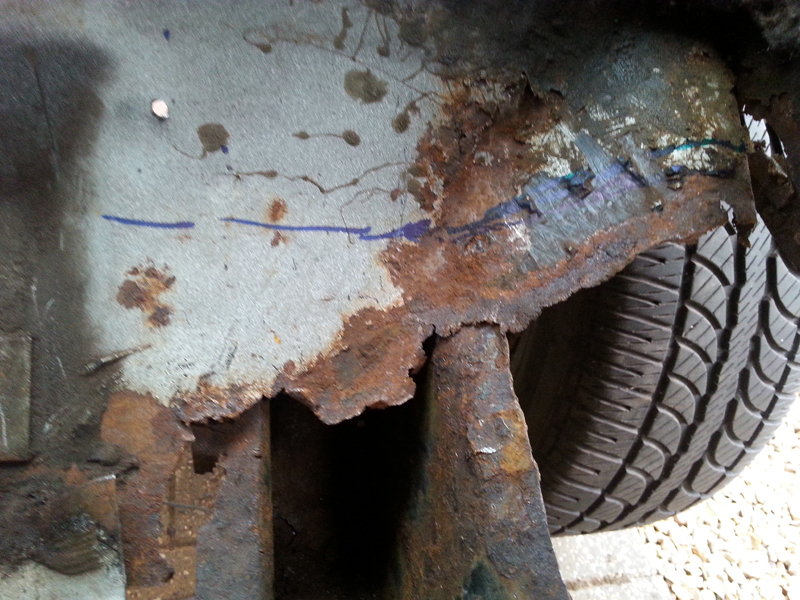
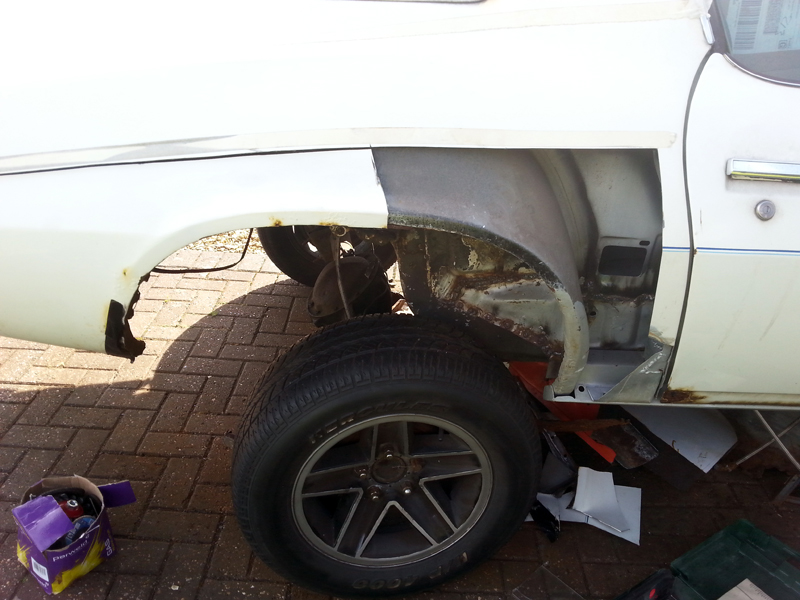
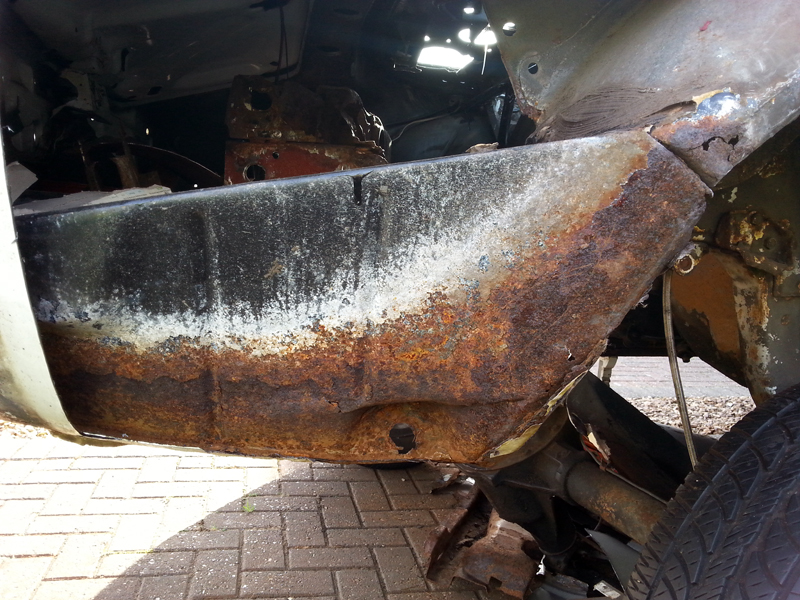
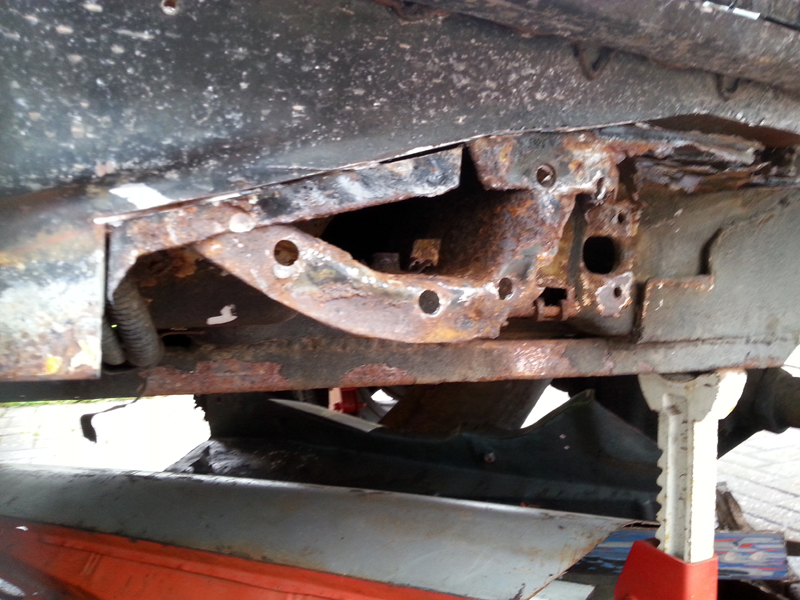
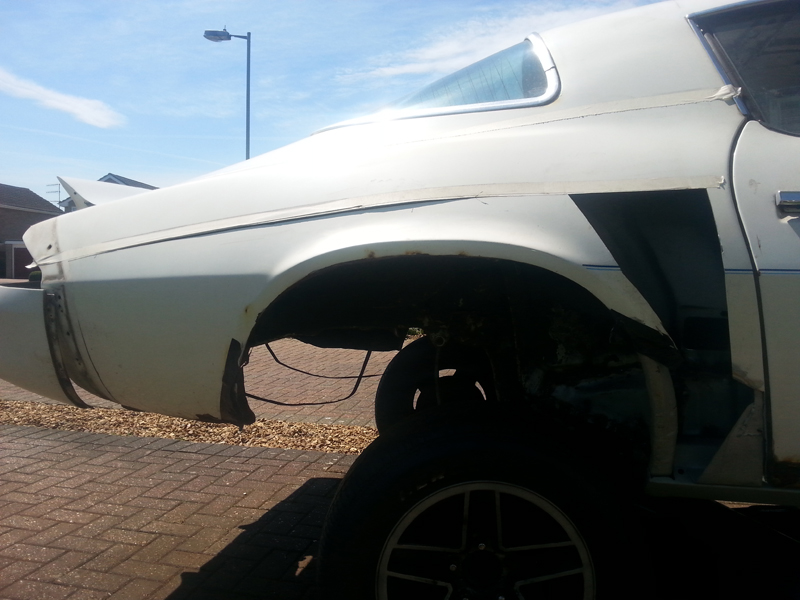
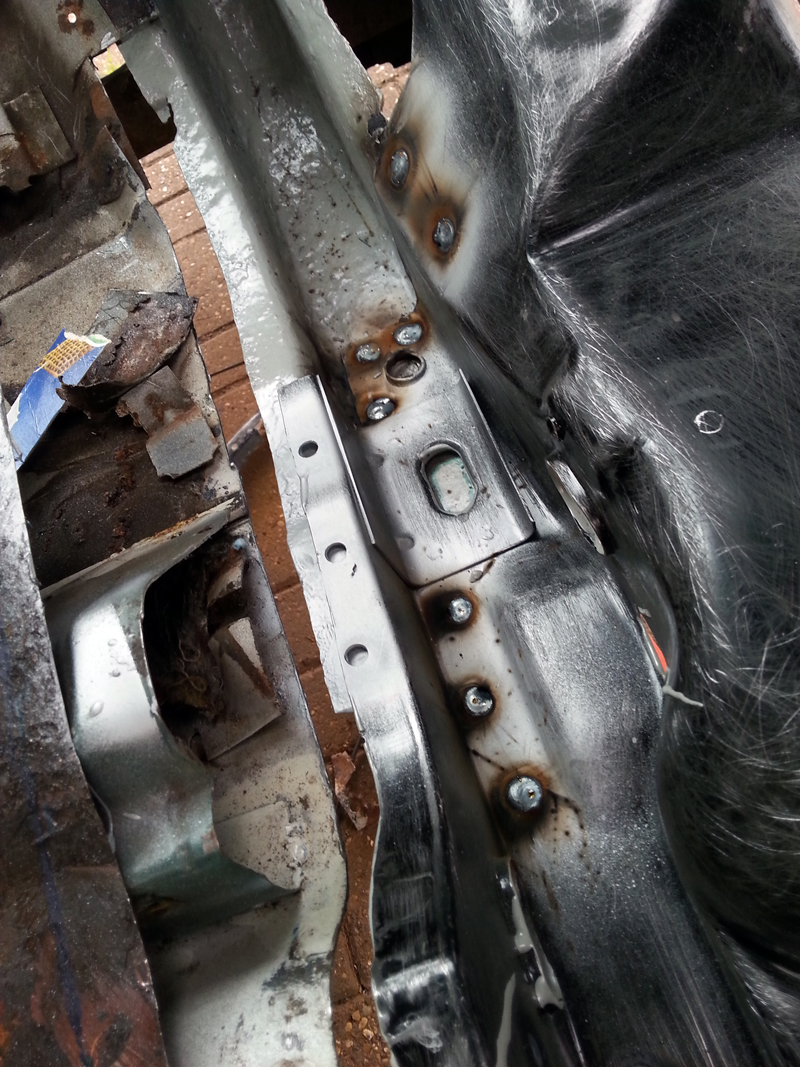
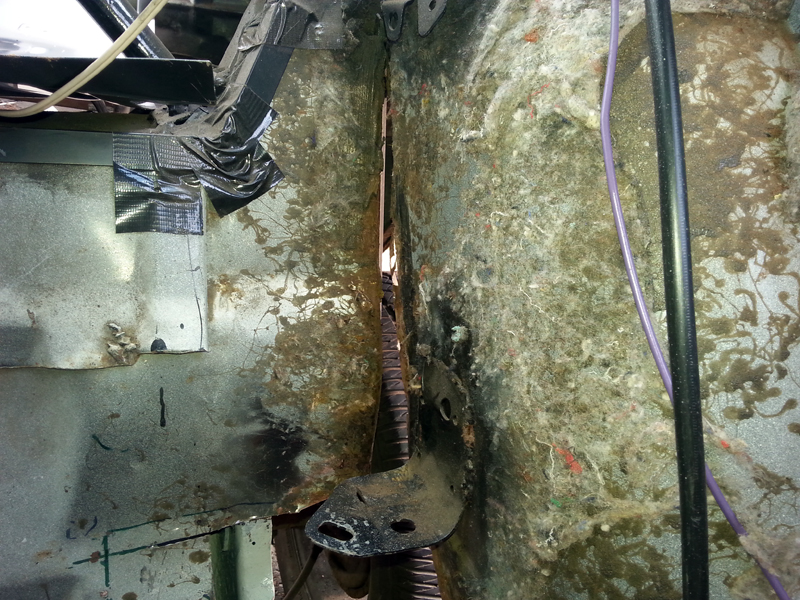
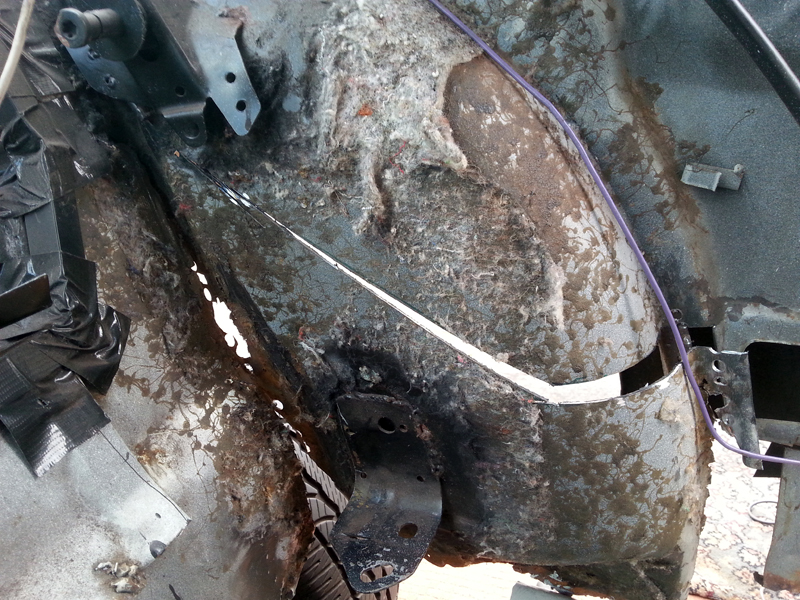
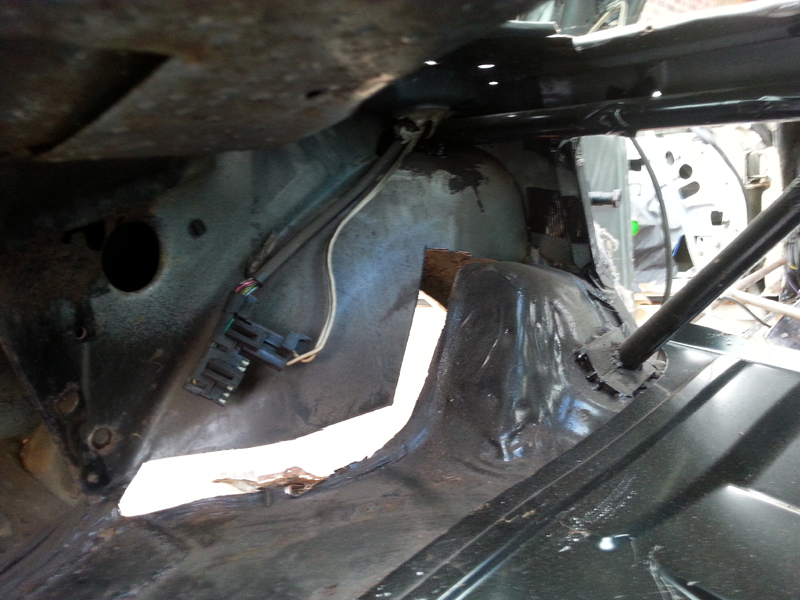
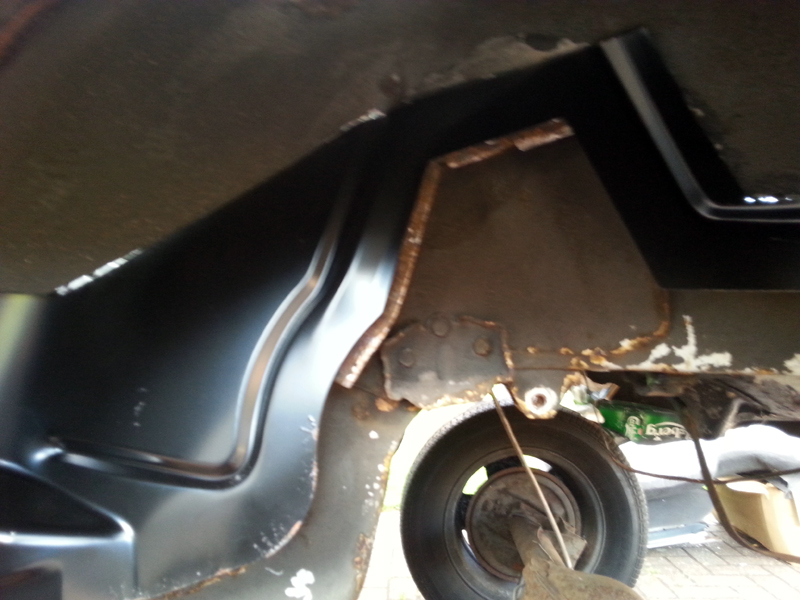
Next day...  Things are going well in the rear floor pan area, but there is another piece of the jigsaw that needs to be included before it can all be welded together, and that is the inner quarter panel.

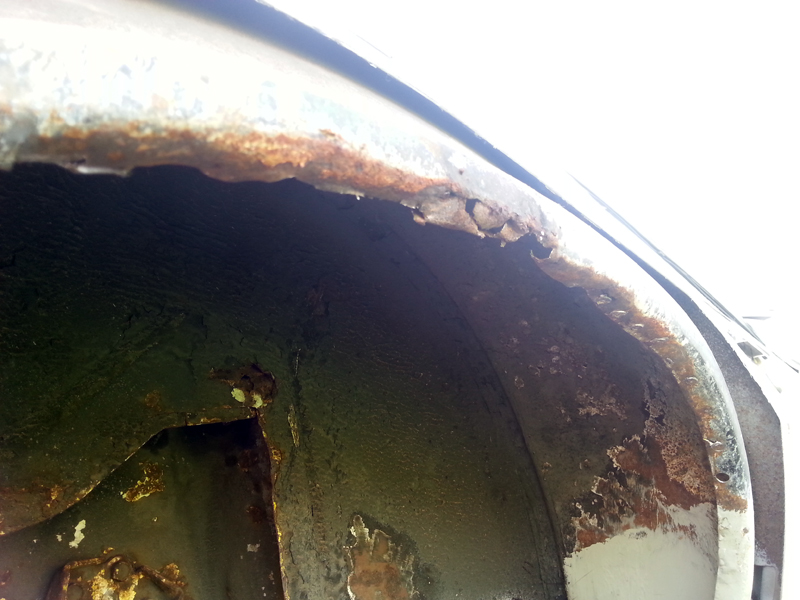
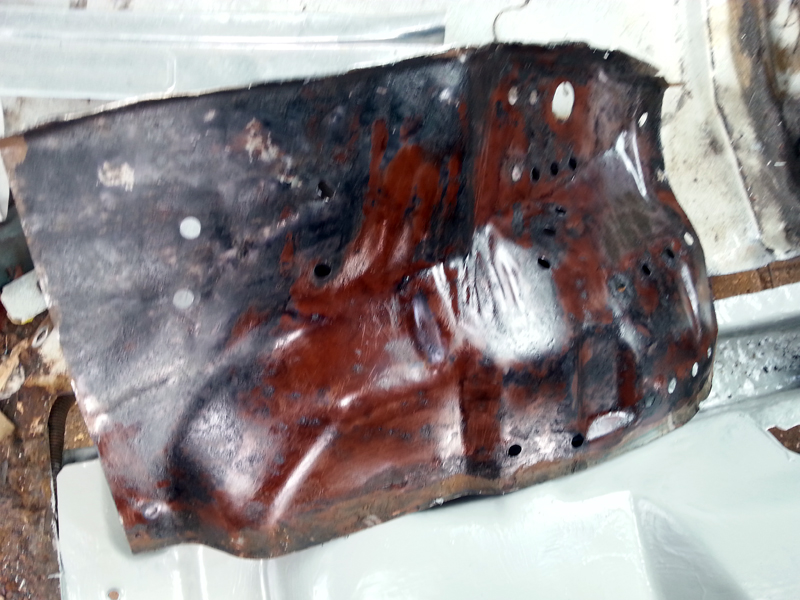
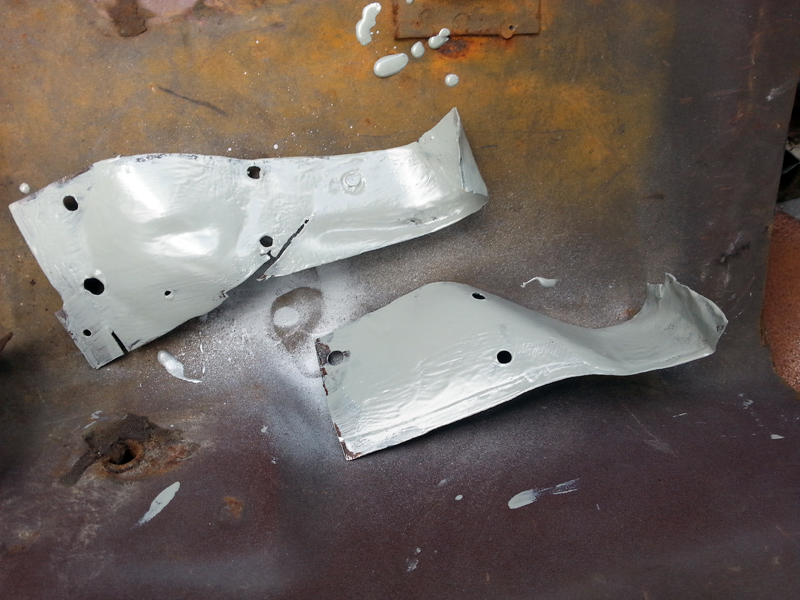
The original plan was to do similar to the passenger side and replace the lower six inches or so, however the lower edge wasn't in that good a condition and really showed up when hit with the wire brush.


This changed the plan to doing a much bigger patch, and using the full lower edge. (I will revisit the passenger side later and see if the same area needs doing there too).

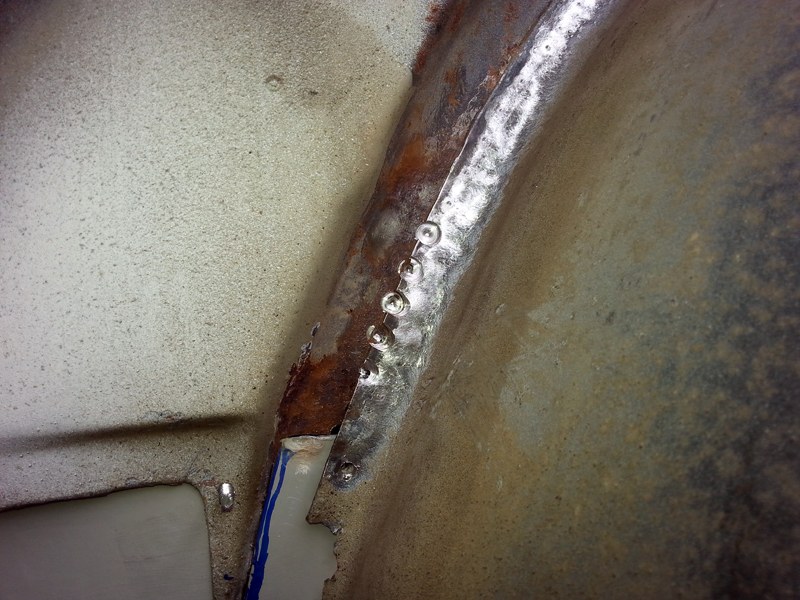
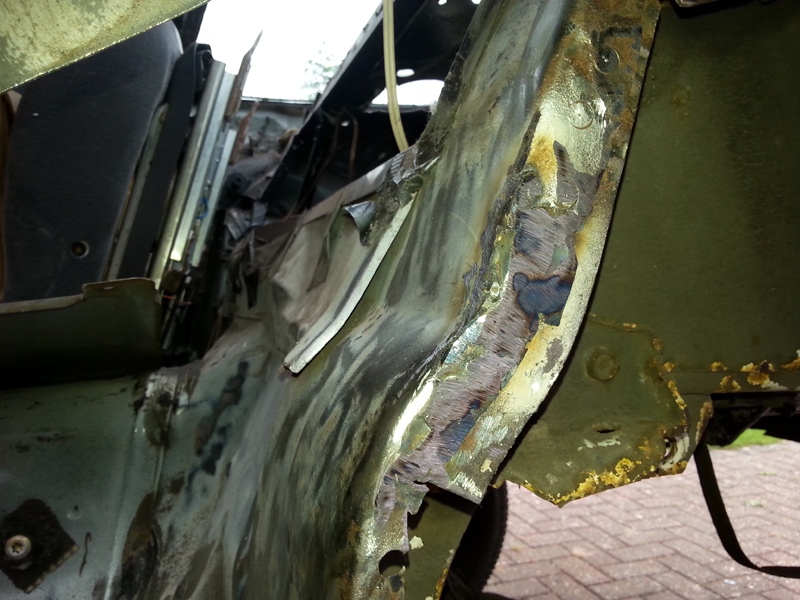
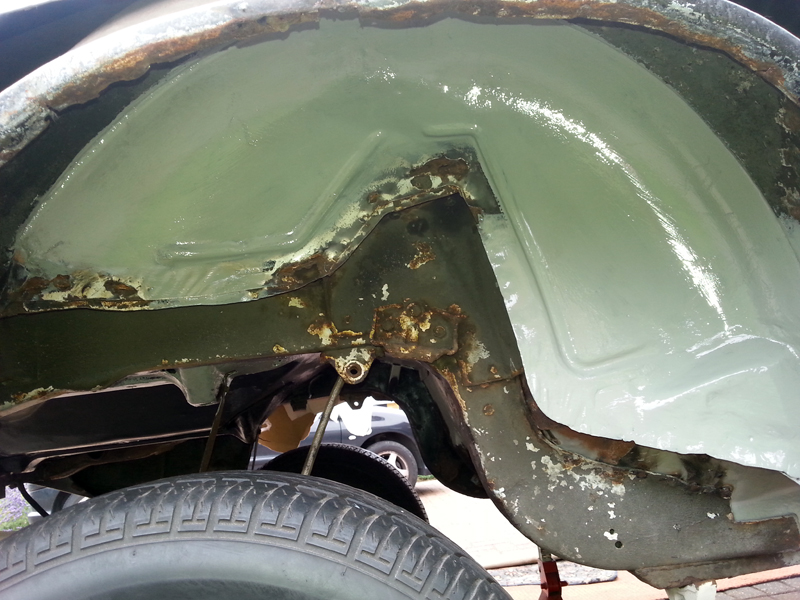
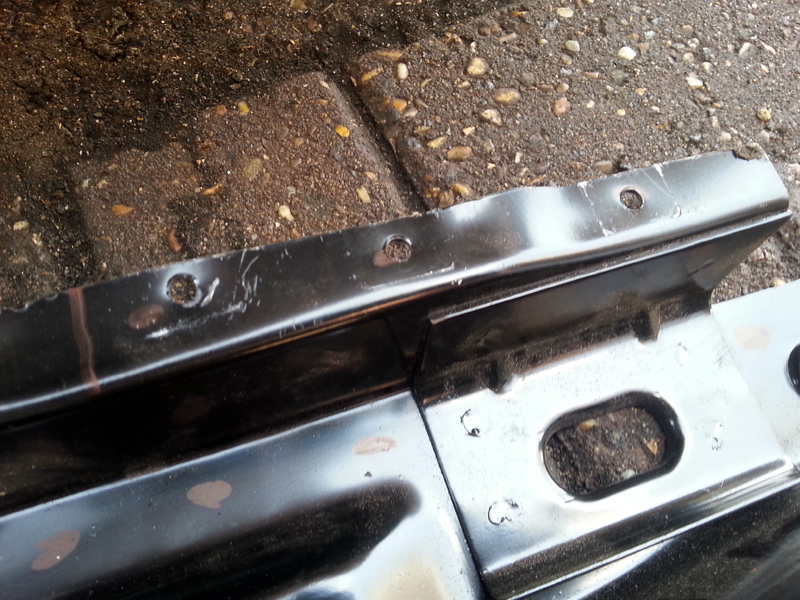
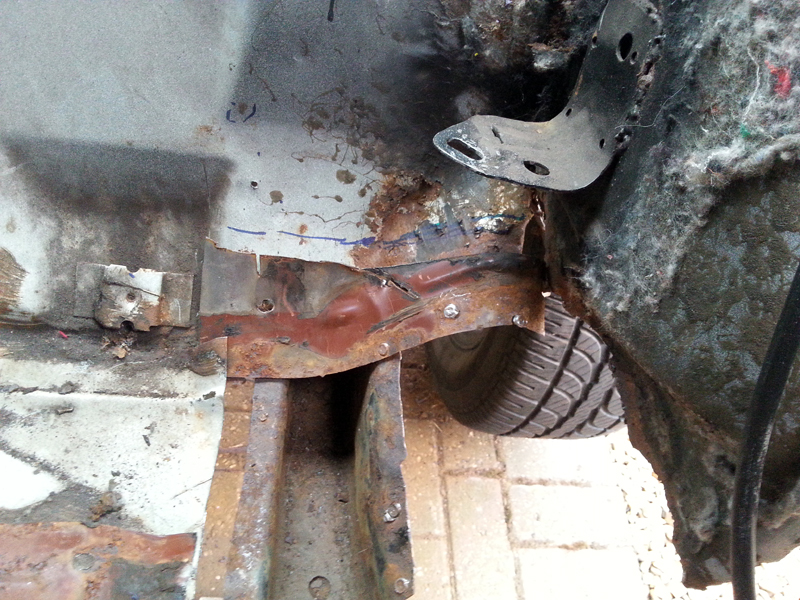
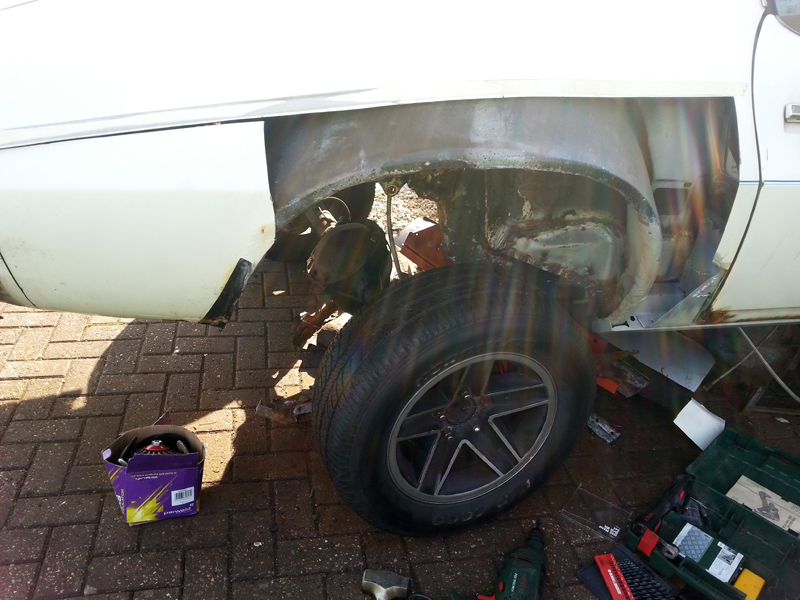
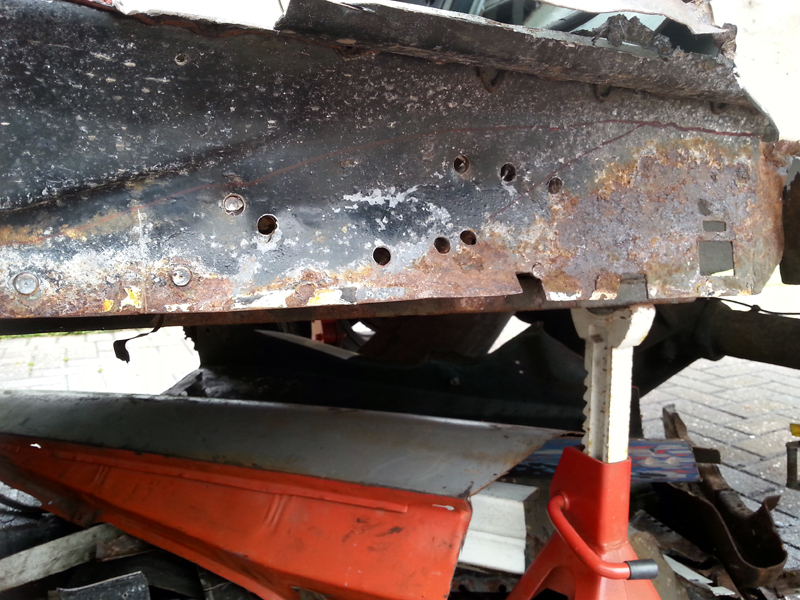
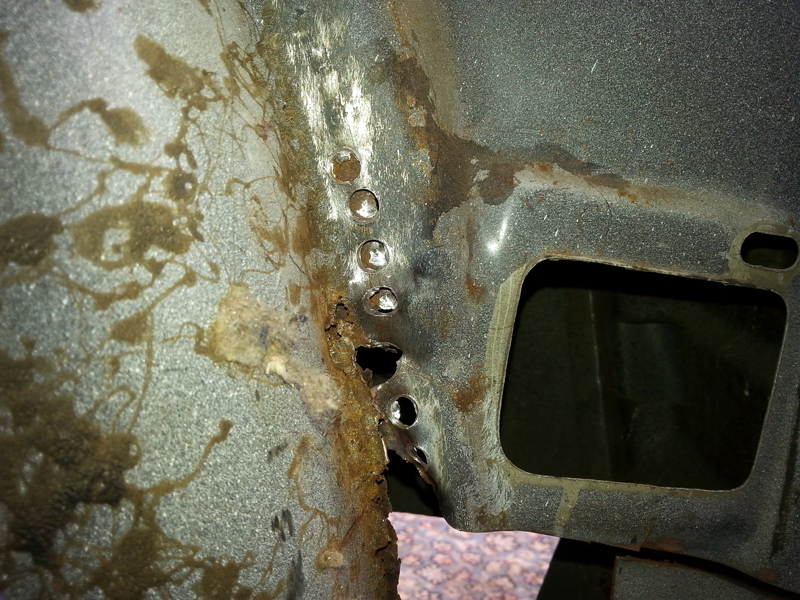
So, it was out with the drills and carefully finding and cutting out the spot welds.  My technique has advanced now, where I drill a 1.5-2mm hole in the centre to use as a guide, rather than just a centre punch. This is proving to provide a much more positive guide, resulting in quicker cuts and less broken cutters.  Downside is it's easy to break such small drill bits, but I think these will be cheaper to replace.


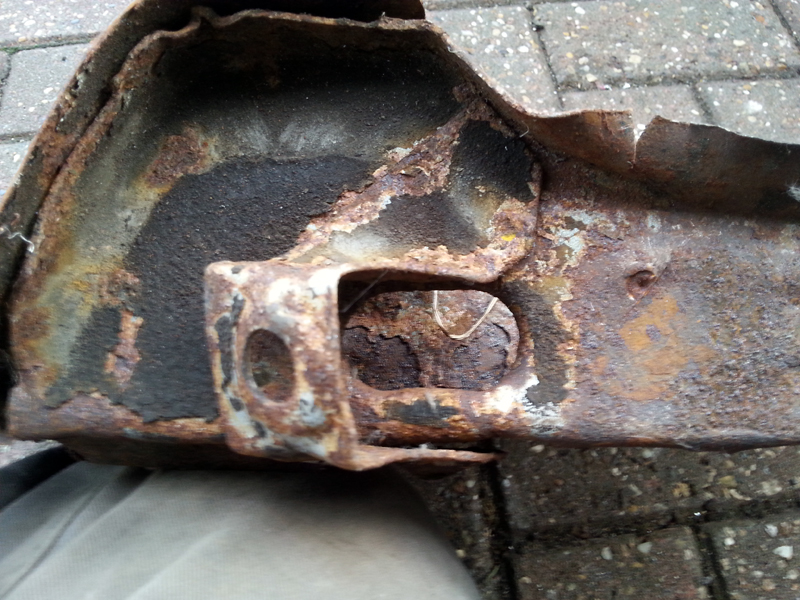
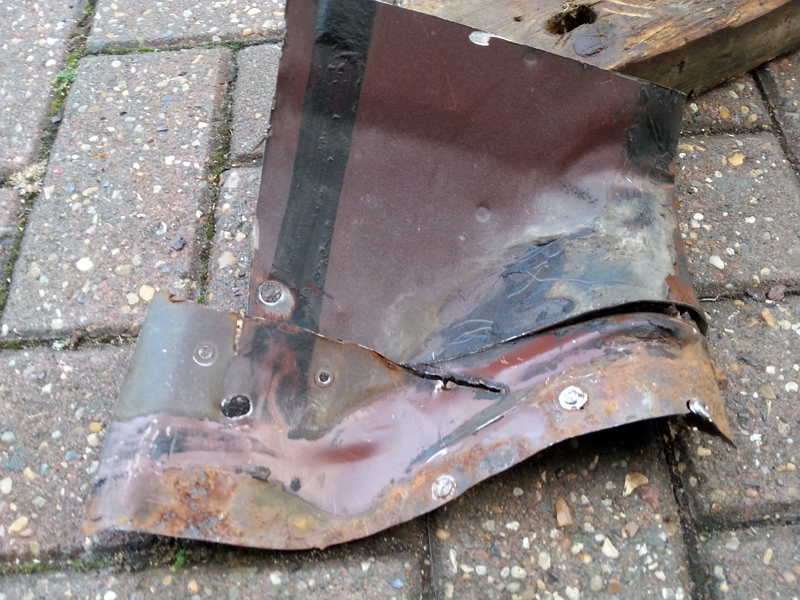
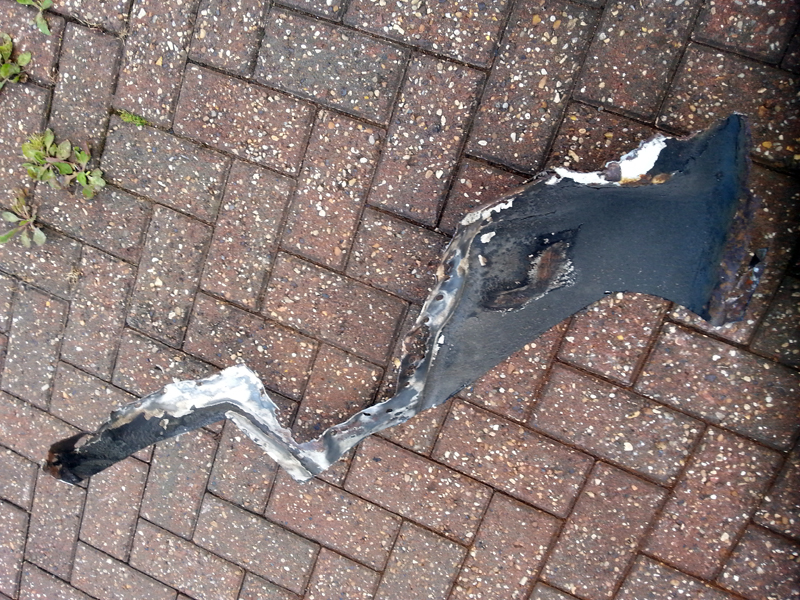
Didn't take long before things were starting to separate, and quite cleanly too.


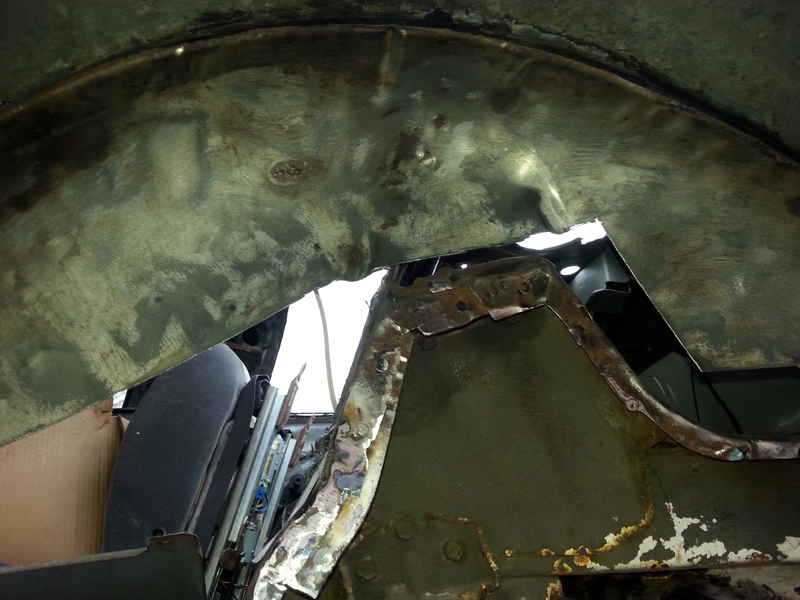
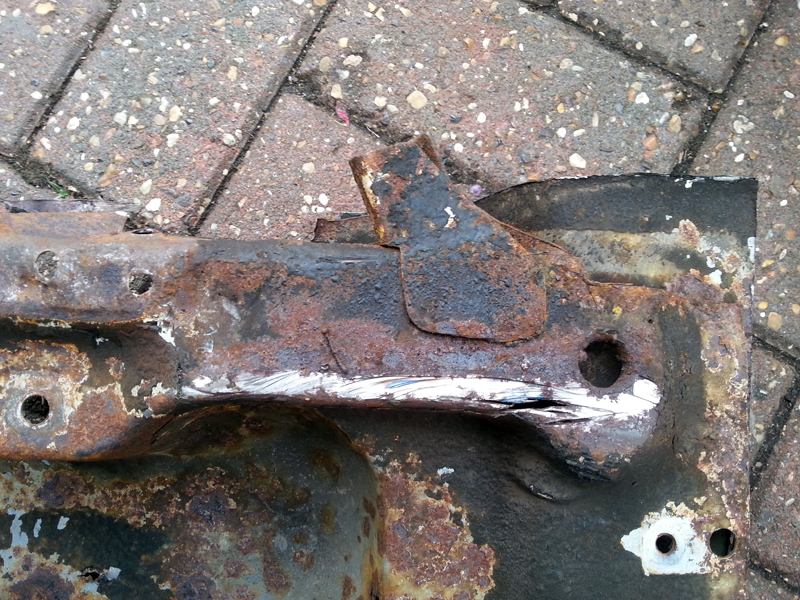
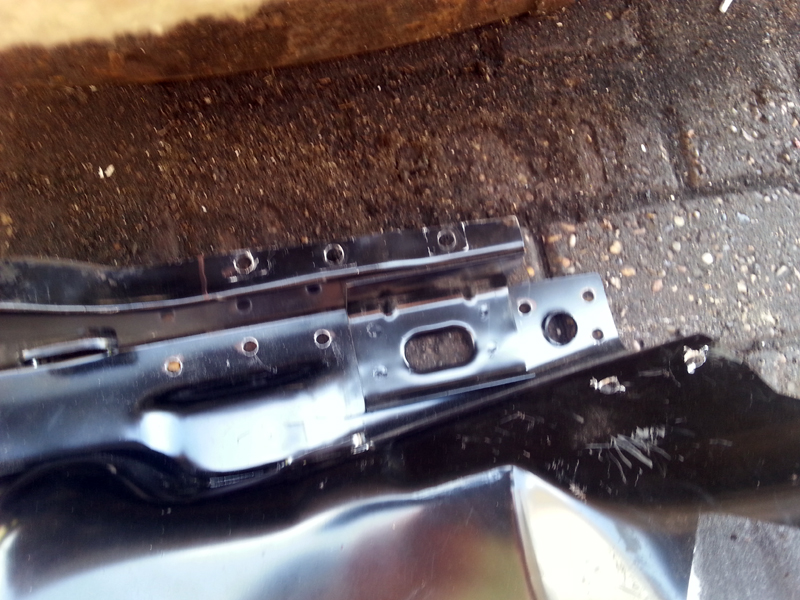
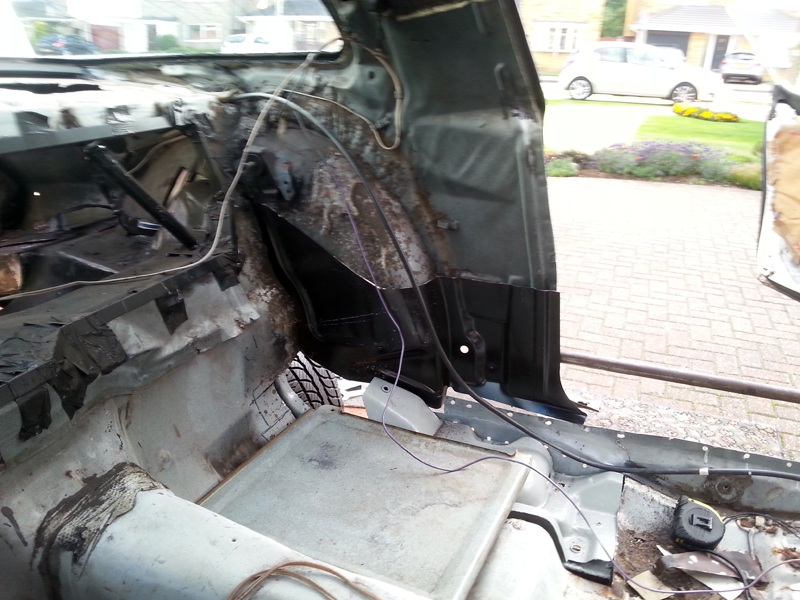
With the panel seperated from shock tower and trunk floor, I moved to the front section to separate it from the outer rocker. After wire brushing the area, the spot welds were just about visible as colour differences in the metal.


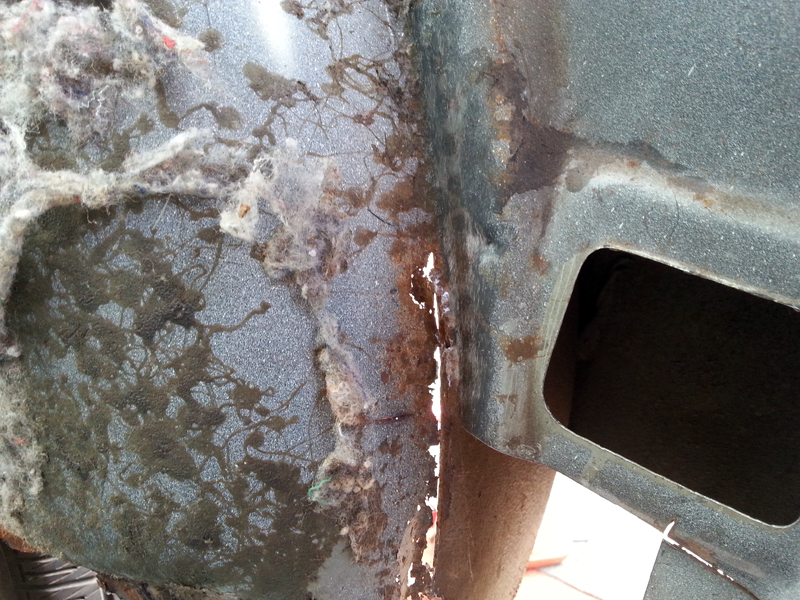
A quick check up the inside of the panel also confirmed how far up the panel I needed to go.


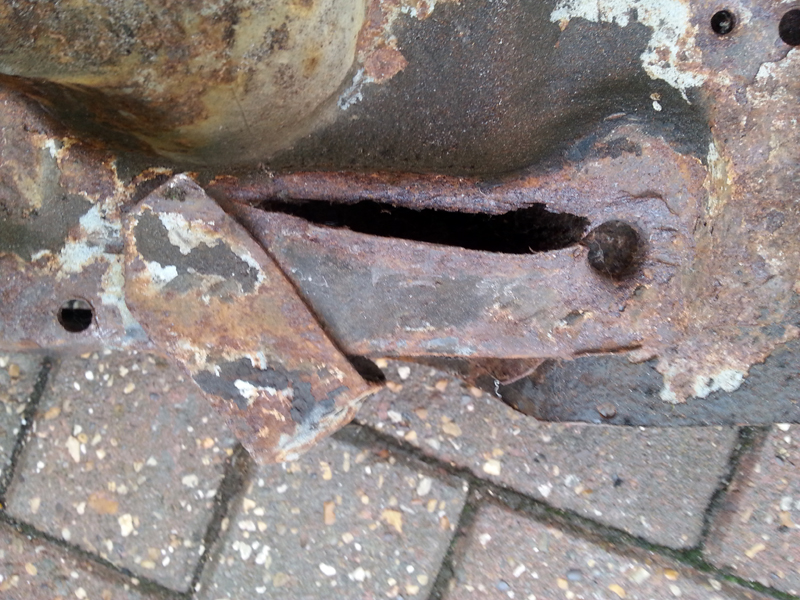
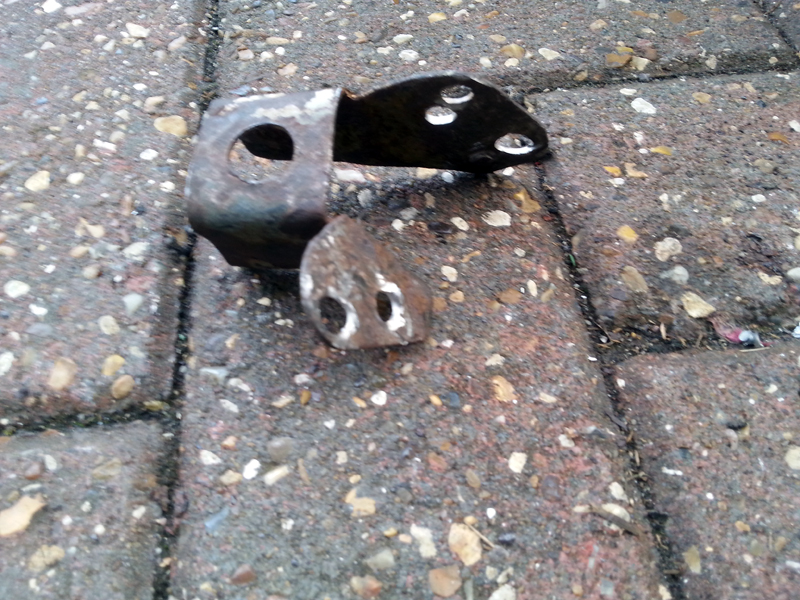
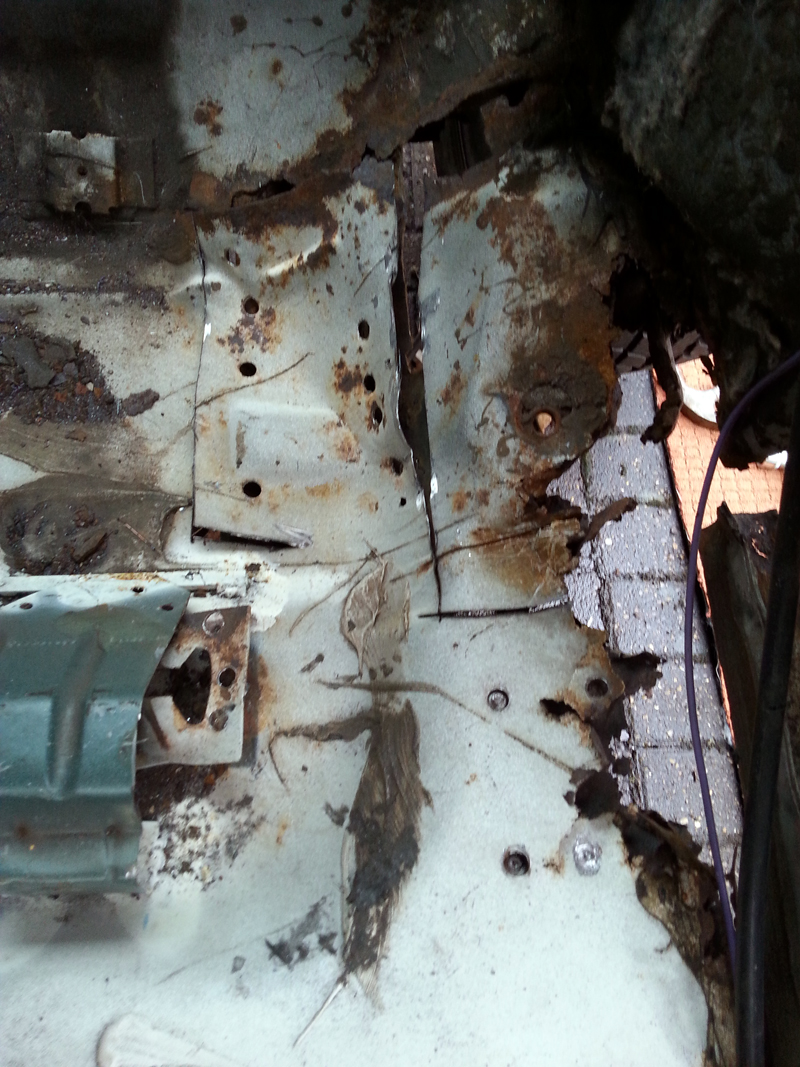
These were quickly despatched and I was ready to start cutting.


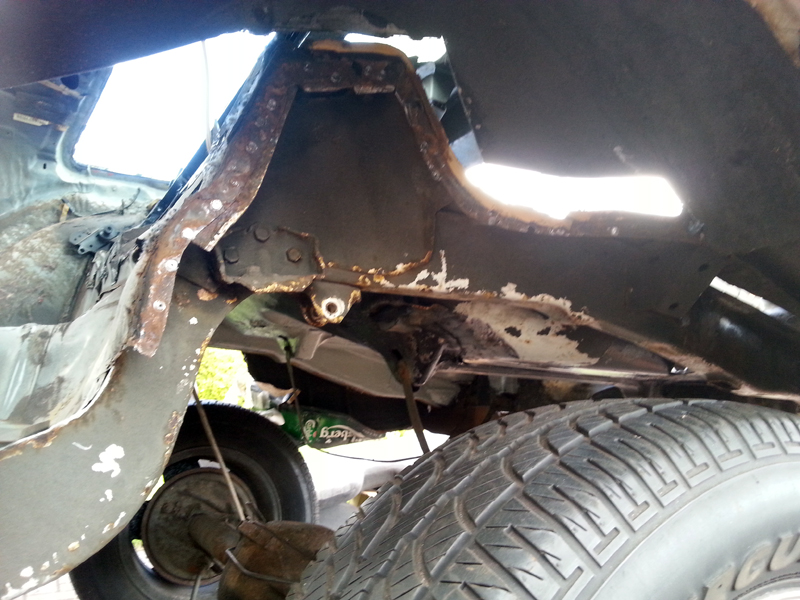
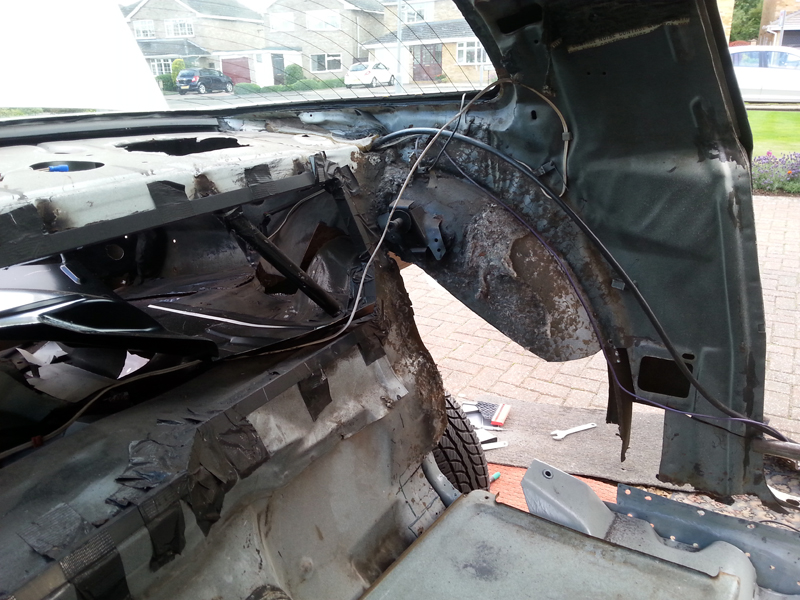
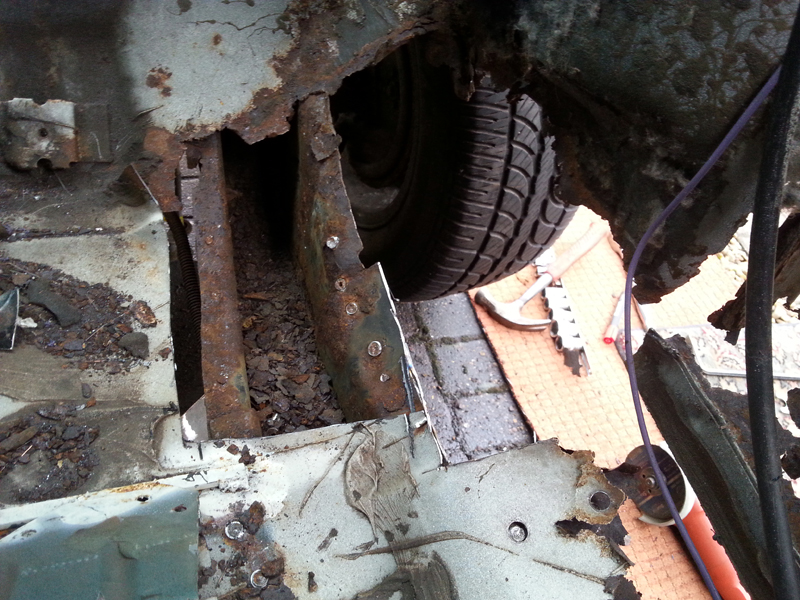
That certainly improves the cabin ventilation!

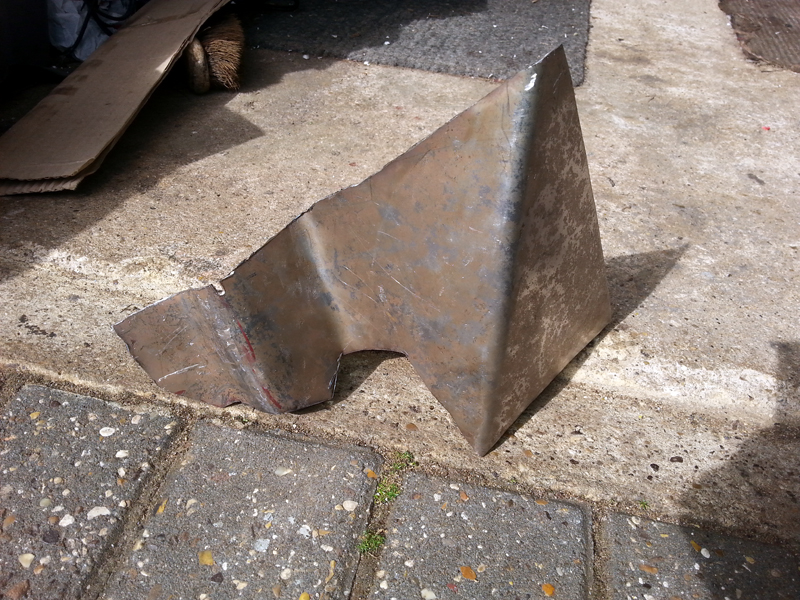
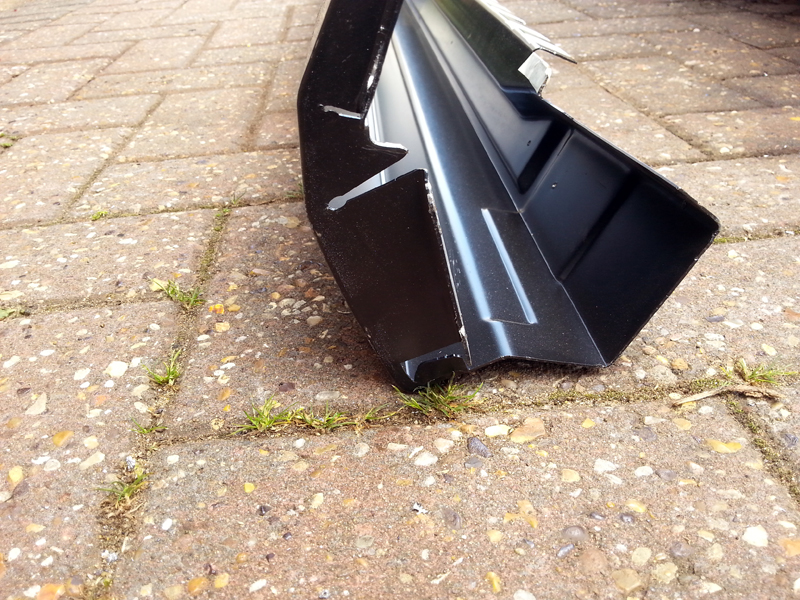
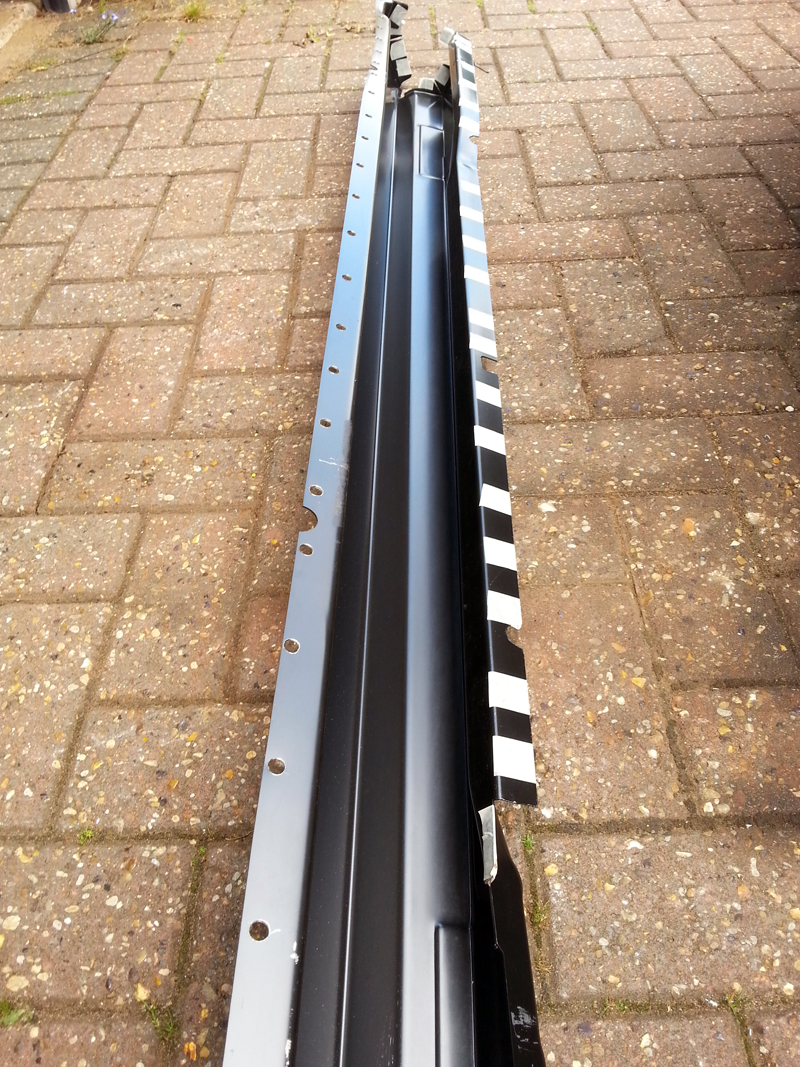
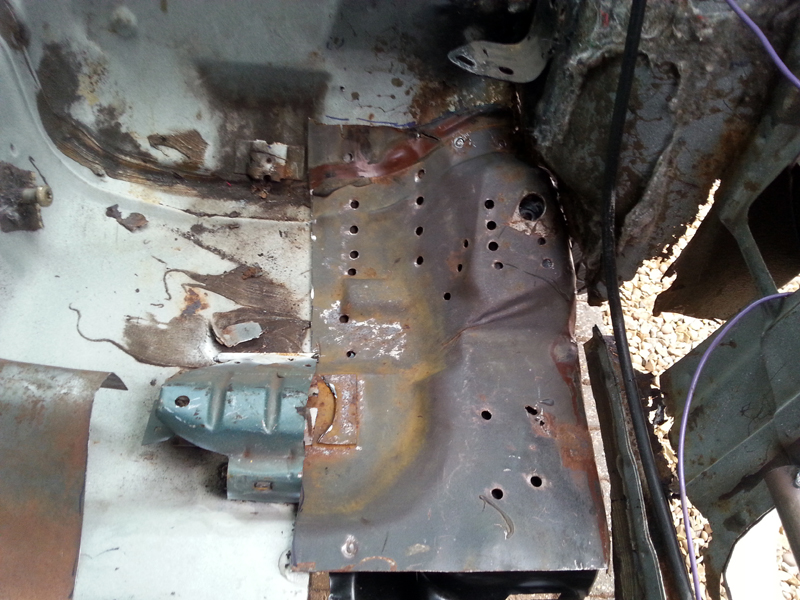
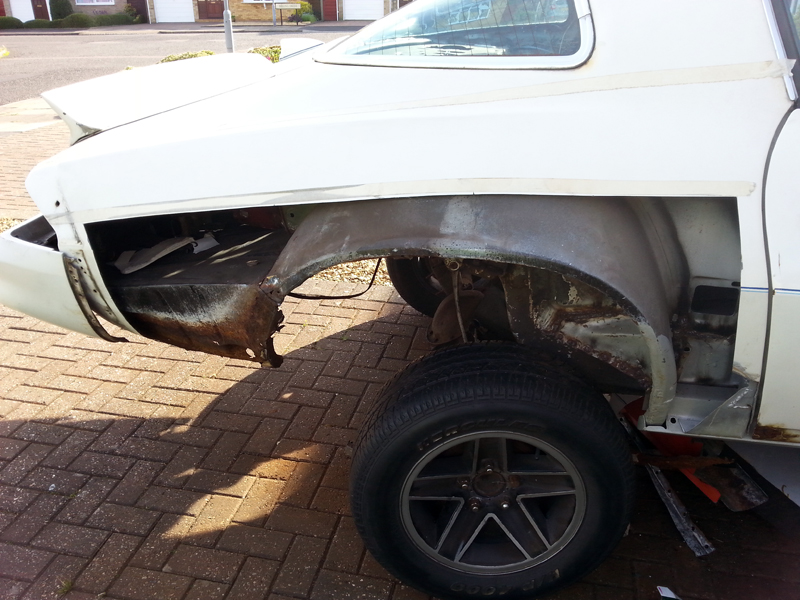
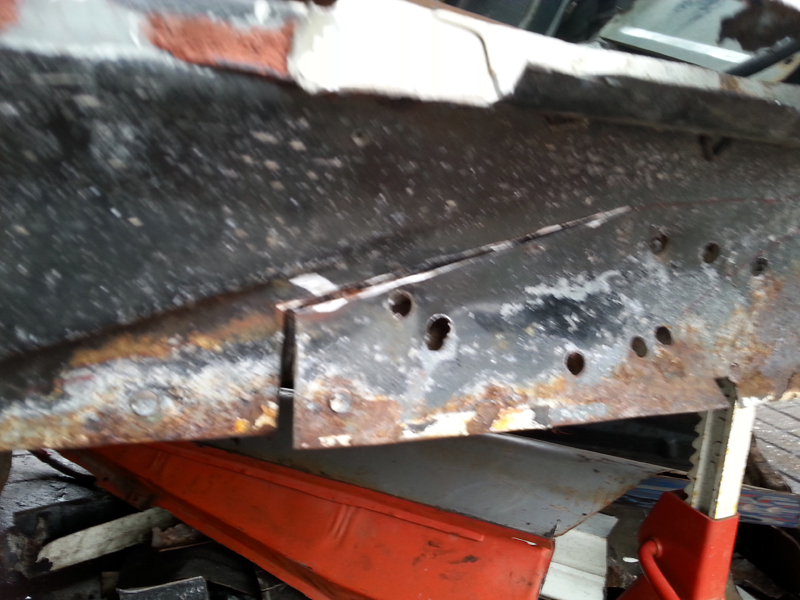
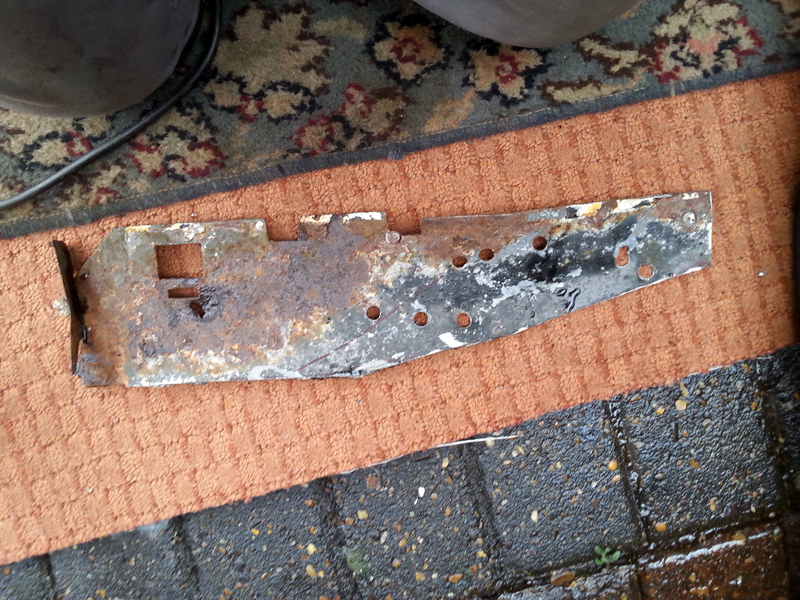
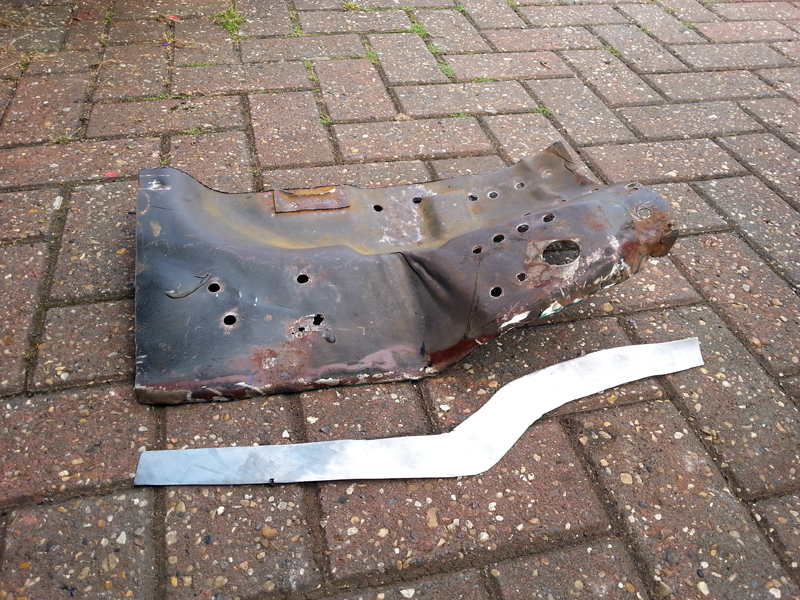
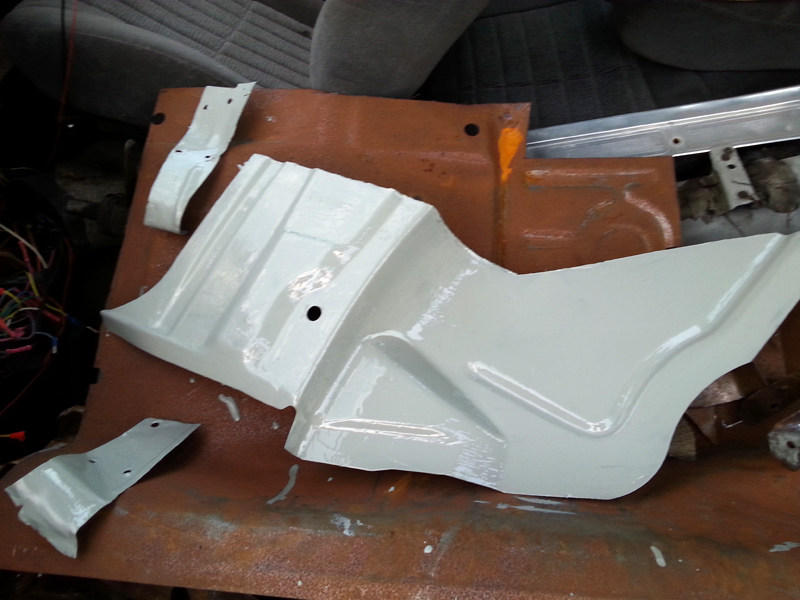
With the bad section cut out in one piece, I was able to use it as a template for cutting from the new panel.


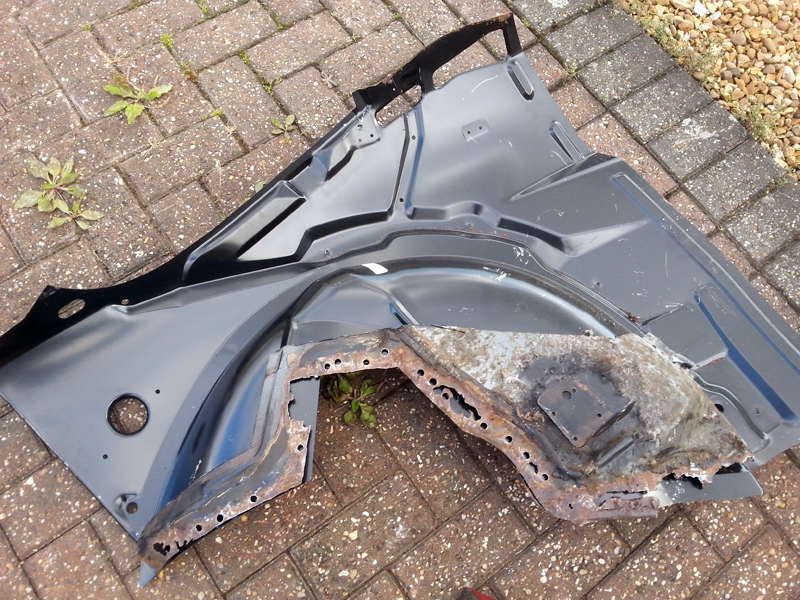
It isn't too far out, but will no doubt take lots of fettling to get right.


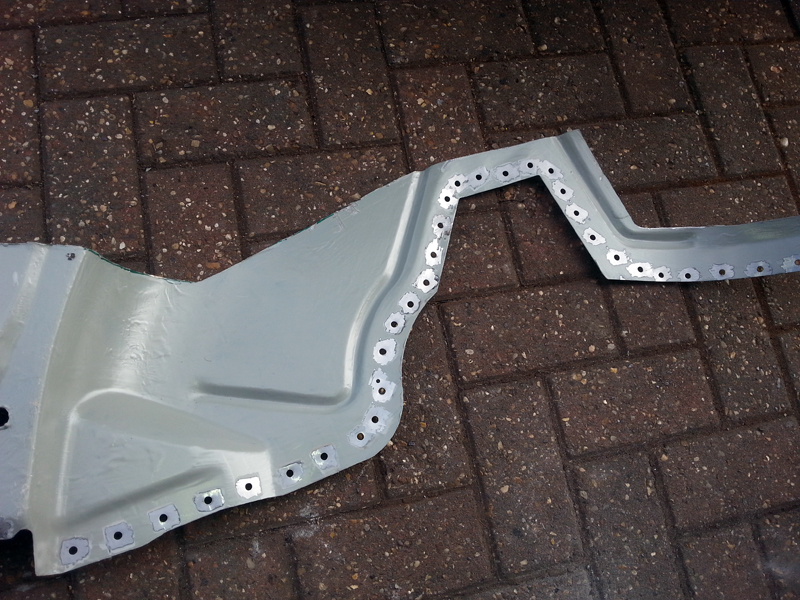
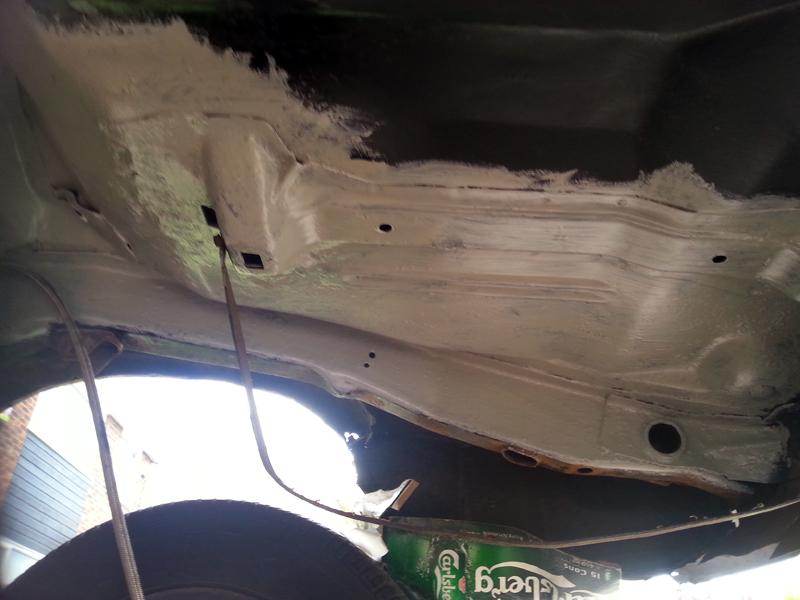
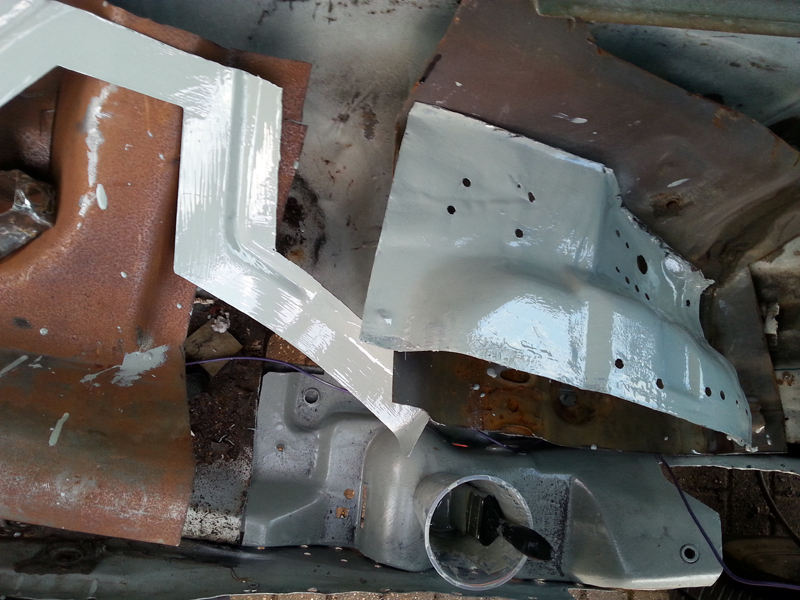
So, as with the 2 previous days, I finished off the day mixing and applying another pot of primer, finishing off the seat back patches, outer rocker, and first side of the newly cut inner quater.


That's it for this run of decent sessions, back to short stints for a while.  It's been a good few days, with some decent progress made and a positive feeling for once.

32
Projects / Re: '79 Camaro - Major surgery
« on: July 30, 2015, 10:29:21 am »
With the family away on holiday, I've been able to get stuck in, and had a couple of good sessions on the car.

I'd spotted a 'doh' moment a while ago, noticing that the new torque boxes didn't have the parking brake cable brackets on them.  Thankfully, although I have recently got rid of a pile of scrap, I did retain the old torque boxes, so have the originals still available to recycle. Not looking too pretty, but they will have to do.


For small brackets, they put up a pretty good fight, but they did come off relatively straight in the end.


To counter the realisation of the mistake, a chance glance at the donor frame rail provided a positive find.  Where I had previously started making a small patch to fit at the behind the rear seat where it joins the inner quarter, I realised that the old rail had this section of panel still attached and in decent condition.  It's a perfect match to the part of the panel that was attached to the rear floor pan patch.  This will save me a lot of work, as it proved really tricky to get the complex bends right when I did the other side. Here are the two parts.


I wanted to start applyint some primer and get stuff put in place, so I spent the next part of the day preparing the frame rail, torque box and inner rocker ready for priming, cleaning and scuffing as necessary.  I also drilled a number of holes in the inner rocker where I will weld in the rocker and floor pans. Primer was then applied, with the small amount of the mix that was left going onto the underside/back seat panels (will have to get a pic of that later, as I missed it)


Before the primer was applied to the inner rocker, part of the prep included trial fitting the outer rocker.  This one is an AMD piece, with noticeable differences to the one used the other side (brand unknown) It seemed to be a better fit, and only needed a minor tweek at the front edge, where the triangle piece was fouling on the lower body.  Holes were drilled for the spot welds along the lower edge and tape carefully applied around the areas to be welded, only for me to realise it would be in the way when scuffing the EDP.


More good session updates to follow soon....

33
Projects / Re: '79 Camaro - Major surgery
« on: July 24, 2015, 11:29:53 am »
I used it when I did the rear window repairs a few years ago, and there are some bubbles appearing now.  That said, I wouldn't say I was particularly knowledgable on what I was doing back then and made tons of mistakes.  It's likely that the rust coming through now was on the untreated inner side, or perhaps through the very thin spray paint (read no other protection).

Planning to do a much better job this time.

34
Projects / Re: '79 Camaro - Major surgery
« on: July 23, 2015, 03:18:35 pm »
Kurust. Don't know if it's the best thing to use,but it's what I had in the garage.

35
Projects / Re: '79 Camaro - Major surgery
« on: July 23, 2015, 12:45:03 pm »
The kids school holidays have started now, so I have a few weeks where I don't have to go and collect them when I get home from work, meaning I have some extra time available for the car. 

I had just over an hour to spare yesterday, and I decided to do something constructive and fitted the patch to the inner rocker.

After cleaning up all the edges, it was clamped into place.


Had a few wire feed problems on the welder, so it wasn't pretty, but then this will be hidden by the outer panel anyway.  Thankfully I was able to sort the feed issue and it did start welding nicely again.


Finally, for today at least, I ground back the inner face, as this is where the floor patch will attach.


A few days ago I had a few spare minutes, so applied some rust treatment to the inner frame rail.  Looking much better now and ready for a coating of epoxy primer.


Got plenty of things close to needing epoxy primer now, so I'll be digging the paint brushes out next week.

36
General Banter / Re: Dual Colour "Switchback" LEDs
« on: July 22, 2015, 11:07:20 am »
Just seen the video - looks really good.

Are the brake/indicators still normal candescant bulbs, or are they LED too?


37
General Banter / Re: Dual Colour "Switchback" LEDs
« on: July 20, 2015, 11:08:45 am »
Looking good - do you have part numbers for the 1157 holders?

38
Projects / Re: '79 Camaro - Major surgery
« on: July 13, 2015, 01:04:22 pm »
I'm getting sloppy with my updates, it's been nearly a month since the last one, and there been a few changes and a number of work sessions since then.  So much so, I'm struggling to remember all the updates.

First up, I managed to find a buyer for the wheel adapters, so thay have gone.  I have also sold both quarter skins.  A strange decision as I have only just got one of them in from the US and haven't fixed the quarters on the car yet.  I was able to make a small profit on them though, and have found something better.  I don't have the funds/luck to find original NOS full quarters, or the new reproduction ones that people are talking about, but I did find a company that sells a skin that is larger than the common ones, and extends up to the window and trunk edge, rather than stopping part way up.  A pair of these, as well as a new tail panel and trunk drop offs is on it's way, along with a few brake bits.

On the car itself, I've been continuing with the driver torque box. Bit by bit I've cut out the old one.


Eventually it was out:


So far, I've just loosely cleaned up the inside of the rail, chipping of any loose rust.  The tip of the rail is in pretty poor shape, but this is where the SFC is, and there is plenty of overlap, so I'm not too concerned.

A quick trial fit of the new box


Next I started preparing the box for fitting, drilling spot welds.  There was also a spot where the stamped hole for the mounting clip was completely wrong, and needed extending.


Whilst the area is open, I've started preparing the floor patches.  There's a bit of section in the rear panel that goes up to the trunk that needs fixing.  I was initially looking at doing this all from a new piece of metal, but there was a few inches of this section attached to the donor floor section, so I am going to use that for part of it and fill in the middle part.


I sliced the donor floor patch a bit wider than the gap and adujsted to get it fitting loosely in the right place.  I needed this to help get the alignment of all of the patches correct, as getting one in wrong would affect the fit of the rest.


Still quite a bit of fettling to do here, but it does feel like I am making good progress again.

In the coming sessions, I need to open up the panel above the frame rail so that I can get in an clean/treat it, along with treating the aleady exposed section, then apply some epoxy primer to that and the new panels.  I want to finish preparing the patches first though, so I can do all the primering at once.

39
General Banter / Re: Finally!
« on: June 22, 2015, 11:15:25 am »
it'd then be classed as a "Modified Vehicle" for insurance

The list of modifications for my Camaro went into three pages !!!  Total additional cost of mods = £0.

Insurance was £200 this year, based on 1500 miles p/a.

I really wouldn't worry.

In fact I'd worry more about doing it and NOT disclosing it 'cos they won't pay-up for sure in a claim.

Who do you insure with?  I'm due for renewal this week.

40
Projects / Re: '79 Camaro - Major surgery
« on: June 19, 2015, 12:08:43 pm »
Not sure I see the benefit in that. Seems like a lot of work.

I thought the water that ended up there came from the rear window leaking/spray from the rear wheels.

41
General Banter / Re: Rocky / American Technique
« on: June 19, 2015, 12:06:11 pm »
He was still there a few weeks ago, no obvious signs of any problems.  As you say, I have also seen him still selling stuff, on eBay and on Facebook.

PM me if you want his contact numbers

42
Projects / Re: '79 Camaro - Major surgery
« on: June 17, 2015, 11:04:12 am »
Currently in the process of getting rid of my Trunk drop offs and just continuing the trunk corners right to the outer panel.  Seems to be the norm to do this to get rid of the water trap.

Sounds interesting.  Any pics and/or links to more info?

43
Projects / Re: '79 Camaro - Major surgery
« on: June 15, 2015, 12:43:39 pm »
I didn't get time to write my updates from last week, so here is another double episode.

Not a lot of progress last week, as only a couple of hours were available (motor bikes still taking up a lot of spare time).  I continued stripping off the passenger quarter panel.  I was working carefully around the outer wheel house lip, with the intention of retaining as much of the original panel as possible. This involved drilling out the spot welds and then cutting strips of the panel every 2-3 holes.


Outer wheelhouse lip isn't as bad as I was expecting, but will need some patching.


Moving further round, onto the trunk drop off, things didn't go so well.  The front edge didn't take much encouragement to seperate at all, and revealed the trunk drop off was in a pretty poor state.  This wasn't at all visible until the outer panel was removed.


Looking at the state of this, I'm going to have to replace the panel.  Knowing that the outer side in this area on the drivers side looks worse, I know without having to look further that I will need that side too.


During the week plans changed once again. I'll not go into detail yet, as I don't want to jinx it, but I am now trying to sell the quarter panels to raise urgent funds.  This means that for now, focus moves again, this time back to the drivers rocker panels and torque box area.

With the door gap bracing checked, I figured it would be OK to start pulling out some more metal.  I wanted to get the end of the inner rocker out and patch prepared whilst there was still some of the stucture inside it to help with alignment.  I've marked where I want to cut and started drilling out the spot welds within that area, then cut around it.  It looks like someones had a go at it with a shotgun!


A suitable patch was cut and shaped, and will be epoxy primered before fitting.

I then started on the floor pan and torque box, concentrating on areas that won't affect the outer edge/fitting of the inner rocker.  Now I know how it all hangs together I'm not worried about getting it out in one piece, so just drilled and cut stategically to get things out as quickly as possible.


Having got this far, it looks like the brake line is going to be a problem, as I can't (currently) move it any more as it's trapped between the floor SFCs.  I'll have another look later, but I am close to just cutting it out and putting a new one in when the time comes.


44
Classifieds & Useful eBay Links / Re: 4th GEN Fun Again Anyone
« on: June 10, 2015, 11:29:40 am »
Doh - didn't spot the ebay links on first read through...

45
Classifieds & Useful eBay Links / Re: 4th GEN Fun Again Anyone
« on: June 10, 2015, 11:28:55 am »
Are these cars you have, or have spotted?

I may be interested in Engine/box, depending on what specs they are (and being able to sell what I have to make the funds up)

What model?  I need parts from a rear brake setup from the LS1 cars.

What about center console?  I'd need to see pics, to make sure it's the right shape.


46
General Banter / Re: Dual Colour "Switchback" LEDs
« on: June 09, 2015, 11:18:36 am »
Me too, they look cool.

I could use them for front indicators and the reverse/fog light.

47
General Banter / Re: Dual Colour "Switchback" LEDs
« on: June 08, 2015, 11:40:19 am »
You might have better luck looking for pigtail adapters, going from your 1157 to whatever the bulb you want is. I have seen 1157 plug to wire adapter, you just need to find the socket for the new bulb and wire them together.

48
Projects / Re: Will you guess what this is gonna be....
« on: June 02, 2015, 12:27:04 pm »
Chav style spoiler for the back of your car?

49
Projects / Re: '79 Camaro - Major surgery
« on: May 29, 2015, 11:19:00 am »
It's a bit naughty of the wheel-spacer seller to claim they're hub-centric . . . . Proper hub-centric wheel spacers are rare and f*cking expensive (and I've only seen them available for the 4th gens and over - Eibach do them I think).

Yes, but overall I'm up in more ways than one, so not fussed about it now.  I can use them to physically check the widths are right, rather than going on recommendations/guess work. I can then adjust the width if necesssary when I re-order.  Got a full refund, so I'm only down a little bit on the customs costs, which I should make back when I sell them on. 

I've got a couple of off-the-shelf options lined up in the current sizes, but if they are different, I may have to go the custom size route - at more than double the price.  At least they will be spot on though.


new thread and pics req
And yes, new thread for the bike, please.

Yes, yes. It's coming...

50
Projects / Re: '79 Camaro - Major surgery
« on: May 28, 2015, 12:12:56 pm »
Despite some decent weather I've not been able to make a lot of progress of late, but there are a few things of note to write about.

First up, the latest purchases have now been collected and are safely stored in my garage.  These include:  Drivers Outer Rocker, Passenger Quarter Skin, del-alum bushes for the front suspension arms, AC Delco Pro ball joints and steering linkages, chunky wheel adapters, thicker wheel studs, locking wheel nuts, rag joint, various gaskets and seals for the TH-350, new shims for the a-arms and an anti-squeak kit for the fuel tank.  Not a bad haul for an limited budget!

Somewhat disappointingly, the wheel adapters are wrong. They were supposed to be hub and wheel centric (lip on the outer face), but are not, despite the seller telling me they were and matched the picture they were using to sell them.


The bad news is that due to the length of time it has taken for them to get to me and be checked, they are outside of the eBay guarantee period. Better news is that I am still covered by Paypal who refunded the full amount, and bearing in mind the costs of shipping back to the US have said I don't have to do so.  This means I now have a set that I can use for mocking up and checking the widths, and can sell them on to help pay for the extra costs of the correct replacements. Happy days.

The next disappointment was the wheel studs.  I should have done better research before buying extra long ones, as it turns out I don't need them that long as the adapters are designed to work with stock length studs.  Rather than cut the down I will try and sell these on and get some new shorter ones.  I should only need to do this for the rear, as I am fairly sure the current ones on the Baer kit are suitable and won't need changing.


I'd originally planned the next job to be fitting the newly acquired outer rocker, but on closer inspection and consideration, I'd decided to concentrate on the inner rocker and rear floor repairs first, as it will give me better access to the inner rocker and torque box with the outer rocker not there.  I've bought a length of box section that I will weld into the outer rocker location as a brace whilst doing all of this.

The outer rocker would need epoxy primering before fitting and I wanted to avoid previous mistakes of mixing too much paint for the job and wasting some of it. With this in mind I've patched up a couple of areas in the trunk floor(both where the exhaust hanger brackets are) and been under the rear wire brushing some of the underside of the trunk floor and seatback panels. A big enough area that will use up the remaining paint.


With that all said and done, having picked up the items there has been yet another change of plan.  Anyone who's had a quarter skin delivered will know just how big the box it comes is. It's huge and taking up far too much space in the garage. It's currently balance on top of the engine crane and hood, and I have to duck under it when I want to get to the back half of the garage.  I could take the panel out, but I would still have pretty much the same issue, but with the downside of little to no protection for the panel.

So, current sub-project is the passenger quarter repairs - one of the jobs that is the most daunting.  I've done as much research on it as possible, and worked out where I want to make my cuts - above the wheel arch, but below the body line.  Yesterday I took the plunge and made a proper start on it, making the initial horizontal and vertical cuts. 


I wanted the main panel cut before I started trying to separate the lower edges from the outer wheel house and trunk drop offs, so that I can bend and wiggle without affecting the panels that will stay on the car.

And that's as far as I got. A delivery of my new motorbike took my attention for the rest of the available time.

Pages: 1 [2] 3 4 ... 174