Author Topic: '79 Camaro - Major surgery  (Read 32297 times)

FUBAR

  • Big Daddy Pimp
  • *
  • Posts: 14533
    • View Profile
'79 Camaro - Major surgery
« Reply #100 on: July 30, 2014, 10:36:32 pm »
Very well done rebuilding this car Jamie

It would drive me stir-crazy-mad that the new panels are rusting before you've even put them in though...
It's the time that we kill that keeps us alive...

Roadkill

  • Guest
'79 Camaro - Major surgery
« Reply #101 on: July 31, 2014, 08:11:32 am »
Good stuff - the welds are looking increasing better.  

art b

  • Pro Pimp
  • *
  • Posts: 8917
    • View Profile
'79 Camaro - Major surgery
« Reply #102 on: July 31, 2014, 12:03:31 pm »
Quoting: FUBAR
It would drive me stir-crazy-mad that the new panels are rusting before you've even put them in though


its the genuine 70's look...
This forum needs, ''YOU'' posting,Not just reading ! :moon:

Jamieg285

  • Pimp
  • *
  • Posts: 7356
    • View Profile
    • http://www.mfatw.com/WD
'79 Camaro - Major surgery
« Reply #103 on: August 01, 2014, 12:11:00 pm »
Quoting: FUBAR
Very well done rebuilding this car Jamie  


Technically, I haven't rebuilt very much of it yet, mostly taking apart and cutting up.

Quoting: FUBAR
It would drive me stir-crazy-mad that the new panels are rusting before you've even put them in though...


I know, far from ideal. It could though be worse. I've read a number of posts about people that had panels with the black EDP, which had rust underneath which ate through the paint some time after installation.  At least I can see this and sand it off before painting.

Quoting: Roadkill
Good stuff - the welds are looking increasing better.  


Ta. Should be really good once the pans are done. I dread to think how many hours that will take.

F Body

  • Trainee Gangsta
  • *
  • Posts: 15551
    • View Profile
'79 Camaro - Major surgery
« Reply #104 on: August 03, 2014, 02:50:57 pm »
Dropped in on Jamie this morning and all I can say is "EPIC"

I have never firstly seen a car that was running with that much corrosion and secondly still basically together without the whole body stripped down

But when you don't have a garage needs must

Jamieg285

  • Pimp
  • *
  • Posts: 7356
    • View Profile
    • http://www.mfatw.com/WD
'79 Camaro - Major surgery
« Reply #105 on: August 04, 2014, 01:11:03 pm »
It's Monday, so it's time for the update on the weekends progress, and good progress it was too.

It started with a short session on Friday evening, getting a few items in primer, specifically concentrating on the areas that would be inaccessible once the welding was started.

First off was final prep of the torque box, scuffing the EDP and re-welding the seat belt nut back on (but now in the right place.


Next was prep'ing the patch panels, hand sanding with 60-grit to get rid of the surface rust and give a good key for the primer.


Quite a bit later than expected I was able to mix up the primer and apply some paint


Saturday was shorter than expected, so I didn't get as much done. Rain just after lunch put a stop to things, so I switched to doing some house maintenance instead.  While the going was good though, I made good progress with the torque box installation.

The primer was dry enough to work with, so the first job was to strip it from any area that would be welded.


A quick spray of weld through primer and it was offered into position and ready to be welded.


Note to self - remember to turn on the gas before welding. Thankfully it was only 1 spot weld that went down with it off, and it didn't look too bad. The rest though were much better.


The run underneath, joining the box to the SFC's was no where near as good as the original, but it was solid and showed good penetration, so was good enough for me.


With the torque box installed, it was time to focus on the rear section of the floor pan.  I tapped it into position, then used a couple of sheet metal screws to pull it down fully into place, and then started to drill the next set of holes to be welded.


And that's when the rain came :-(


Sunday was a nice sunny day, all day, so I was able to get more done, and was the first time for a long time that I felt I had really achieved something.

First off was finishing drilling the floor pan, including drilling a hole for where the seatbelt bolt will go.


Before that part could go in, I needed to put in the small patch in the rear corner, where the floor rises to meet the trunk floor. It was offered into place, with the floor patch also in place and screwed down. A bit of massaging (whacking with a hammer) and a couple of sheet metal screws were required to get to to match the contours of the existing metal and the floor patch.


Once happy, and as with the other pieces of pan, this was hand sanded and then drilled, with a coat of primer put on the non-accessible sections. As the primer is made up in batches, I put some on the top side of the other patch, applied it over the recent welds and gave some of the other bits a second coat, to try and use up the spare paint.


After the primer was dry enough to continue, this was then welded into place.


During these stages it became clear that the original patch was too small and there was a gap on the outer edge that needed to be filled.  Luckily a simple piece was cut and welded in quite quickly.


With all that done, I was finally ready for the floor patch. As before, screwed into place, and the welding commenced.


The spot welds proved pretty easy, but the seam was a lot tricker, but I got better as I went.


A bit of grinding to clean it up, deal with the 5 pin holes (I was expecting more, so was happy there), and it's almost done.


I've left the front section, as I want to wait until the mid section of the floor is re-attached to the inner rocker. It's currently a couple of mm lower than it should be and if I welded the floor now it might make it more difficult to correct later on.

I'm knackered now and need a week to recover.

Jamieg285

  • Pimp
  • *
  • Posts: 7356
    • View Profile
    • http://www.mfatw.com/WD
'79 Camaro - Major surgery
« Reply #106 on: August 07, 2014, 01:55:04 pm »
Managed to fit an hours work in last night, so here's a very short update.

Focus is now back to the front floor patch, and doing the final fettling before welding it in.  First job was to get it lined up where I wanted it and to hold it in place with the sheet metal screws. I did need a bit of persuasion on the right side, where it meets the inner rocker, so that the panel would be far enough to the right.


With this done, I could see just what a balls up I had made of cutting, with some large gaps in places at the front and rear :-(


Both are too wide to easily bridge with weld, yet to small to fit a filler piece of metal. So, although it is annoyingly more work, I set about widening the gaps so that I could add a patch to the patch.


I did get as far as cutting out the area marked and did weld in the patch metal. It was still a bit narrow, so needed a bit of 'filler' on the outside edge.  I forgot to get a picture of this before I finished, but will get one next time, hopefully I will get a bit of time tonight.

I'm hopeful that the rear section will close up a bit with some strategically placed hammering. The step section needs to be tweaked, so I will do that before deciding whether I need to add anything to the rear end of the panel.

I'm also getting low on gas for the welder, I can't believe how quickly it's going and I'm wondering if I've had the flow up a bit too high.

Jamieg285

  • Pimp
  • *
  • Posts: 7356
    • View Profile
    • http://www.mfatw.com/WD
'79 Camaro - Major surgery
« Reply #107 on: August 08, 2014, 01:01:46 pm »
As hoped, I had a bit more time available yesterday, so work continued...

First off, here is the missing picture from the last update, showing the patched patch.


There was a bit of overlap on the left edge, so I recut that to fit properly.


There was another gaping hole on the other side that needed sorting, so I went about this in the same way as the last. First work out where the gap becomes acceptible and cut away a section up to that point.


Using a small piece of cardboard, make a template and transfer it to the donor metal.


Carefully cut that out and prepare both pieces for welding.


Get it welded in and test fit to make sure it's right, then hit it with the grinder to clean it up.


With that done, and another trial fit, the rear edge doesn't look to bad now, and for most of it I think is withing 'bridging' range.


Will have to see what the weather is like at the weekend now, fingers crossed it will be dry. On sunday I've got a road trip to take a look at a pair of fenders for sale, which might be in slightly better condition than mine. Both will still need fixing, but I'm looking for an option with less work.

Jamieg285

  • Pimp
  • *
  • Posts: 7356
    • View Profile
    • http://www.mfatw.com/WD
'79 Camaro - Major surgery
« Reply #108 on: August 11, 2014, 12:42:08 pm »
I didn't get any work done on the car this weekend, but the shopping trip turned out well.

I travelled about an hour to have a look at a used pair of wings, advertised as needing some TLC.  Asking price was £50.  It's pretty rare to find these in any condition here in the UK, so it was worth having a look.

Sadly they were a bit worse than they looked in the photos and do need a fair bit of work doing on them. I gave each one a thorough check over, and disappointingly passed on both of them for different reasons.  They'd been on ebay for 2 weeks with no bids and once the guy realised I wasn't going to buy them either, said if I wanted them I could just take them, as he would only scrap them now.  Result!  Not sure yet what I will do, either repair these or take the inner braces and use them to rebuild my own.  For now I will just store them and make a decision when the time comes.  

While I was there, he asked if there was anything else I wanted (he's planning on a full restoration, so is selling of loads of used parts). Most of it was rough or run of the mill stuff which I didn't need, but I did spot a shiny carb. A 4160-1850 is a direct swap for what I've got, and it looked like it had barely been used. We agreed on a price which included an as new Holley air cleaner assembly.   Looking at the prices of these, I've picked up a real bargain there.

Jamieg285

  • Pimp
  • *
  • Posts: 7356
    • View Profile
    • http://www.mfatw.com/WD
'79 Camaro - Major surgery
« Reply #109 on: August 11, 2014, 12:48:52 pm »
Oh, and I forgot to add, the wings have got the front extensions still on them, which are in reasonably condition.  Being as I'm sorted for these, I can take these off, give them a quick clean up and sell on, hopefully for more than I've just spent.

I'll also be able to sell on my old carb too, so all in all, quids in.

Jamieg285

  • Pimp
  • *
  • Posts: 7356
    • View Profile
    • http://www.mfatw.com/WD
'79 Camaro - Major surgery
« Reply #110 on: August 15, 2014, 01:16:51 pm »
Another day where I've missed reporting the update, so here is one covering the last 2 evenings, where I got about 3 hours done overall.

Job 1 on Wednesday was to properly assess the fenders I'd picked up and start preparing the extensions for resale.  On detailed inspection, neither fender is particularly good, both needing a fair bit of work to make then useable. In reality, I am unlikely to bother and will just cut out the braces and use them to repair my originals.


The extensions don't look too bad, and with a bit of care were removed from the fenders intact (more than I can say for my originals).  I quickly sanded them both down to bare metal to get a good look at the underlying condition.  Neither were perfect, some pitting and one has clearly had some attempts at repairing a rust hole in the past.


As I'm not going to be using either of these, I didn't waste any more time on the, so quickly applied a layer of primer to stop any flash rust. Pictures have been taken and they will be going on ebay soon.  Hopefully they will at least get back the money paid out for the carb, and maybe some extra to help pay for some suspension bushes. More on those (much) later in the project.


With that distraction out of the way, it was back to the front passenger footwell to continue with final preparing for welding.  I carefully worked out where to drill the holes for spot welding, the drilled, ground around and then applied the weld-through primer.


It was only after I've applied the primer to the pan section that I realised I'd forgotten about preparing the holes along the outer edge, so I'd need to do these next time, before being able to start welding.


Thurs evening was expected to be a washout. There had been a massive storm in the afternoon, and it was still raining as I rode home from work. Amazingly, there was virtually no sign of bad weather when I got home, just a couple of small puddles, so I made hay whilst the sun shined.

First job was to finish the edge preparation on the pan. Thankfully the primer is quick drying, so I layed it on and left it to stand whilst I got the rest of the tools out.


Shortly after, the first spots were added, and the sheet metal screw removed.


I needed to make a few adjustments on the side of the trans tunnel, but I carefully worked my way backwards and forwards to different sections, closing the gaps.
It's amazing what a difference there is in having the pan just sitting in situ (as it has done for a few weeks) and having even just partially welded in. It feels almost whole again.


I've got most of the way around from the bulkhead to the rear corner, and some of the back edge done, but then the storm started to make a re-appearance and I had to make a sharp exit, still getting soaked in the process.

Even with the sudden end, I feel like I have taken a huge step forward. I'm looking forward to the next session where I can close of the last of the edges and have an almost complete floor back in on that side. Not sure when that will be yet though, as there's a lot of other stuff planned for the next few weeks.

All this welding is not good. I'm already nearly through the first bottle and will have to get another one soon. At least the refils are cheaper.

Jamieg285

  • Pimp
  • *
  • Posts: 7356
    • View Profile
    • http://www.mfatw.com/WD
'79 Camaro - Major surgery
« Reply #111 on: September 17, 2014, 08:06:16 am »
After what seems like an eternity, I'm back working on the car again.  :-)

My gas supplier has retired and the next nearest supplier doesn't deliver and doesn't stay open late, so I had to get up early and get there before work on Friday.  Given how quickly the 9ltr bottle went, I've upgraded to a 20ltr bottle, which is also filled to a higher pressure, so I am hoping it will last to the end of the project this time.

After work finished I hit the welding again. Firstly I finished off the rear edge of the passenger pan, knocking the edge into alignment as I went.


I didn't go all the way around, but have left the floor to sill joint free at the moment, until I have fully patched the pan.

There are a few spot welds between the pan and the front torgue box/support panel. I wedged the support panel up from underneath and filled in the spots.


I started grinding the edges of the pan, but got fed up of that after a while and moved onto something else. I'd got the rear edge ground down.


I'd decided that the inner rocker wasn't going to be coming out anymore, so started welding it to the outer rocker and front body shell. I used clamps either side of each spot weld to pull the panels tight together and worked my way along the top edge. When those were all done they were quickly ground flat.


I did a few of the welds on the underside edges too, but some were obscured by the axle stands, and some will have to wait until the pan is ready to be welded up too.

With the front section of the pan now solid, I was happy to finish the front edges of the rear section, from in front of the rear seat forwards.  This was trickier than I'd hoped as some areas of the original pan were a bit thin and I ended up chasing holes around.


As you can see, once the panels had moved about and lined up, there was quite a gap left, too big to bridge with welding alone (and I'm getting quite good at that!)


I found an off cut that was pretty close in shape, it just needed a little bit of trimming, before being welded in place and filling the void.


With that done, pin holes found and filled, the seam was ground down.


I managed to squeeze in another short hour yesterday, and set about sorting the final piece of the passenger floor jigsaw, the edge piece joining the front and rear patches. The remains of the full floor pan fills most of it, but it's not quite long enough due to the modifications I needed to make before.


First job was to find some suitable off cuts with the right sort of shape, measure and cut to size.


These were carefully welded to the ends of the main piece, checked, recut, rewelded and finally ground smooth.


Finally, it was offered into place and marked for the locations of the extra spot welds that are needed.  Ran out of time to do any more, but the next jobs will be to drill those holes and get it coated in primer, ready for welding into place.  WIth that done, I'll be ready to join the floor to the rockers and the passenger side will be almost done.

Jamieg285

  • Pimp
  • *
  • Posts: 7356
    • View Profile
    • http://www.mfatw.com/WD
'79 Camaro - Major surgery
« Reply #112 on: September 22, 2014, 12:48:27 pm »
I had another full weekend on the car (weather permitting), so managed to get another big chunk of work done.

It started Friday night, with a small painting session, applying the epoxy primer to the parts to be welding in the next day, and a couple of other bits to use of the rest of the mix.


Once again I underestimated just how far the paint would go and didn't have enough parts prepared and wasted some. I need to factor in this and get more stuff prepared for next time.

I needed to add a couple of extra holes to the final piece of the floor, and then applied the weld-through primer on the areas that would be welded.


Whilst that was drying I started on my plan of preparing other parts for primer by digging out the wire guards and hitting them with some rust-converter.


The replacement drivers side one appeared to have had some wax treatment in the past and was affecting the reaction.  I may need to strip the wax before applying the primer, but I'm lazy, so will probably just try it and see if sticks, then clean it up if it doesn't.


The floor patch went in quite smoothly, although I wasn't able to properly deal with the sides of the floor braces. Rather than spot welds, I just welded along the edges.


With the floor now in one piece and adjusted into place, I was able to start welding the lower edge of the outer rocker and the inner side, joining the floor to the rockers.


It turns out my upside down welding requires a lot more practice. I wasn't happy with the way the floor welds were coming out, so I added some welds on the top surface for added strength. These will get covered by seam sealer later on.


Underside welds were not pretty...


By this time, the rain was starting to get beyond light, so I had to pack up for the day.

Jamieg285

  • Pimp
  • *
  • Posts: 7356
    • View Profile
    • http://www.mfatw.com/WD
'79 Camaro - Major surgery
« Reply #113 on: September 22, 2014, 01:17:45 pm »
The next morning I set about finishing the inner wheelhouse. The patch was all prep'd and ready to go.
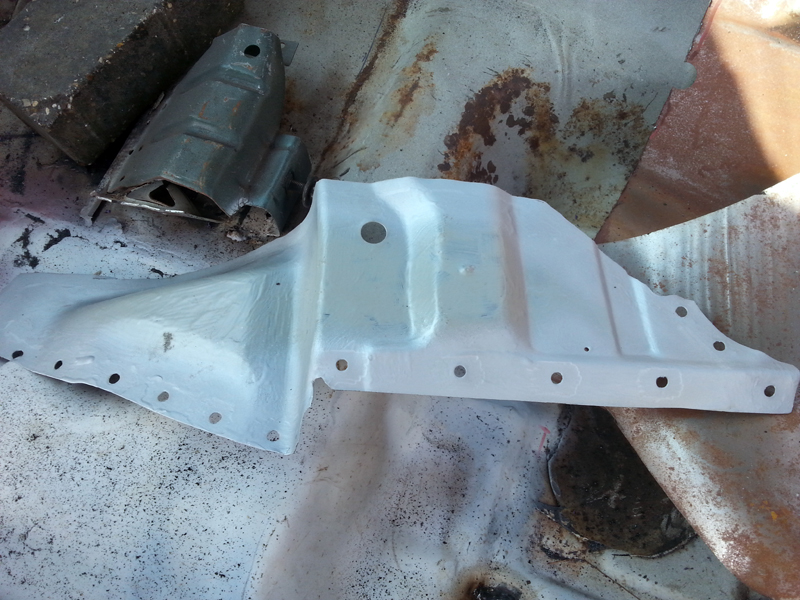

Or so I thought.  Whilst I was getting it lined up, I spotted that I had missed a line of holes where it joins the outer wheel house.  Thankfully I saw this and was able to sort it before it was welded into the car.
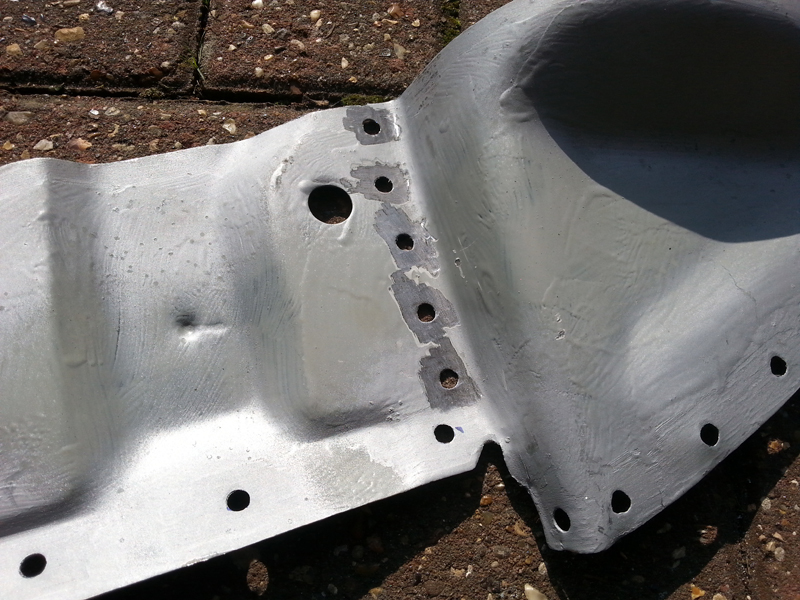

A quick spray of weldthrough primer around the new holes and on the car and I was ready to go again.
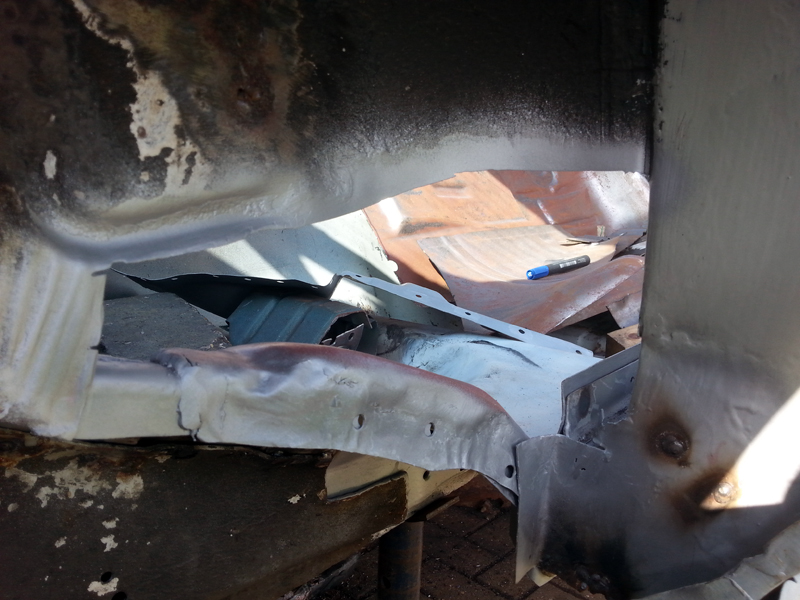
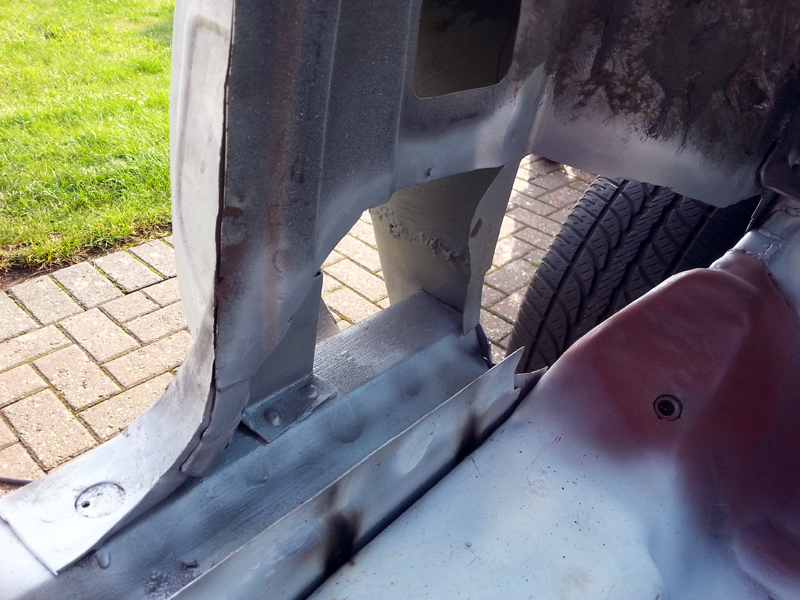
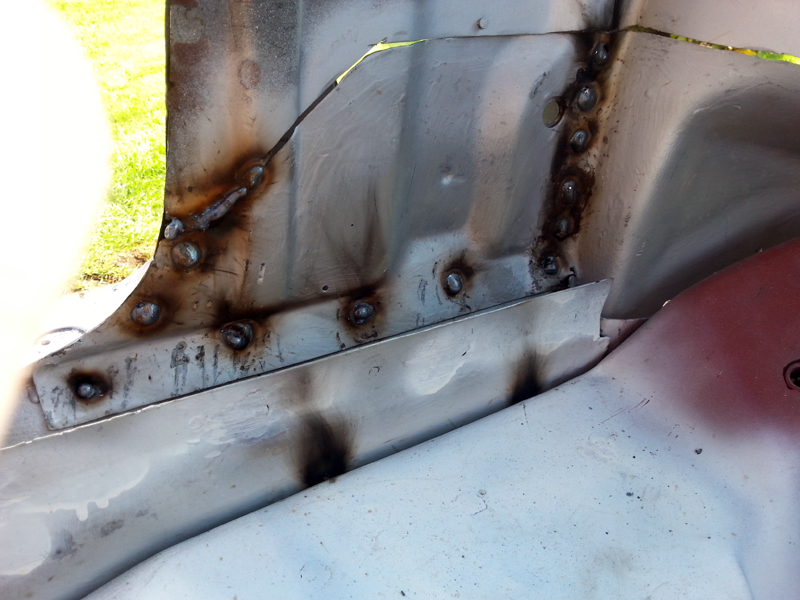


As is becoming customary, I had a gap that was too big to be welded. I really need to cut my patches a bit bigger, and only trim them at the last minute. As before, a donor piece was found and used to plug the hole.
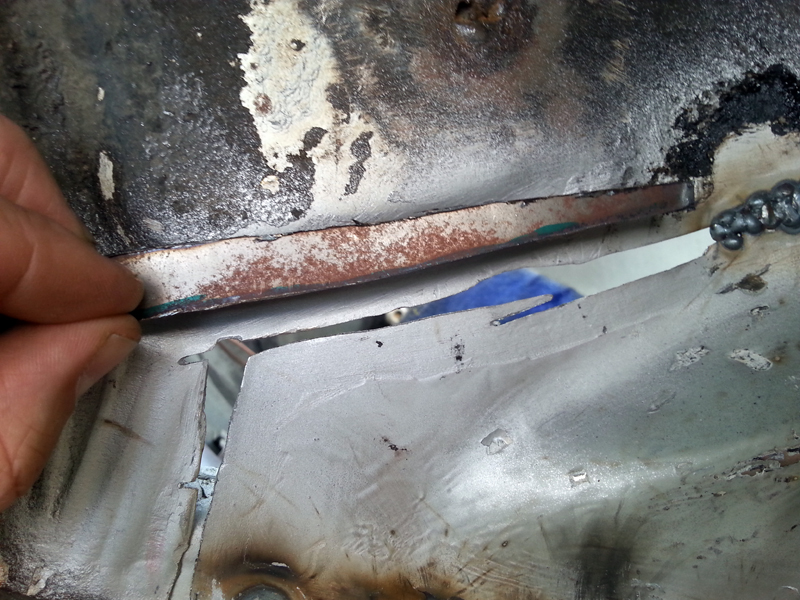
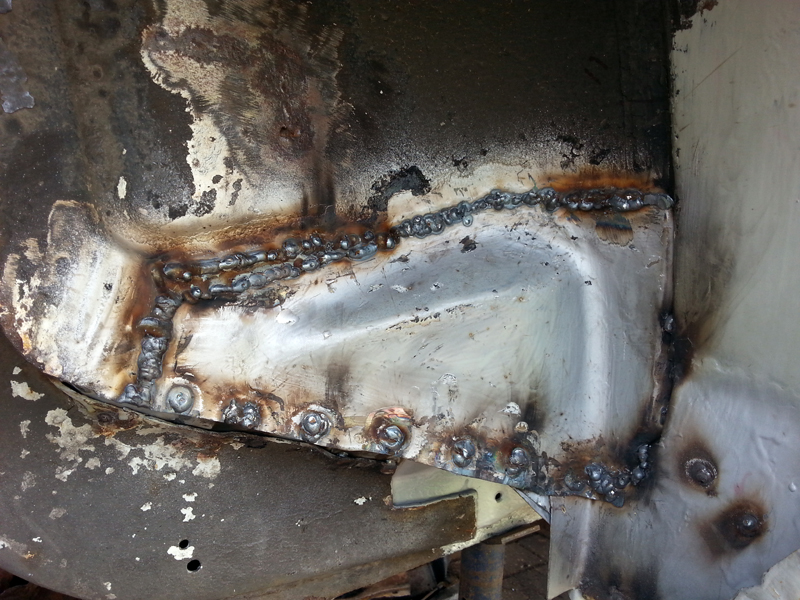
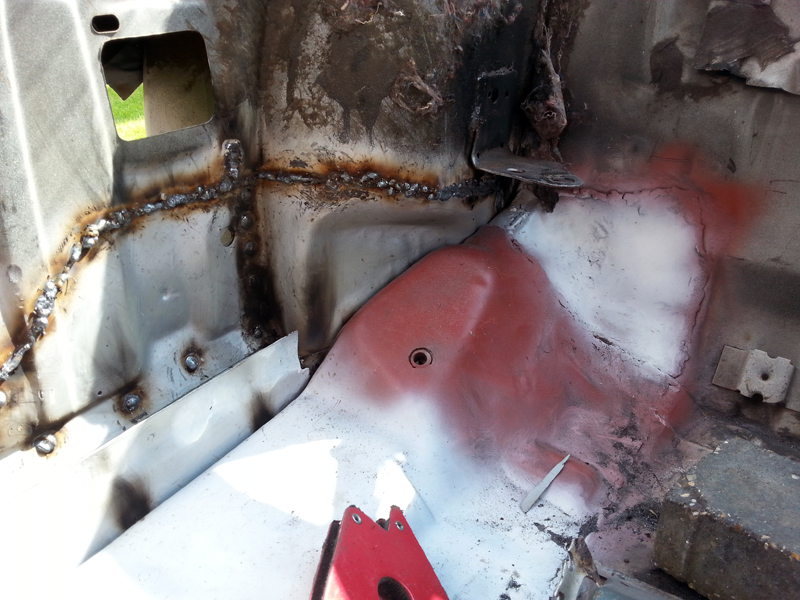

For the first time in months, the passenger floor is complete!   (Apart from grinding/cleaning and painting)  Time for lunch...


After a short break it was back to the grindstone. I fancied a change of scenery, so moved to the rear of the car to attack the rear panel and get it repaired/strengthened before having a go at the rear frame rail.

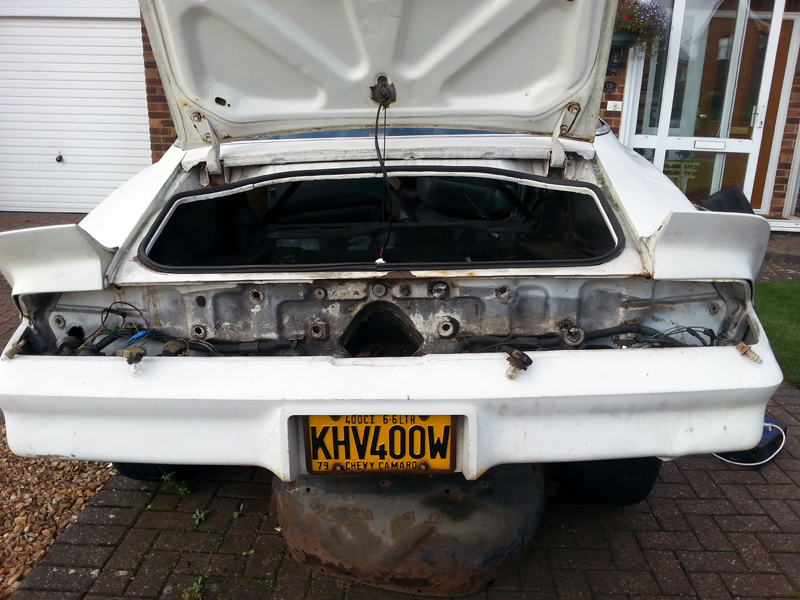
Start point - a fully assembled tail.
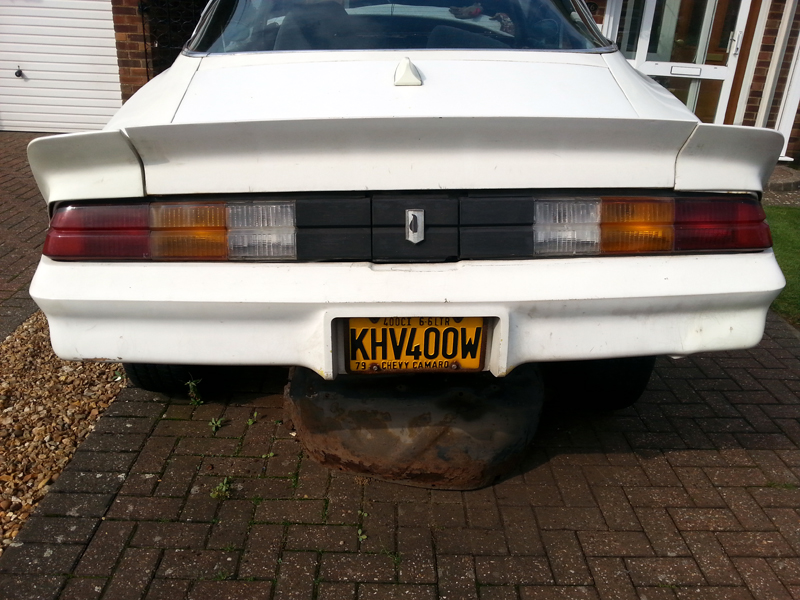

I'd done some repairs to the trunk floor a few years ago, and these appear to be holding up well.
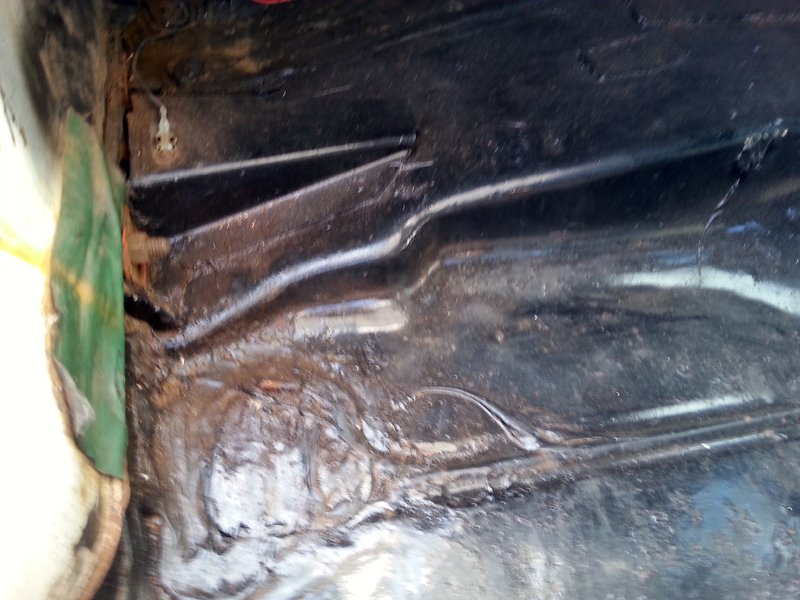
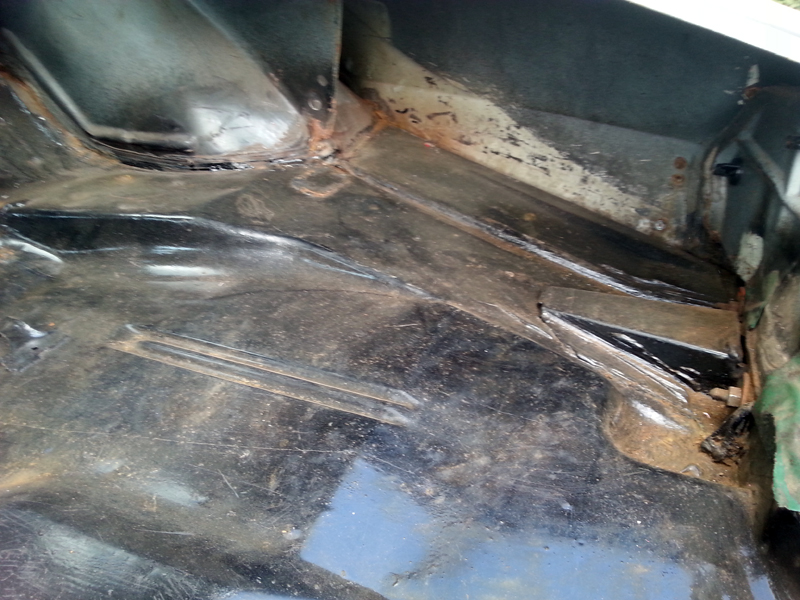

It seems a real shame, but I think I am going to have to cut sections out to enable a proper repair on the rail, but I will do a proper assessment on that when I get to that stage.

Back to the job in hand, first job is get the tail lights out.

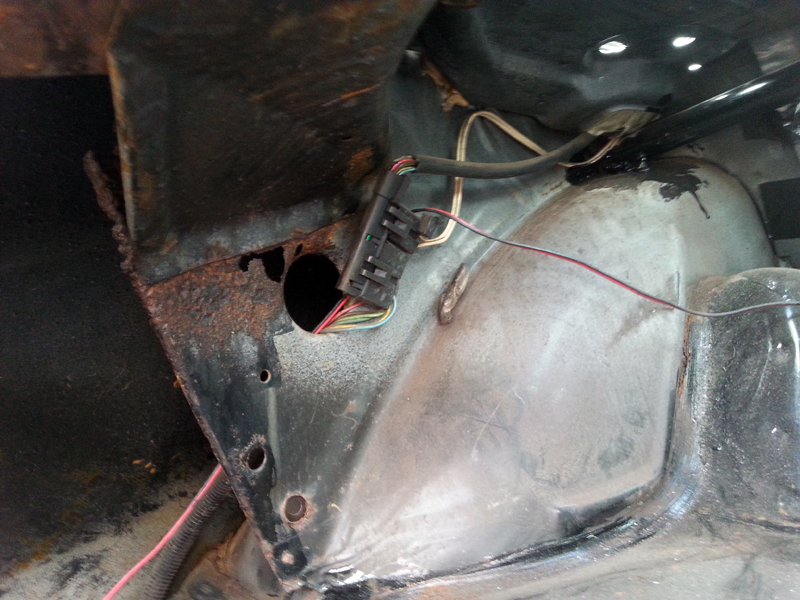
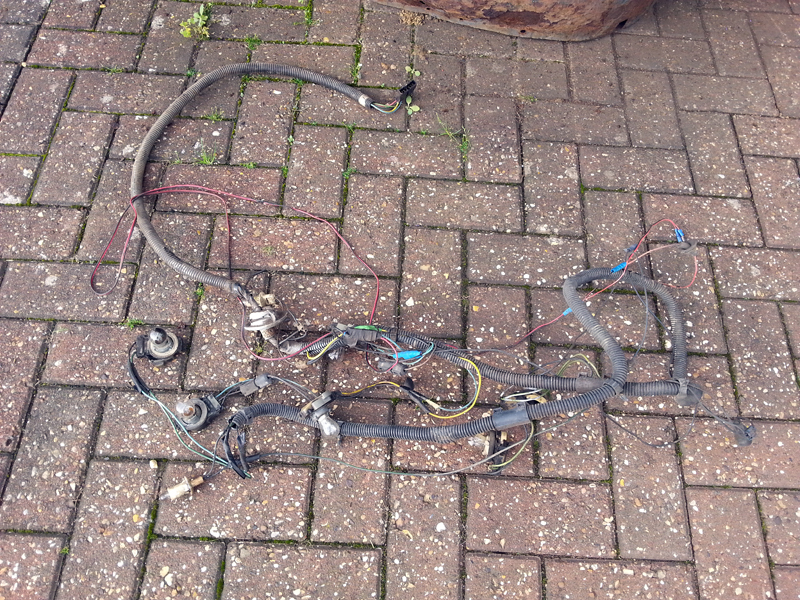
With cutting and welding on the cards, it's best to get the wiring harness off and well out of the way, rather than trying to work around it. First locate the connector, deep inside the trunk, and then the ground point.
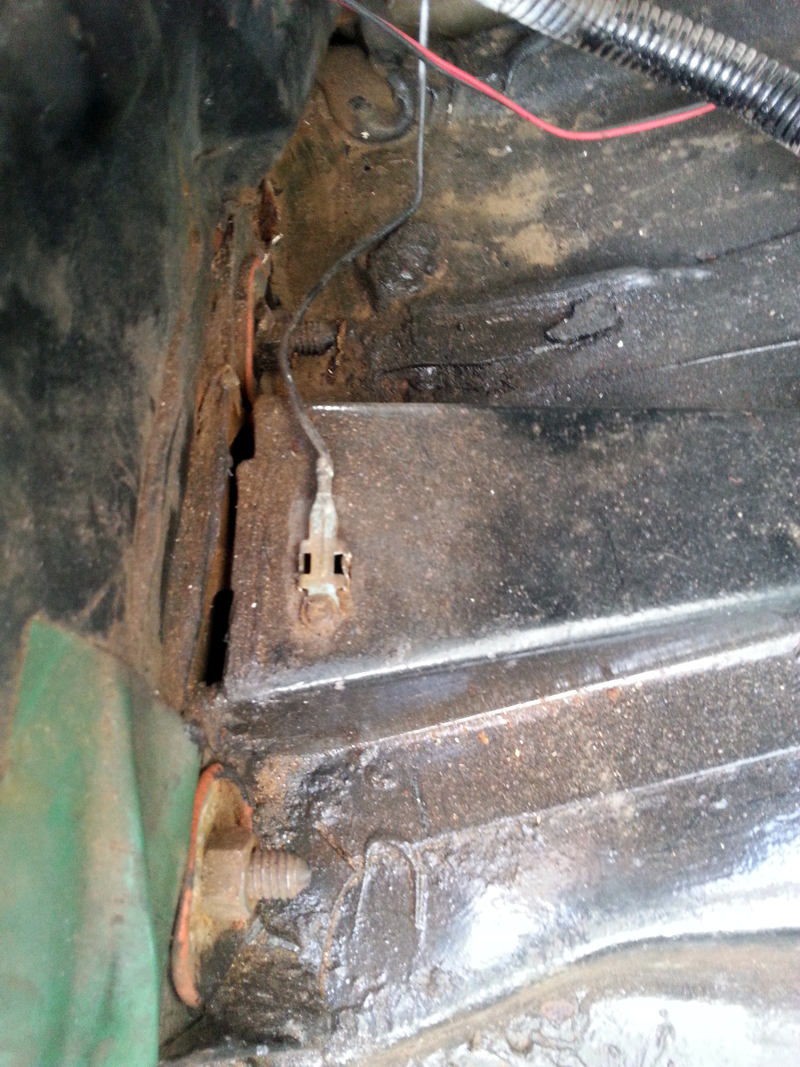

The ground screw was seized, so I cut the wire, and will sort if properly on re-assembly. With a bit of fiddling with the clips, it all came out OK.

Next is removing the bumper and cover (attached).  This involves removing the trim
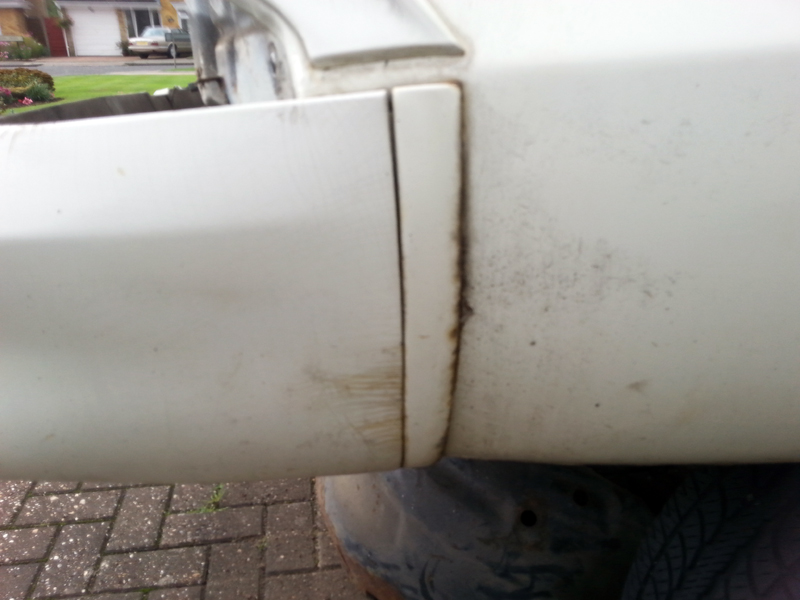

Two nuts on the inside of the trunk and one screw on the lower end on the outside and these wiggle out.
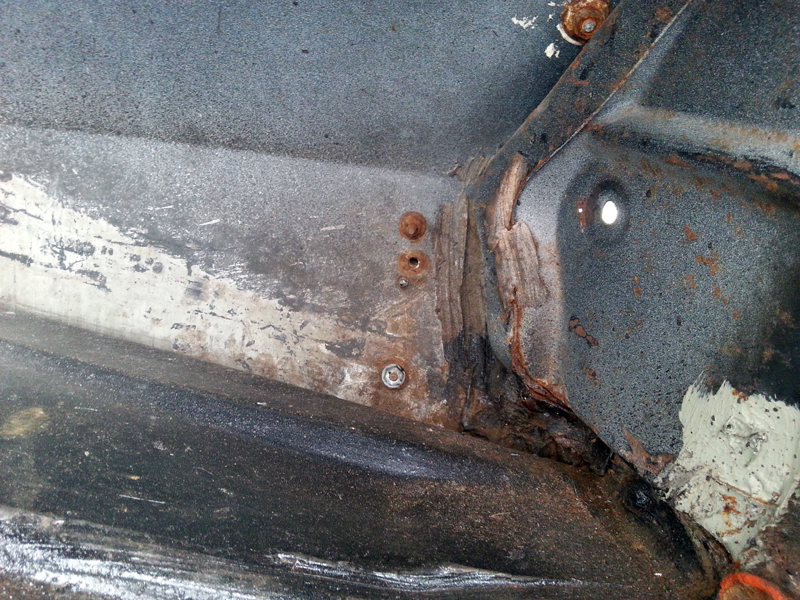
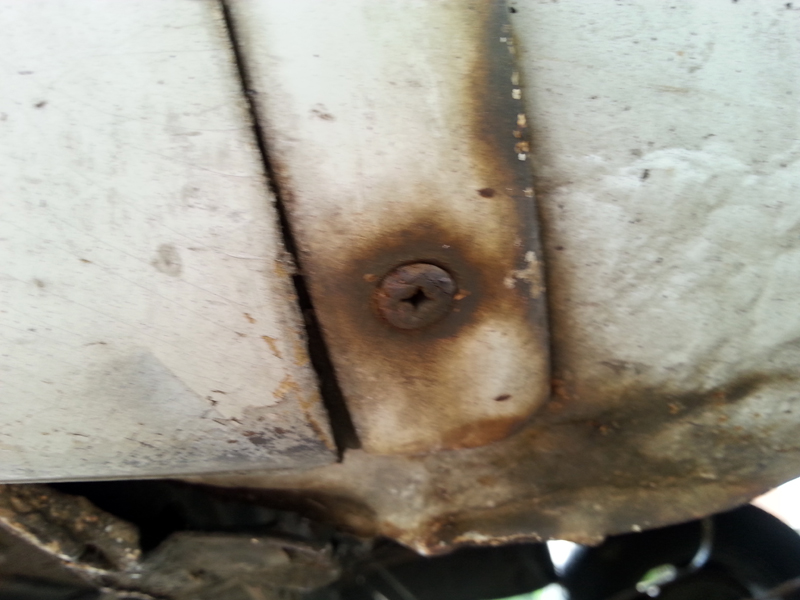

Considering these are one of the weak parts on these cars, mine seem to be holding up well and won't need much attention before refitting.

There are 2 screws each side of the bumper cover, but looking at the fastener type, I don't think these were original.
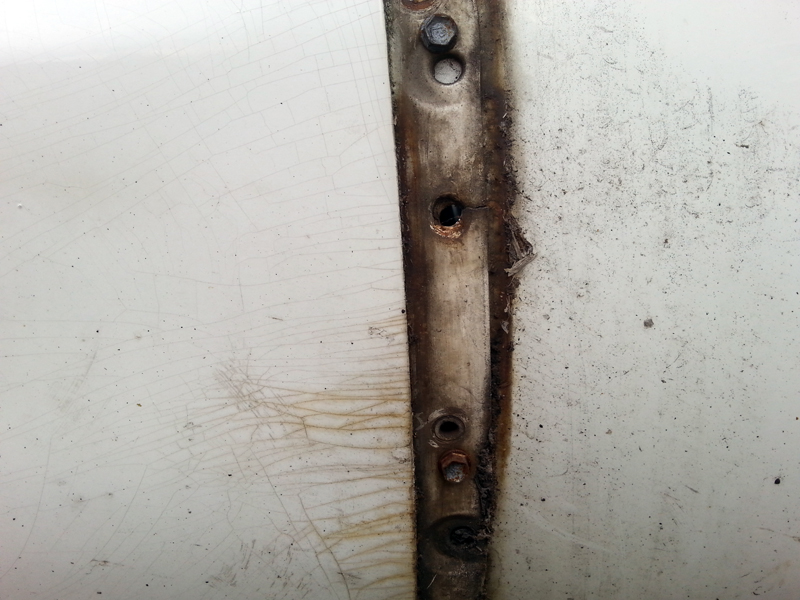

Finally is the bumper itself, 8 nuts, 4 each side, 4 in the trunk and 4 underneath.
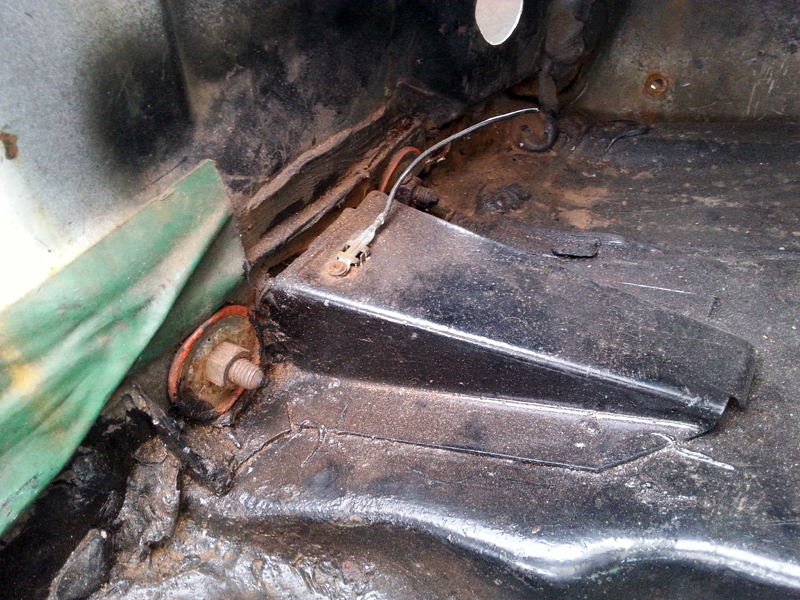


Of these, 3 of the coach bolts started spinning, so I had to weld them to the bumper in order to get the nuts off. It took over half an hour for these 8 nuts in all, but finally, the bumper was lifted off.
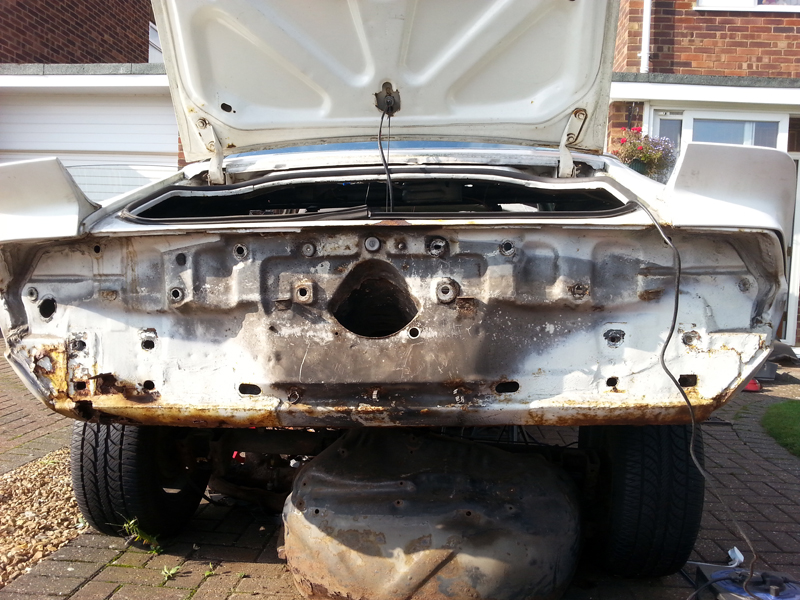

Initial inspection was as I expected. A smattering of rust, particularly on the lower edge, and the left side being by far the worst.
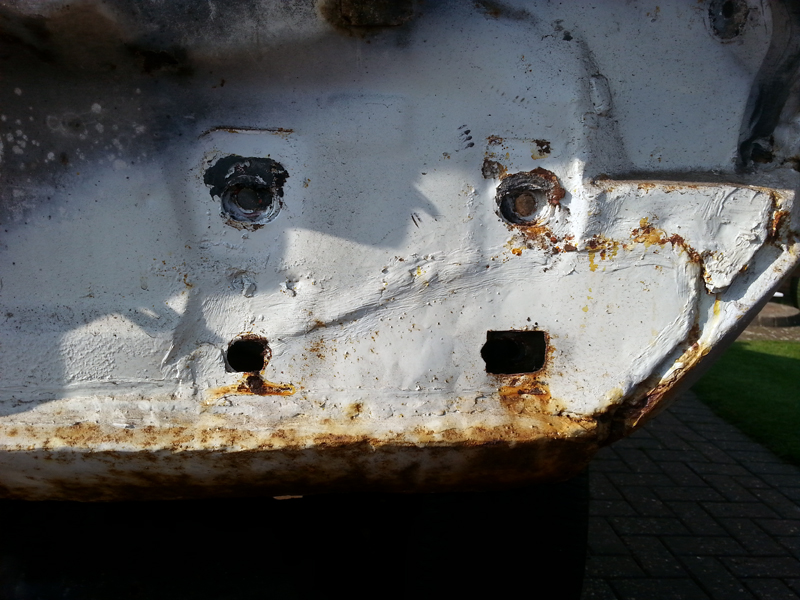
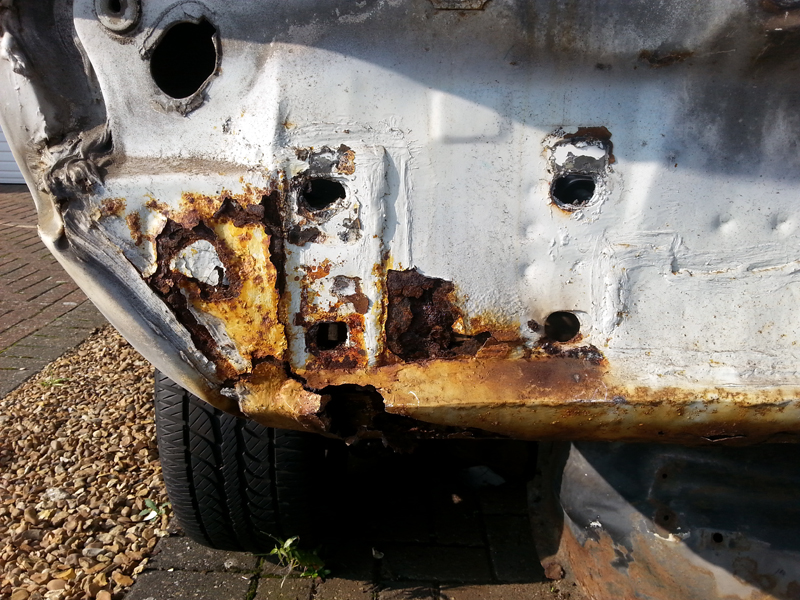

Before going any further, I held up the repair panel and marked up where it would extend to. Unfortunately, it wasn't big enough to cover the whole area of damage, so some customer pieces will be needed.

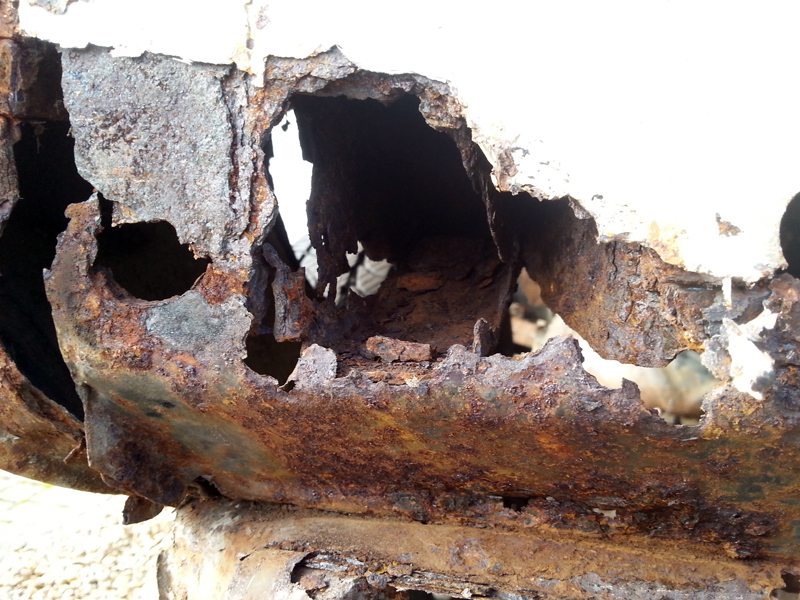
I cut along the marked line and started pulling off the lower section. It wasn't pretty underneath and as I dug further, it showed the drivers side to be a real problem and will require significant rebuilding.
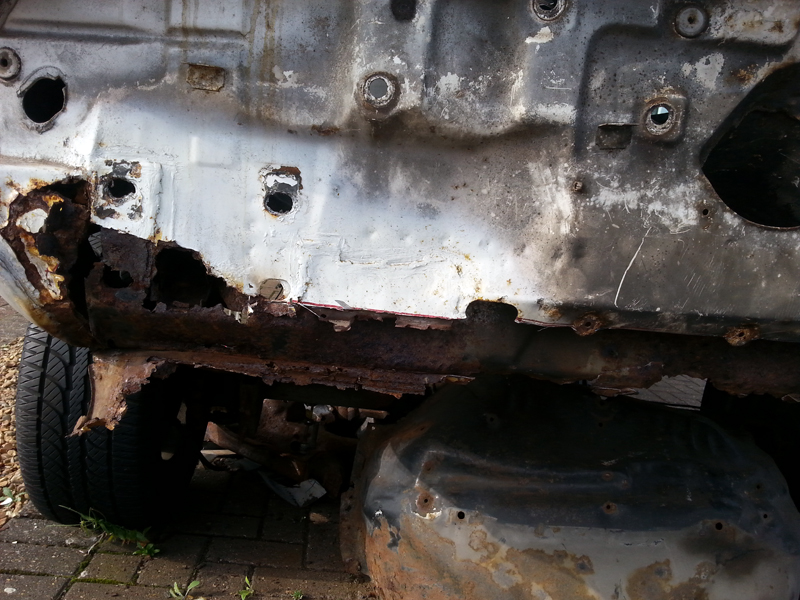

This shows just how bad that frame rail is, we are looking at the end of it here.

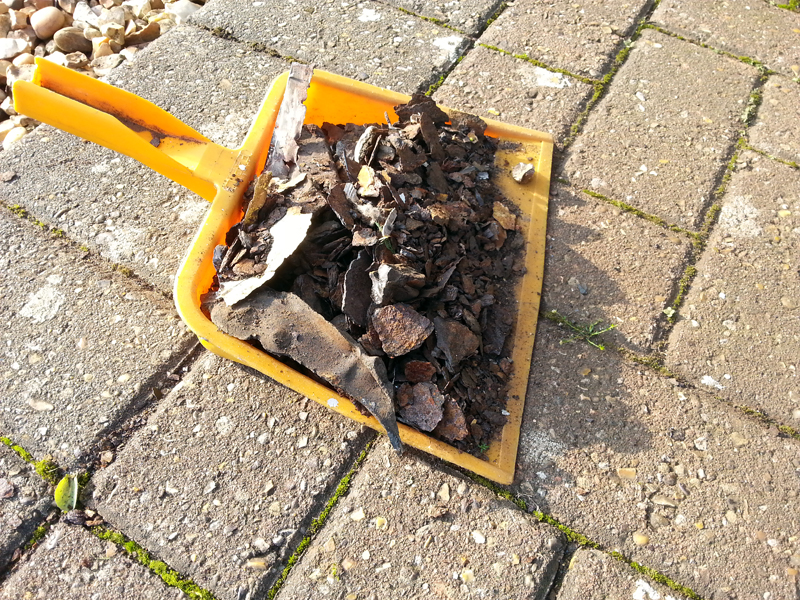
Another pan full of rust, just from this corner.

This is most of the outer panel stripped back, but I may need to go further, to give me access to repair/make the inner panel.
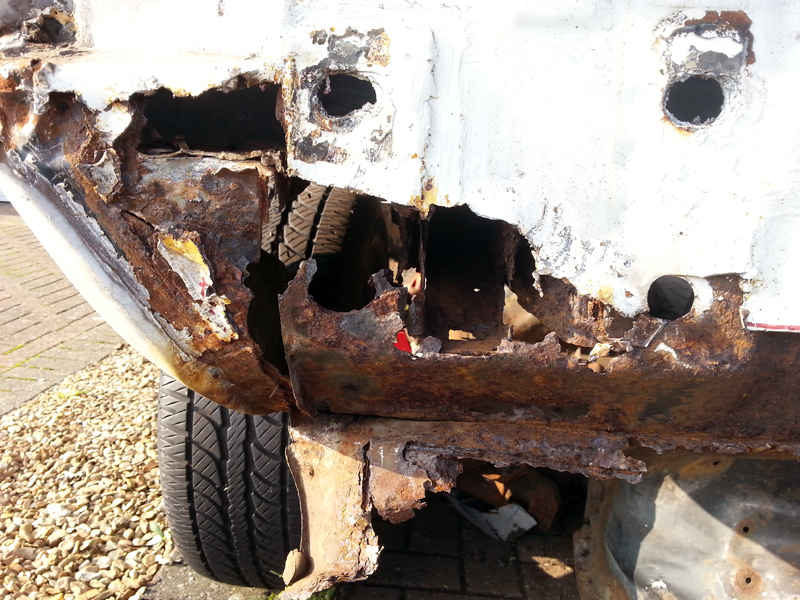

The passenger side isnt' as bad, but it will need some work on the inner panel too.  Thankfully, that panel is fairly simple, so I should be able to sort it without shelling out on a full repair panel.
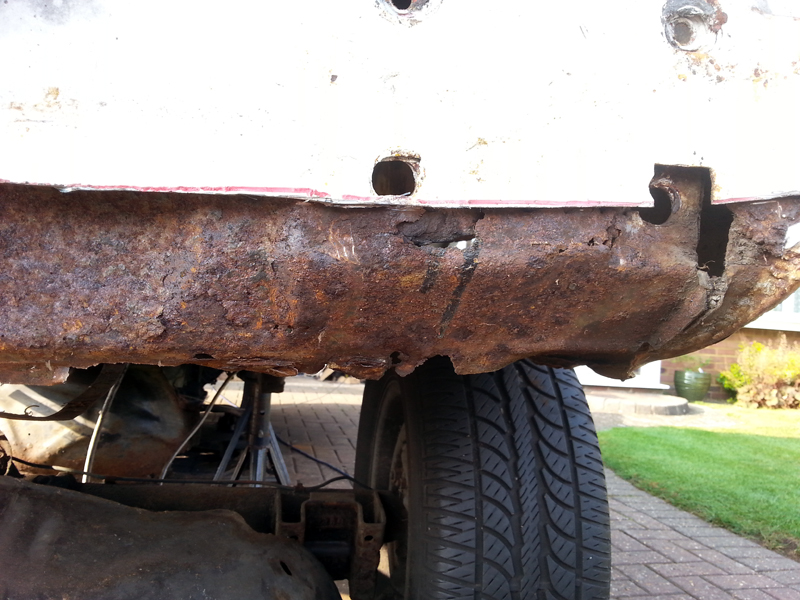


I now have another dilemma. Whilst pulling the back apart, I could see that the replacement panel I have goes on top of the rear quarters. I was going to leave the quaters until last, waiting until I had the rear frame and drivers floor done, but now it looks like I have to replan my order. I'm not sure which way to go now - Drivers floor and rocker, followed by the quarter, rail then tail? or carry on with the rear panel (all bar the final patch piece, rail then floor and quarter, with the tail finished last.

I will have to ponder that for a while.

Jamieg285

  • Pimp
  • *
  • Posts: 7356
    • View Profile
    • http://www.mfatw.com/WD

Roadkill

  • Guest
'79 Camaro - Major surgery
« Reply #115 on: September 22, 2014, 02:04:44 pm »
F*ck.

That's some going.  Epic amounts of rust though, it's shocking how car manufacturers clearly didn't learn to identify and protect water traps beter.


Jamieg285

  • Pimp
  • *
  • Posts: 7356
    • View Profile
    • http://www.mfatw.com/WD
'79 Camaro - Major surgery
« Reply #116 on: September 23, 2014, 12:14:49 pm »
Quoting: Jamieg285
I'm not sure which way to go now - Drivers floor and rocker, followed by the quarter, rail then tail? or carry on with the rear panel (all bar the final patch piece, rail then floor and quarter, with the tail finished last.


I've been playing in photoshop with an image of the replacement panel, lined up against the rear of my car, to show me where the back is double skinned, to help me understand how all the joints interact at the back.


As you can see, it doesn't extend up that far, in fact it doesn't go above the trunk floor.

Armed with this info, I am now planning to cut back the outer panel a little more, to give me access to repair most of the lower section of this panel.  It will end up being a bit of a patchwork, which is more work and less pretty than swapping the panel, but I don't have the funds for doing it properly.

I won't complete the rear section after that, but will then move onto the rear frame rail.

Not sure how quickly it will get done, as there's loads on the calendar in the coming weeks. I will get an odd 30-60 minutes here and there, so will have to make the best of that time.

Jamieg285

  • Pimp
  • *
  • Posts: 7356
    • View Profile
    • http://www.mfatw.com/WD
'79 Camaro - Major surgery
« Reply #117 on: September 26, 2014, 12:57:02 pm »
It's taken a while to get it setup, but I've finally got the added bonus of being able to work from home twice a week, which means I have some extra time at lunchtimes and immediately after finishing to do some work on the car.  This could prove vital to keep this project running as the poorer weather sets in and the days get shorter.

I managed to get 2 such sessions in this week, so set about continuing with the tail panel treatment.  

I carried on where I left off, digging a bit more rust out of the drivers corner, and starting to cut bits out to good metal, ready to receive a patch. Although I will need to patch all the way across, I don't fancy trying to make a 5-6 foot long patch with various bends in it, so will be making it in sections.  Here is the first section cut out, and the first piece that needs to be reproduced.


Armed with the trusty cereal box, a loose template was made up, then transfered to a piece of metal (re-using what's left of the floor pan) and cut to shape.


This was then bent into shape and offered up into the void. Not bad for the first attempt. A bit more shaping and cutting required on the right side.


A little bit more work and it's ready, in-fact, it's such a good fit I don't need to hold it!


I want to apply primer to all of these patches, but will need them all ready for painting at the same time, otherwise I will be wasting the paint having to make it up for such a small job. Because I need this piece in place for reference for the next piece, I've tacked it in for now and will remove when ready to paint it.


With that done, it's onto the next section. First work out how far to go, not too long, and not too complex in each part. This one has 2 bends in it, so I didn't want to go as far across as the third. Again, cut it out, make a template and start shaping the metal.


I deliberately made this piece on the large size, as the double bends in it will affect the outer edges. Once the bends are complete and I'm happy then I can trim the edges down to size.

That was it, a short time disappears very quickly.  When packing up, I did run into a minor issue.  The tacked in patch hasn't yet got the holes drilled in it for the bumper bolts. Thankfully, the top bolts go in enough to get a nut on then, but this is putting some pressure on the tacked plate.


Hopefully it will be OK until next time, when I can drill the holes if required.

Jamieg285

  • Pimp
  • *
  • Posts: 7356
    • View Profile
    • http://www.mfatw.com/WD
'79 Camaro - Major surgery
« Reply #118 on: October 01, 2014, 01:29:32 pm »
Another lunchtime and evening session yesterday, so work continued on the inner tail panel repairs.

Most of the lunchtime session was used up trying to shape the patch. Although I though it was simple, the multiple bends were quite difficult, and I may make smaller part patches when doing this section on the other side.


After much bending, re-bending, trimming and re-bending, I was finally satisfied it was OK and tacked it in one end and did a proper join to the piece already there on the left. I'm now planning to build the patches up into a left and right piece and then join them in the middle.


The light in the evenings is fading fast now, so if I want to get as much done as possible I need extra light.  A dig around in the back of the garage and I've found what I need.


The next section reaches to the center section of the panel, and does have some difficult bends in it. I've cut around those bends, so that this bit is fairly flat, and the tricky bends will be added later.


I picked up a neat trick of You-Tube recently. I made the template before cutting the bad metal out, transferred it to the new metal and cut that to shape.  This was then held in place and I sprayed weld through primer over the edges.  When the patch is taken away it leaves a perfect outline of what needs to be cut, which should eliminate lots of trimming.


Here it is cut, and then with the untrimmed piece offered into position.


I didn't want to bother with the welding equipment in the dark, so moved across to the passenger side. As with the left, I wanted to work from the outside in. With the experience of the other side, I cut more of the outer panel away to reveal all of the inner panel and the end of the frame rail. Although it looks pretty bad, it's the inner panel that's taken the worst of it and the frame rail is (thankfully) pretty solid. A bit of cleaning up and a layer of expoxy is all that will be needed there, before welding in the new inner panel patches here.

Jamieg285

  • Pimp
  • *
  • Posts: 7356
    • View Profile
    • http://www.mfatw.com/WD
'79 Camaro - Major surgery
« Reply #119 on: October 06, 2014, 01:21:18 pm »
An interesting weekend, with a few twists and changes of plan.  I only got a few hours on Sunday afternoon, but that was long enough for a few significant developments.

I started out continuing with the rear panelling, initially tacking in the last patch, then stripping out the outer section and preparing that patch.


It was at this point Debbie came out and queried what I was doing - "You'd be better off which one big piece there", "Is that going to be safe like that".   That led onto a short discussion on the availability of the panels, and lack of budget. Begrudgingly she accepted that it is probably a good idea to do it with the proper panels, but we'd need to look at how much that would be.  It's a start...


So with that unexpected turn, there seemed little point continuing with the tail section, at least until I know if I will be getting the repop panels or not.  Attention was now diverted to the next job, namely the drivers rear frame rail. The patch on the rear tail would give me a reference for the rear section, so I was OK to continue with it. I dug the donor rail out of the garage, and spent about 45 minutes comparing it to the one on the car and trying to work out the best way to deal with it.  In short, I am not really much further forward yet. I've come up with a couple of options, both needed a fair amount of work in different ways. I've started a different thread on this to canvas opinions - please take a look and let me know what you think - http://www.mkb.cc/forum/index.php?action=vthread&forum=3&topic=12275

So, stuck on that and still with an hour or so to go, I looked for the next thing to try.  I decided it would be a good idea to start peeling back the layers and see just what needed to be done on the drivers outer rocker.

Even without any digging I new there would be some patching required, as there was a rust hole visible straight away. A bit of hacking showed the hole wasn't too big and there was some solid metal below it.


However, as I dug a bit more, things weren't looking so positive. It was clear there was some bad rust, but the holes weren't big enough to see properly.  Out with the angle grinder (the power button is now permanently on, so has to be controlled by plugging/un-plugging it) and I cut away some of the lower quarter panel.   Can anyone say 'filler'


With that out of the way, I was able to see some serious problems. I'm really confused as to why the inner support bracket had been cut, especially as I couldn't see any obvious attempts at repairs. The edge facing me is well gone, but at this point I was still hopeful that this could be patched with sheet metal, but the top edge of the rocker looked a bit rough too and needed further investigation.

I cut out a small section of the inner panel to view from the other side, which also gave me access to stab a screwdriver into it.  Needless to say, the result wasn't good.  The full tail section of the rocker is done for, and cannot be patched.


The only option is a full replacement.  Thankfully, the inner rocker looks to be solid enough to be retained (a miracle considering the damage either side of it), so it won't be as big a job as the passenger side.  Give that this will be a mandatory purchase, it may have a bearing on the chances of getting the other panels that were being considered.   The one thing that is on my side here, is that I have conceded that there is no chance that the car will be completed this year, which increases the chances of a bit more budget being allowed.  I suspect we will have to get past the Christmas spending before I will know, so I'm going to have to think more carefully about what jobs I do in the meantime.

Jamieg285

  • Pimp
  • *
  • Posts: 7356
    • View Profile
    • http://www.mfatw.com/WD
'79 Camaro - Major surgery
« Reply #120 on: November 20, 2014, 02:04:48 pm »
Hi everyone, after what seems like an eternity I'm back on the case.  Progress through the winter months won't be as quick as it was, as I'm currently limited to a couple of hours a week, lunch breaks when working from home.

The current budget is definitely at zero, so any new parts will have to wait until the new year, and I'll have to be selected on what I can get.  With this in mind, it was back to the DIY job under the rear bumper...

After refreshing my memory of where I'd got to with this, I got back to forming the plate for the right side of the panel. Clamping the lower section patch panel in place allowed me to work out where the bend at the lower end needed to go.


Little bit of fiddling and I was happy with the fit.  I'm not worried about an exact fit now, and am expecting to do some massaging later on when I weld the inner and outer panels together.


With that done, the patch was tacked into place.


I'd missed a trick here in not including the first bend on that piece of metal, and despite my best efforts I was not able to do the close double bends in the next piece. Instead I ended up making a small slither to form the first bend.


Moving inboard, the next bend took a bit of time to get right, but I got close enough eventually.  This took most of the available time, so all I could do was spray around the patch, ready for cutting next time out.


Looking at that outline, I may modify the left side a bit more, as that cut looks a bit tricky!

Jamieg285

  • Pimp
  • *
  • Posts: 7356
    • View Profile
    • http://www.mfatw.com/WD
'79 Camaro - Major surgery
« Reply #121 on: December 04, 2014, 02:09:38 pm »
This update covers 3 lunchtime sessions from this week and last. Not mega progress, but at least some movement.

I continued with the inner tail panel section, looking to complete the passenger side.  The next section was marked at the end of the last session, so it's simply a case of cutting it out and then tacking the next be in place.


Then to the final piece on this side, which was a nice flat section and really easy compared to the previous ones.


That's both sides done, although there is still some tweaking to do with the horizontal bends to get the inner and outer to meet, and some trimming to size to be done.


The final bit of fabrication, for now, was the middle piece that joins the two sides. Being curved I was expecting this to be tricky, but found it to be quite simple.
First find a suitable sized off-cut and bend it around a hammer.


Then it was held in place and marked for trimming.


And finally offered into place.


I've not welded this piece in yet, I want to wait until the sides have been removed, fully prep'ed and welding in properly before I do this bit.

Not sure if I'm going to take this much further now, I may divert to starting on the drivers outer rocker.  I need to carefully work out the remaining steps for this bit and plan when they will be done.

Jamieg285

  • Pimp
  • *
  • Posts: 7356
    • View Profile
    • http://www.mfatw.com/WD
'79 Camaro - Major surgery
« Reply #122 on: January 08, 2015, 01:37:41 pm »
You know that things are moving too slowly when you have to check your own progress thread to remind you where you got to last time!

After more than a month off (mostly with good excuses) I got a spare hour to start tinkering again.  Rather than continue with where I was, I have decided to switch my focus, and work on things that will help me to regain some storage space, as I'm running out of room to move in the garage.

Target #1 is the frame. If I can get the frames swapped over, the old one can be sold on and create a small space in the garage (may even boost the budget too, fingers crossed.

The front clip is mostly separated already, but the there are a few things still attached that need to be removed.  The main obstacle is the engine and trans which will have to be pulled out before I move the frame, the rest I am hoping can stay on for now and get transferred over bit by bit.  I've not really planned it that well yet, but I will get a better idea as I get stuck in.


Due to the limited space on the drive and the lack of wheels to roll the car back, I can't do what I have done previously and just lift the engine over the nose and roll backwards.  Being as it will be swapped over anyway, I'm going to remove the core support, making engine removal a piece of cake (I hope).

Onto actual progress for the day, which doesn't amount to much...

First step was to remove the radiator. This was drained and hoses/lines removed.


Had a few problems with the transmission cooler lines, as both nuts were stuck to the sleeves. I managed to free the top one OK, but the lower one just twisted the sleeve.


Thankfully I spotted it and stopped turning it before it split. In the end I had to resort to spinning the radiator around the line, rather than turning the nut.  Bit of a faff, but it worked.


With the radiator out of the way, it revealed another area that will need some attention. Hey-ho.


The rest of the time was spent cleaning up the mess left from draining the radiator and packing up.  I did take a few pics to help with alignment/re-assembly.


Roadkill

  • Guest
'79 Camaro - Major surgery
« Reply #123 on: January 08, 2015, 03:33:01 pm »
Quoting: Jamieg285
You know that things are moving too slowly when you have to check your own progress thread to remind you where you got to last time!


Story of my life !!!

That said, progress is progress, however little.

Jamieg285

  • Pimp
  • *
  • Posts: 7356
    • View Profile
    • http://www.mfatw.com/WD
'79 Camaro - Major surgery
« Reply #124 on: January 26, 2015, 03:24:39 pm »
Not exactly progress, but I wanted to post it anyway, as it's the most positive excitement I've had with the car for what feels like ages.

Whilst having some tyres on the family car fixed, I got the guy to fit a tyre to one of the C5 rims.  Not sure why it's so exciting, as it's only one of the four and the tyre won't be used on the road, it's only for measuring and checking clearances, but it feels kinda good to see it there.


Not the best pics for visualising the final look, but the best I can do right now!