Author Topic: '79 Camaro - Major surgery  (Read 31821 times)

Roadkill

  • Guest
'79 Camaro - Major surgery
« Reply #125 on: January 26, 2015, 05:37:19 pm »
It's the little things that keep us going . . . .

Jamieg285

  • Pimp
  • *
  • Posts: 7356
    • View Profile
    • http://www.mfatw.com/WD
'79 Camaro - Major surgery
« Reply #126 on: February 10, 2015, 03:19:30 pm »
There was an unexpected flurry of activity this weekend.  Somewhat surprisingly there has been an advancement of the budget and I am now able to order some more parts. Key purchases in this order will be the outer rocker for the drivers side, quarter skin for the passenger side, new outer tie rods, and the necessary adapters and hardware to let me fit the C5 wheels.

Why the urgency? A quick call to the importing company (STS imports) tells me that the next container is due to be packed in the next 2 weeks, so I need to get everything ordered and shipped to them sharpish, or it will be months before I see any of it.  The problem now is that I've not worried about finallising the details of what I needed as I thought I had loads of time in which to do it.

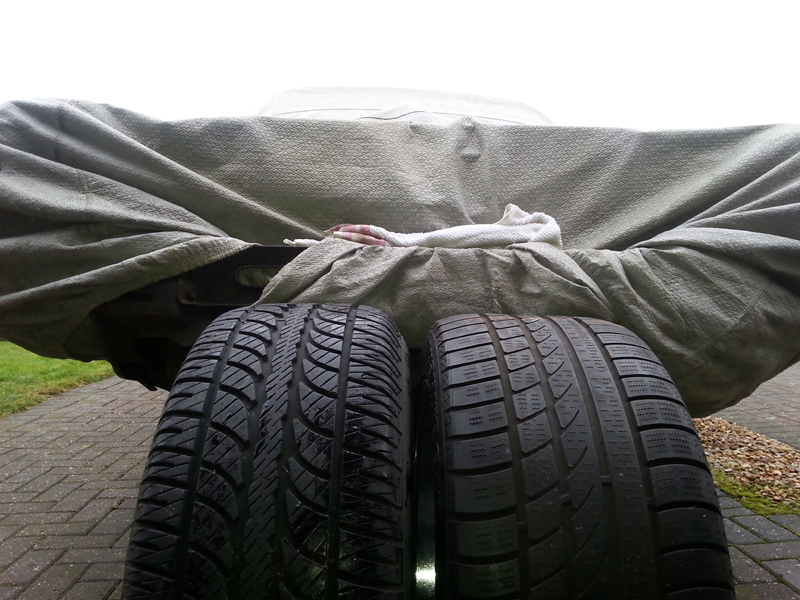
So, first was confirming the size if the wheel adapters. General wisdom seems to be a 2" spacer at the front, and 2.5" at the rear, but measure first to make sure.  Being as I have no suspension fitted, measuring clearances exactly isn't going to be possible, so I'll have to make do with comparing the wheels.  

Side by side, you can see that the new tyre is slightly shorter than the old ones, which may or may not help with clearance.


Next I check the backspacing, using the edge of the tyre as the reference rather than the wheel rim. I did this because the old tyre had much more sidewall bulge, and doing it this way measures to the outermost contact point.


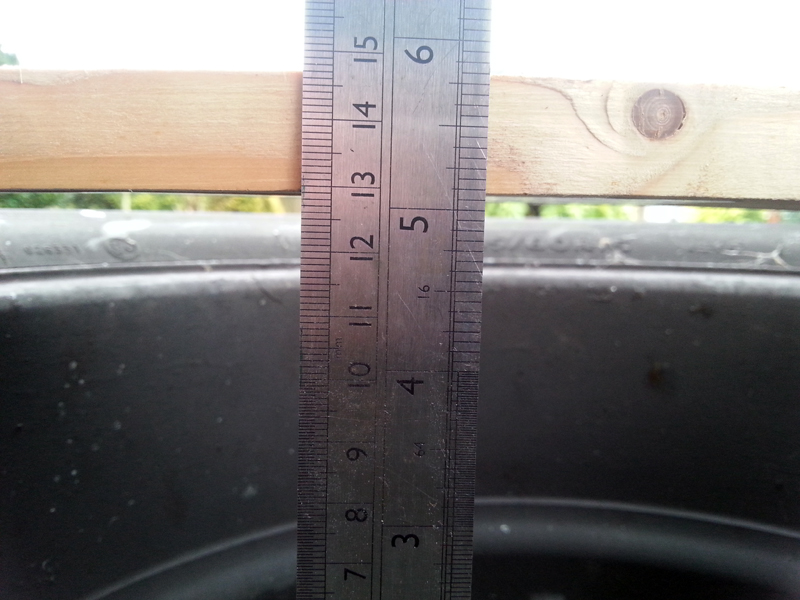
Based on this, it looks like the new wheel/tire combo is 2 1/8" offset.  I figure the 2.5" spacer at the rear will be fine, but I am now concerned by the front. Will 2" be enough?  With it being just 1/8", I may be able to get away with a thin spacer if needed.


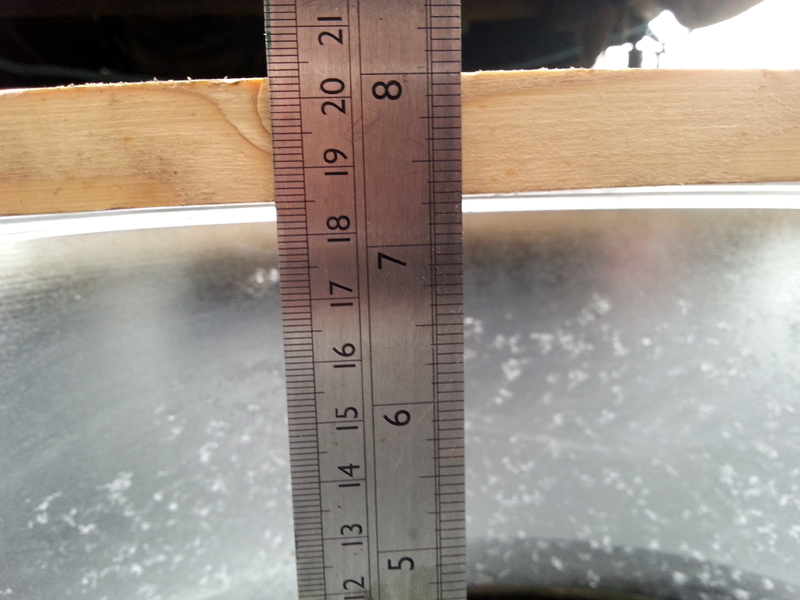
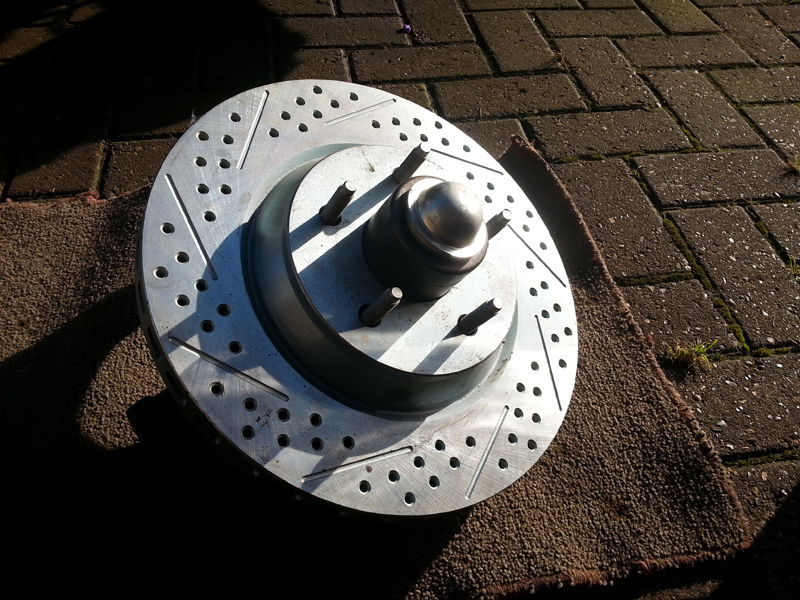
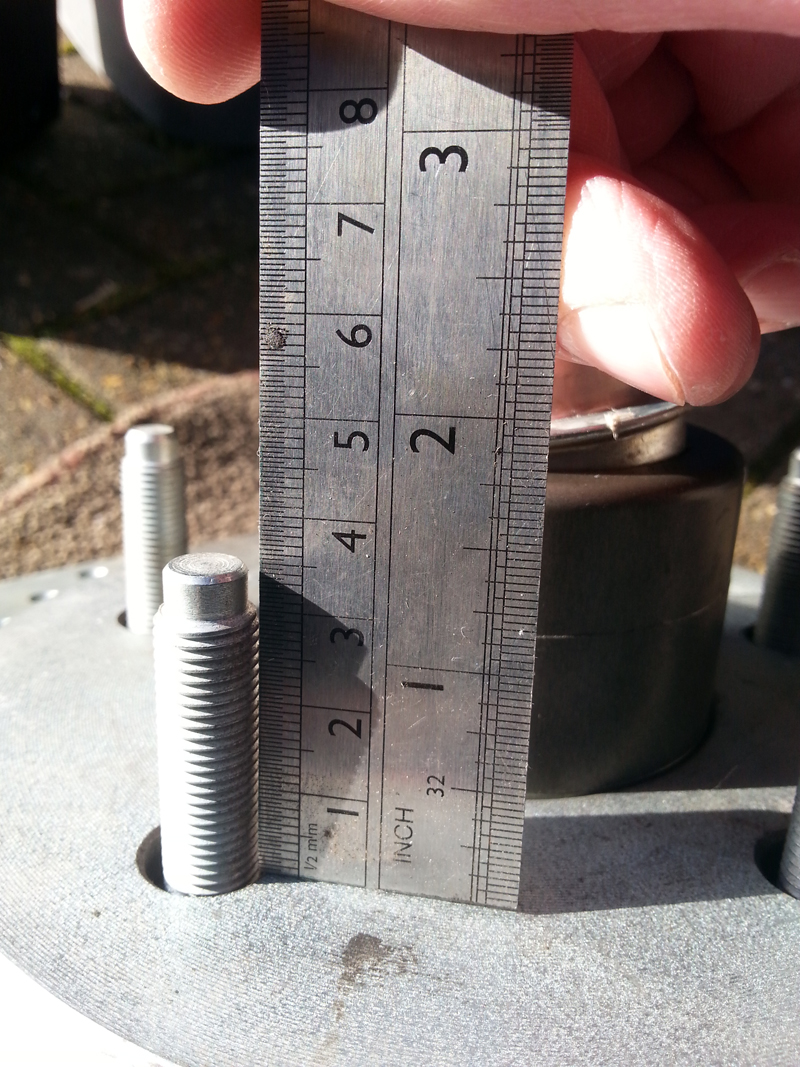
With the thickness of the adapters sorted(?), next task was to work out what studs I'd need. The rear drum is still on stock studs, and I've been advised to up the thickness of them to cope with the added stress of the adapter. I'm going to go with 12mm, to match the studs that will come in the adapters.  I've figured that the stud needs to be at least as long as the adapter, plus the thickness of the rotor.   So, off with the rear wheel and drum, and measure the thickness of the axle flange.


As I write this, I have realised that I should have also measured the thickness of the brake drum. However, having subsequently looked for the parts, it's not overly relevant, as I will have to get 3.25" studs, and will be cutting them down to fit.  

Being thicker studs, I also needed to see if I could find any that would fit the existing holes, or if I would have to drill the holes larger to fit the studs. The stock studs are about 0.472", but the new ones will be 0.505", so I'll need to get a 0.5" drill bit sometime.  


That's the rear sorted, but I also need to check the fronts.  I will be fitting a new Baer front kit, and had no idea what studs it had fitted as standard.  Now I know they're in one of thses boxes, and my money is on it being the one at the bottom:


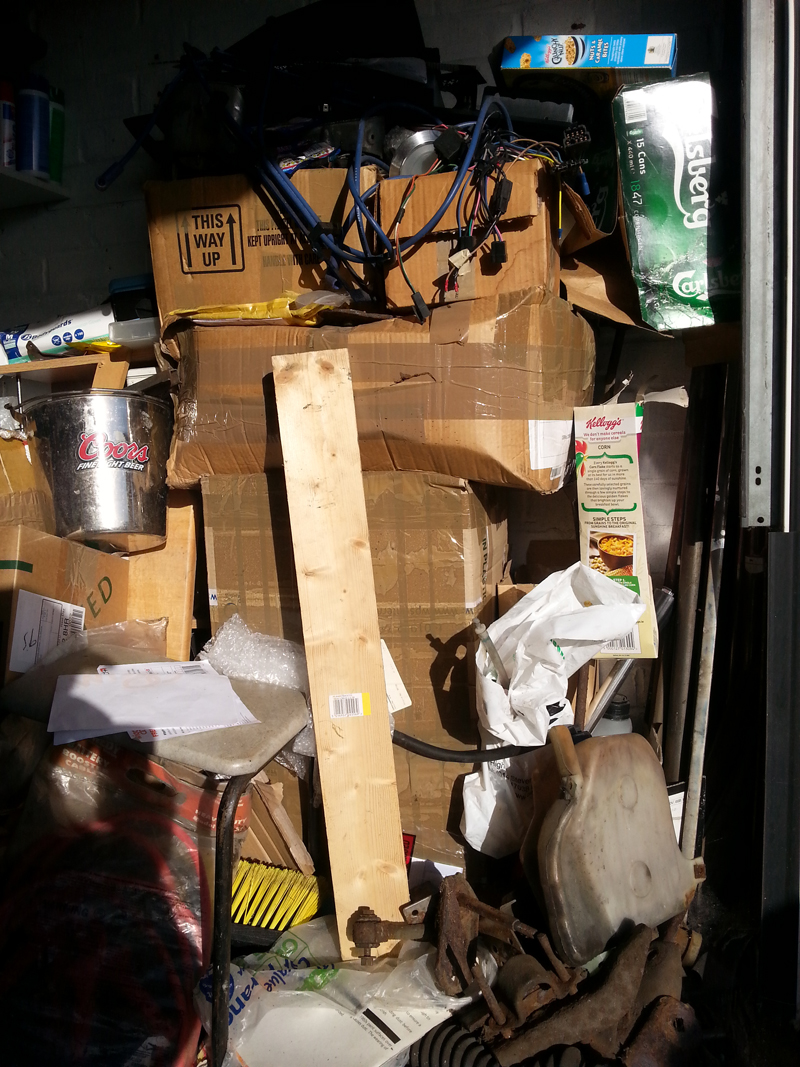
Yep, I was right. Bottom box, but I did get them out reasonably quickly, although not without casualty:


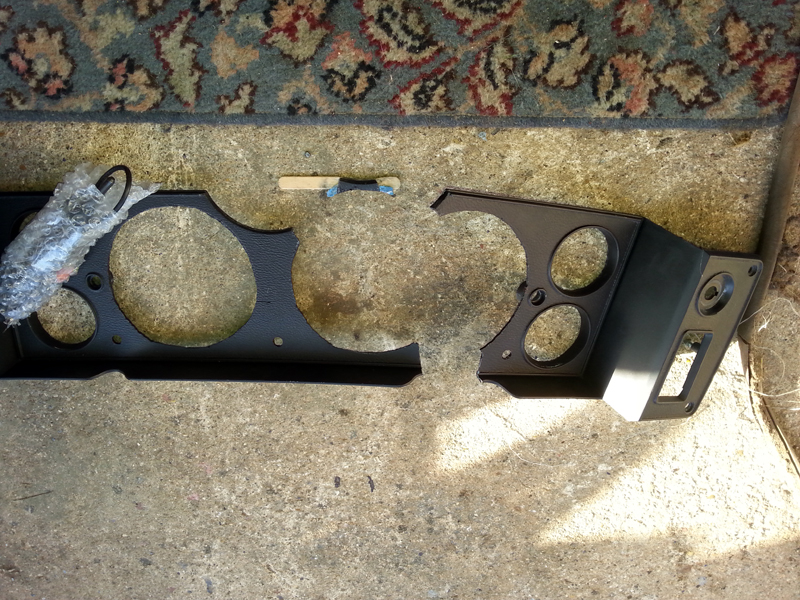
I'm hoping this will be repairable, otherwise I've got to re-do all the holes in a fresh dash bezel.

Anyway, back to the task in hand, the front studs.


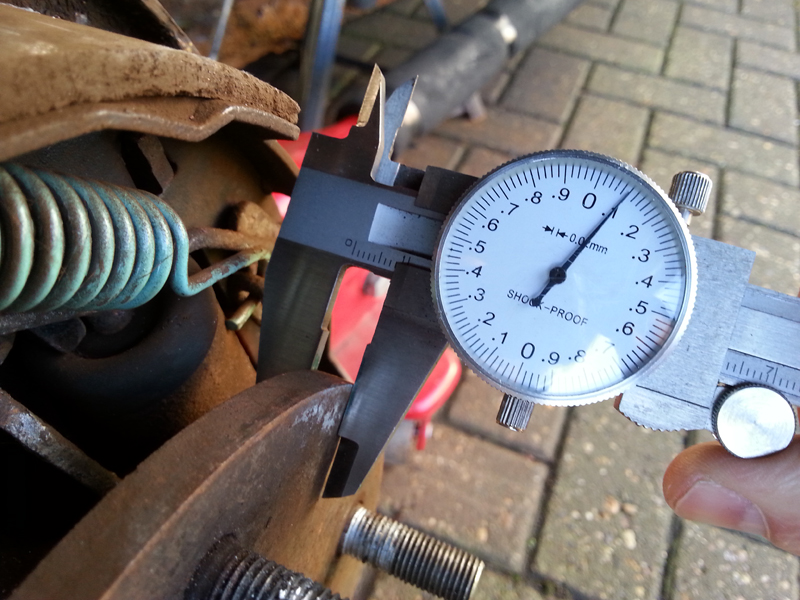
It was clear early on that the existing stud would be too short, but I also needed to extract one to be able to measure the hole diameter. I could assume that it would be a stock size, but I didn't want to get it wrong as I don't fancy having to drill these holes out.  


Knowing that these studs can be in pretty tight, I went straight for the ball joint press.  Even then, I still had to stand and use my full body weight (and I'm not a lightweight) to get any movement.


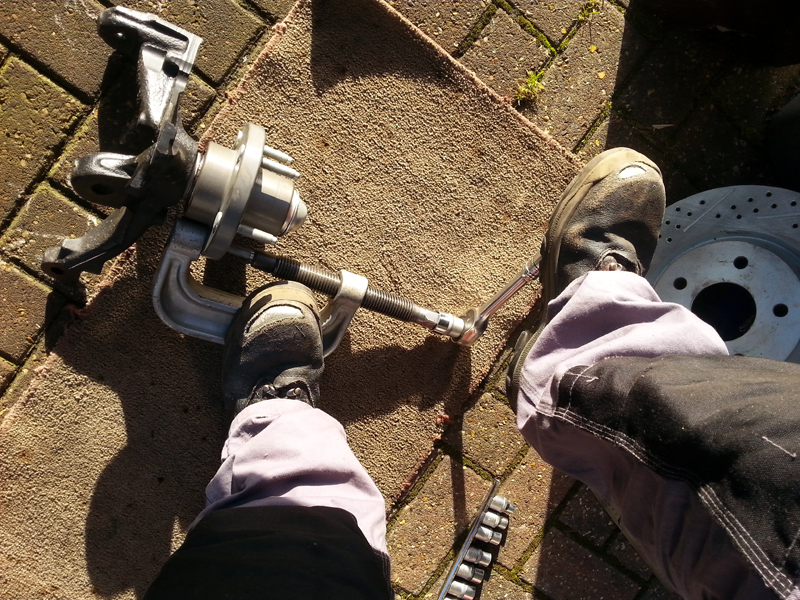
Eventually it popped out, and I was able to confirm the full length and knurl thickness and confirm that I could use the same set of studs as will be used at the rear.

I then spent a bit of time rooting around in the garage, hoping to find a few things that I could sell quickly to raise a bit more cash.  I was planning to go for some del-lum bushes, but a recent ebay find has put that on hold. I won't go into it now, as it's still in auction and I don't want to jinx it, but fingers are tightly crossed.

Jamieg285

  • Pimp
  • *
  • Posts: 7356
    • View Profile
    • http://www.mfatw.com/WD
Re: '79 Camaro - Major surgery
« Reply #127 on: March 03, 2015, 01:46:28 pm »
Had a bit more time to work over the last week, so a few things to update.

First off is my latest acquisition.  Luck was with me and I go this at the opening price:


Yes, a fully refurbished and powder coated 1979 Core Support! And only 30 mins away from home!  This could save me weeks of work.


I've also been busy ordering stuff to come over from the US in a container.  Back-order delays meant I won't get the quarter panel I need (I will get this on the next shipment later in the year instead), but I have got the drivers outer rocker, chunky wheel adapters, along with the required longer studs and new lug nuts, del-alum bushes for the front suspension and new tie rods. 

With all these items needing more storage space in the garage, the focus has to be on making space.  With this in mind, I've gone full steam ahead into removing the old sub-frame alowing me to get the new one out and under the car.  With a lot of the new parts that are going to go on, I've decided to try and sell the frame complete with suspension/steering and brakes.

First job was to start dismantling the frame, removing anything I want to keep.  Core Support and front cross member out first.


With some battling (trying to keep the circuit intact) I got the full steering assembly out too.


Try as I might, I couldn't separate the linkage from the pitman arm, which I needed to keep.  Thank fully overnight I receieved some words of wisdom and used a different technique (brains not brawn) and it popped off easily.


Last minute check on engine/frame to body connections, cut 1 wire and disconnect the fuel line at the pump and I was ready to lift the engine.  To give myself as much room to move as possible, within the limited space available, I pulled the whole thing forward.


I should have done it earlier, but the brake lines and calipers were still attached and being a bit of a pain, so I quickly pulled these off.


With that done, it was bolts out and engine up!


Then carefully slide the frame out, lift it up and move to the rear of the car where there is a bit more working room.


The engine was carefully tucked back under the car, and then attention moved onto preparing the frame for sale.

First thing was to remove the engine mounts, as I'll be needing those to refit to the new frame.  A couple of quick reference shots to make sure I use the right mounting holes and these were removed - a lot easier with the lower A-arms out.


The trans cross-member was also removed, and these will all be cleaned and painted before being re-fitted.

Not sure whether to keep hold of the suspension shims. I know I have some more, but cannot find them at the moment. Just in case, I measure all four packs, so I have something to aim for later.


I gave it a quick rub down with a wire brush, then started to re-fit the old suspension which I won't be needing any more.  It all went together really easily. The hardest part was moving afterwards, as it must have more than doubled in weight.  Thankfully I was able to slide it under the rear of the car and just had enough time left to tidy up for the day.

Next jobs will be to extract the new frame from the bottom of the pile in the garage and get it under the car for a test fit.   Cross member and engine mounts will need cleaning and painting before it can go together properly, but a successful trial fit will mean it's safe to get rid of the old frame.

Roadkill

  • Guest
Re: '79 Camaro - Major surgery
« Reply #128 on: March 03, 2015, 01:58:25 pm »

Try as I might, I couldn't separate the linkage from the pitman arm, which I needed to keep.  Thank fully overnight I receieved some words of wisdom and used a different technique (brains not brawn) and it popped off easily.


I had the same issue, years back and never resolved it so I'd be intrigued to know the "trick".

It's cool seeing the front frame away from the car . . . Would be so much easier if I could've done that with the third gen !!!

FUBAR

  • Big Daddy Pimp
  • *
  • Posts: 14533
    • View Profile
Re: '79 Camaro - Major surgery
« Reply #129 on: March 03, 2015, 06:03:09 pm »
Camaro looks a bit different from this chilly morning in Feb 2006:


(In the background... not the frame near the front  :P)
It's the time that we kill that keeps us alive...

Jamieg285

  • Pimp
  • *
  • Posts: 7356
    • View Profile
    • http://www.mfatw.com/WD
Re: '79 Camaro - Major surgery
« Reply #130 on: March 04, 2015, 12:38:57 pm »

I had the same issue, years back and never resolved it so I'd be intrigued to know the "trick".


Surprisingly simple.  Instead of concentrating your efforts trying to push/pull the joint out of the hole, you work at deforming the hole so that the joint and hole no longer match.  In this example you hit the end of the pitman arm (90* to the joint), as if you wanted to oval the hole.  A few sharps hits (less effort that I was using to try and force the joint out) and it simply popped loose.  I've also heard that using 2 hammers either side (instead of the end) of the arm will do a similar job.

Jamieg285

  • Pimp
  • *
  • Posts: 7356
    • View Profile
    • http://www.mfatw.com/WD
Re: '79 Camaro - Major surgery
« Reply #131 on: March 04, 2015, 12:40:55 pm »
Camaro looks a bit different from this chilly morning in Feb 2006:


(In the background... not the frame near the front  :P)

It could quite easily be confused at the moment  ???

Roadkill

  • Guest
Re: '79 Camaro - Major surgery
« Reply #132 on: March 05, 2015, 09:28:53 am »
Surprisingly simple.  Instead of concentrating your efforts trying to push/pull the joint out of the hole, you work at deforming the hole so that the joint and hole no longer match.  In this example you hit the end of the pitman arm (90* to the joint), as if you wanted to oval the hole.  A few sharps hits (less effort that I was using to try and force the joint out) and it simply popped loose.  I've also heard that using 2 hammers either side (instead of the end) of the arm will do a similar job.

Cool, will bare that in mind next time . . . I'm sure there'll be a next time . . . :)

Jamieg285

  • Pimp
  • *
  • Posts: 7356
    • View Profile
    • http://www.mfatw.com/WD
Re: '79 Camaro - Major surgery
« Reply #133 on: March 13, 2015, 01:50:23 pm »
A few minor updates and unusually for me, no pictures this time.

I took the time to clean up and apply some paint to the transmission cross member and engine mounts, so that I could re-use them on the new frame.  (turns out I didn't need to worry about doing this now, but hey-ho a job done is a job done)

Before selling my old frame, I wanted to be 100% certain that the replacement would fit without issue. So, it was dragged out of the garage and offered up to the car. There were some fun and games working out how the new solid body bushes fitted (no instructions!), and even more fun trying to get the end of the frame squeezed into the ends of the sub-frame connectors and then still be able to shift the frame into position. To try and make it easier, the front end of the frame was being lifted by the engine crane, which gave me plenty of swing and movement. After about half hour of shifting and shoving, it finally all lined up and bolts were test fitted.

All that work, only to take it out again! As there are still floor and rocker fixes to do on the drivers side, I didn't want to have the frame attached, and I also needed somewhere to put the engine.  With limited space the engine was lifted and dropped onto the frame, then the whole lot was picked up again and tucked back under the car.

To help get more space in the garage, the new core support was loosely fitted to.

I've started to repair the front piece that goes between the frame horns for painting, knocking off the loose rust and old paint.  Not planning to fit it yet, as I want the frame as bare/light as possible until it's properly bolted back on the car.


Jamieg285

  • Pimp
  • *
  • Posts: 7356
    • View Profile
    • http://www.mfatw.com/WD
Re: '79 Camaro - Major surgery
« Reply #134 on: March 19, 2015, 12:57:34 pm »
I have a feeling that most of the updates this year are going to be from short bursts during my lunch breaks at home.  Here is this weeks:

With the sun shining and a feeling of a bit of warmth in the air, I decide to start working on the body work again.  Although I have been doing some bits and pieces, none of them feel particularly important - although all progres is good progress. 

The replacement drivers outer rocker panel is now on the boat to the UK and all being well will be in my hands within a month, so I made the decision to start working on the removal of the old one.  Now I know what's involved, I'm going in with a much less surgical approach, and going more for speed.

I started of with stripping the paint off the lower edge to reveal the spot welds. Rather than using a small almost pen sized wire brush in a drill, I've opted for a more brutal looking affair in the angle grinder, and it made a much better and quicker job. I wish I'd started using it before now.


Knowing that I can't get the spot weld cutter into those spots, my next step was to start cutting out the bulk of the panel, thus removing the restriction.  I'll need to brace across the door opening again, but with this in place I wouldn't be able to make the cuts across the top, so I have made the initial cuts that need doing before the brace is put in.


I ran out of time to finish these, and will probably need to finish a couple of them off with the dremel.  I finshed off the day by placing the brace in, and making the necessary mods to it so that it fits the opposite side of the car.


I'll do the final top cuts and weld the brace in next time, before cutting the bulk of the rocker out.


I must stop looking on ebay. Even though my budget is overstretched, and space is limited, I can't seem to avoid finding bargains.  It's hard to pass on a £35 fuel tank that's only a few years old.  The filler neck is the wrong length, so I'll have to make some modifications, but apart from that it's all good. Plus it had about £20 worth of fuel in it, which I can put to use in my bike.

Rob

  • Filthy Ho
  • *
  • Posts: 2515
    • View Profile
Re: '79 Camaro - Major surgery
« Reply #135 on: March 21, 2015, 06:20:44 pm »
I must stop looking on ebay. Even though my budget is overstretched, and space is limited, I can't seem to avoid finding bargains.  It's hard to pass on a £35 fuel tank that's only a few years old.  The filler neck is the wrong length, so I'll have to make some modifications, but apart from that it's all good. Plus it had about £20 worth of fuel in it, which I can put to use in my bike.

Had a little punt on that myself.  Didn't consider you'd be on it as well...LOL

Jamieg285

  • Pimp
  • *
  • Posts: 7356
    • View Profile
    • http://www.mfatw.com/WD
Re: '79 Camaro - Major surgery
« Reply #136 on: April 14, 2015, 01:43:29 pm »
I didn't get a chance to enter the last update, so here is a double one, although still quite short.

Work continues on removing the drivers rocker.  Last time out I finished the cuts that were started last time and started drilling out the spot welds along the top edge.


It was a lot easier doing it from the outside, rather then crouching inside the cabin.  I also spotted that I could use a normal drill and go straight through, again easier than using the spot weld cutter, which will have to be used on some of the spots later.

Today I did a bit more.  I made sure that I didn't forget about the brake/vapour lines running down the inside edge of the rocker. 


I removed enough brackets to move it away from the work area, although I don't think I'll be able to remove it completely, as it being captured by the SFC.


I forgot to take some pictures (will get them next time), but I found a small area in the floor, around the drain plug and floor/toe board transition area that will need to be patched.  Didn't look too big or too difficult.

With time running short, I made a start on the rear door section, finding and drilling out the spot welds.  The rearmost one on the vertical side was rusting out, so I may need to take a closer look at this before I well the new panel in.


Good news is the first of the shippments from the US has arrived in the UK and is ready for collection.  The second is packed and due to sail anytime soon, so I'm holding off collecting until both lots are available.

Jamieg285

  • Pimp
  • *
  • Posts: 7356
    • View Profile
    • http://www.mfatw.com/WD
Re: '79 Camaro - Major surgery
« Reply #137 on: April 16, 2015, 01:31:56 pm »
With a few other jobs to do deal with before getting to the car, today's session was very short at just 30mins work time. I did get as much done as I could.

I started by getting more of the rear end of the rocker out, succeeding in getting most of it off.


What's left there is a bit more fiddly, and will take a bit more care in making sure I leave what I can of the neighbouring panels. A job for a day with more time.

Whilst the disc cutter was out, I also trimmed back some more of the front end back. Again the front is going to be a bit more tricky, especially if I am going to keep the door on (not sure if it's possible yet, but I'm going to give it a try.

Next up was a quick slice into the remains of the top strip and pulling it off, which just a couple of spots needing encouragement with the chisel.


Finally, just before packing up, I bent up what remains on the lower edge, so that I will be able to get the spot weld drills in next time.


Jamieg285

  • Pimp
  • *
  • Posts: 7356
    • View Profile
    • http://www.mfatw.com/WD
Re: '79 Camaro - Major surgery
« Reply #138 on: April 22, 2015, 03:05:47 pm »
A few more short sessions this week, making more good progress on getting the rocker off.

First off, here is one of the missing pictures from last week, showing the recently uncovered area on the drivers floor that will need patching.  I will probably loose the plug and just put in a flat panel.


Onto the actual work... despite saying I did't want to take the door off, we had friends over for the weekend and, with the help of a few beers, I managed to get an agreement to help lift if off and refit afterwards. 

Had similar problems with the door hinge bolts as the other side.  One snapped, and there was one that was in at a strange angle and came out stripped.  Attempting to get another bolt in the same hole looked like it would do the same thing again, so for now there is just one bolt on the lower hinge - same as the other side!

Thankfully, there were less spot welds in the top section that the passenger side, so it was pretty quick to drill out all of the welds that would be hampered by the door, and then we could get back to relaxing and enjoying the weekend.


Yesterday I continued getting that front piece out, removing the inner spot welds.  I did find another small area that will need patching in the panel behind the kick panel.


Attention then moved to the lower edge, which meant out with the trusty spot weld cutter, as I didn't want to drill right through the inner rocker this time.
I started near the back where access was easiest, cut two holes out, then split it so that I could peel the metal away as I worked in either direction.


Rear section cut away pretty quickly.


Front section took a bit longer, but was making good progress.


Today was all about continuing along the lower edge.


I couldn't get to the front to spots on the lower edge, so worked on the 3 on the underside.


Almost there.  Most of what is left is more tricky locations to get into with the drill.  Hopefully I'll get them all out in the next session, but I expect it may take longer.


Good news is that the next container is now sailing and is due here in about 3 weeks.  Bad news is I've already come up with a few more things I need, so will have to have another shipment later in the year.


Roadkill

  • Guest
Re: '79 Camaro - Major surgery
« Reply #139 on: April 22, 2015, 03:24:09 pm »
You seem to be gaining quite a stockpile of steel under the car !

Impressive progress.  I think I would've lost the plot by now, if it were me.

Jamieg285

  • Pimp
  • *
  • Posts: 7356
    • View Profile
    • http://www.mfatw.com/WD
Re: '79 Camaro - Major surgery
« Reply #140 on: April 23, 2015, 11:15:52 am »
You seem to be gaining quite a stockpile of steel under the car !

Yes, it's starting to look a bit untidy now, and it's limiting access underneath.  I need to find out if the recyclers will take it and how much for. No point lugging it 15 miles for next to nothing.


Roadkill

  • Guest
Re: '79 Camaro - Major surgery
« Reply #141 on: April 23, 2015, 02:50:31 pm »
The scrappy will take it but it won't cover your fuel for the 15 miles (not unless you've got a reel of copper in there, too).

I gave up taking stuff to the scrappy, just didn't cover my time or the fuel.

Jamieg285

  • Pimp
  • *
  • Posts: 7356
    • View Profile
    • http://www.mfatw.com/WD
Re: '79 Camaro - Major surgery
« Reply #142 on: May 05, 2015, 12:36:02 pm »
A small update from last weeks mid-week session.  Targets for today were to start repairing the small areas at the front of the outer rocker area, getting them done before the new rocker is ready to go in.

Whilst digging out a bit more of the rust that was found on the inner panel, I found a patch on the outer side that needs attention too.


Time was short, so I opted to start on the outer section first, grinding it back and finding the limits of the rust. Then a donor piece of metal was found and bent to match the curve.


This was then trimmed to size, the area prepped and then welded in.


I did get it fully welded in, but my welding touch has dropped off over the winter and it looks awful.  With the door in place I can't get the grinder into it yet, so this will have to wait till a lot later in the project.

Jamieg285

  • Pimp
  • *
  • Posts: 7356
    • View Profile
    • http://www.mfatw.com/WD
Re: '79 Camaro - Major surgery
« Reply #143 on: May 05, 2015, 12:56:15 pm »
Finally, the first big update of the year. It was a long weekend and the family were away.  It was supposed to be 3 full days on the car, but rain put pay to that on Sunday, but there were still two good days of work done.

Yet again, focus changed and I set out with the intention of completing the drivers rear frame rail in the available time.


Before cutting anything out, I wanted to make sure I was set for positioning the replacement. I came up with the idea of using a piece of scrap as a height guide, fixing it to a re-fitted shackle bolt and bushing.


Then I measured to the side to get the alignment in that plane.


The last few spot welds were removed, although suprisingly, there was only one to the top section of the frame.


I worked out where I wanted to cut. Far enough past the rust, but not too far, then drilled some guide holes through the trunk floor so I'd know where to cut from the top side.


Then it was in with the cutter. Access was difficult with the angle grinder, so it was partially done with that, with the rest finished off with the Dremel.


All done and a bit of hammering and it fell out. Well almost. There was one more spot weld between the frame end and the cross rail. A quick slice with the cutter and it was properly out.


Yes - I think this did need replacing!


Whilst preparing the end in the car, I came to the conclusion that I wanted to extend the cut a bit further, getting it away from the oval hole in the base. A few chops later and another chunk was out.


With the overall length now sorted, I was able to remove the donor section from the replacement rail. I made sure I was an inch too long, so that I had plenty of room to trim it down to fit. The last thing I wanted as to cut too short!.


Then, bit by bit, I carefully removed gradually smaller and smaller chunks and slices until the two ends were a good fit.


The end of the rails were prepped, height gauge put in place and clamped together and out came the welder.


It's fair to say, it wasn't pretty and I wasn't overly happy with it. 


Next job will be to grind it back and work out which bits need going over again.

It was now late on Saturday (still daylight :-) )  and I was really happy with the progress.  I had not imaginged that I would get so far through this in one day. 

Jamieg285

  • Pimp
  • *
  • Posts: 7356
    • View Profile
    • http://www.mfatw.com/WD
Re: '79 Camaro - Major surgery
« Reply #144 on: May 05, 2015, 01:07:20 pm »
Monday morning and the first thing I did was cut the rail out again :-(

As well as not being happy with the standard of welding, it appears that something had shifted between me setting it up and welding it in and it was in crooked.


To make it easier, I cut some more of the trunk pan away, giving much better access to the inner side, both for the new cut (which was also done better this time) and the welding.

This time, more care was taken getting everything setup and held in place and off I went again.


This time the it went in properly and the welding was far, far better.


Welds were then ground flush, with some filling added where needed.


Unfortauntely, now too late to do properly with the original rail in one piece, I found a small section right next to where I had welded that needed sorting. For now I have cut that bit out and started preparing a patch.


So, overall, I didn't get much further on the Monday than I had got on Saturday, but at least this time it was done properly.  Still some way to go though. I want to try and add some internal support, but not sure how yet as access is very tight in there.  Some of it will have to wait until the quarter panel is out, even then I'm not sure it will be enough.  Time will tell!


Jamieg285

  • Pimp
  • *
  • Posts: 7356
    • View Profile
    • http://www.mfatw.com/WD
Re: '79 Camaro - Major surgery
« Reply #145 on: May 28, 2015, 12:12:56 pm »
Despite some decent weather I've not been able to make a lot of progress of late, but there are a few things of note to write about.

First up, the latest purchases have now been collected and are safely stored in my garage.  These include:  Drivers Outer Rocker, Passenger Quarter Skin, del-alum bushes for the front suspension arms, AC Delco Pro ball joints and steering linkages, chunky wheel adapters, thicker wheel studs, locking wheel nuts, rag joint, various gaskets and seals for the TH-350, new shims for the a-arms and an anti-squeak kit for the fuel tank.  Not a bad haul for an limited budget!

Somewhat disappointingly, the wheel adapters are wrong. They were supposed to be hub and wheel centric (lip on the outer face), but are not, despite the seller telling me they were and matched the picture they were using to sell them.


The bad news is that due to the length of time it has taken for them to get to me and be checked, they are outside of the eBay guarantee period. Better news is that I am still covered by Paypal who refunded the full amount, and bearing in mind the costs of shipping back to the US have said I don't have to do so.  This means I now have a set that I can use for mocking up and checking the widths, and can sell them on to help pay for the extra costs of the correct replacements. Happy days.

The next disappointment was the wheel studs.  I should have done better research before buying extra long ones, as it turns out I don't need them that long as the adapters are designed to work with stock length studs.  Rather than cut the down I will try and sell these on and get some new shorter ones.  I should only need to do this for the rear, as I am fairly sure the current ones on the Baer kit are suitable and won't need changing.


I'd originally planned the next job to be fitting the newly acquired outer rocker, but on closer inspection and consideration, I'd decided to concentrate on the inner rocker and rear floor repairs first, as it will give me better access to the inner rocker and torque box with the outer rocker not there.  I've bought a length of box section that I will weld into the outer rocker location as a brace whilst doing all of this.

The outer rocker would need epoxy primering before fitting and I wanted to avoid previous mistakes of mixing too much paint for the job and wasting some of it. With this in mind I've patched up a couple of areas in the trunk floor(both where the exhaust hanger brackets are) and been under the rear wire brushing some of the underside of the trunk floor and seatback panels. A big enough area that will use up the remaining paint.


With that all said and done, having picked up the items there has been yet another change of plan.  Anyone who's had a quarter skin delivered will know just how big the box it comes is. It's huge and taking up far too much space in the garage. It's currently balance on top of the engine crane and hood, and I have to duck under it when I want to get to the back half of the garage.  I could take the panel out, but I would still have pretty much the same issue, but with the downside of little to no protection for the panel.

So, current sub-project is the passenger quarter repairs - one of the jobs that is the most daunting.  I've done as much research on it as possible, and worked out where I want to make my cuts - above the wheel arch, but below the body line.  Yesterday I took the plunge and made a proper start on it, making the initial horizontal and vertical cuts. 


I wanted the main panel cut before I started trying to separate the lower edges from the outer wheel house and trunk drop offs, so that I can bend and wiggle without affecting the panels that will stay on the car.

And that's as far as I got. A delivery of my new motorbike took my attention for the rest of the available time.

art b

  • Pro Pimp
  • *
  • Posts: 8917
    • View Profile
Re: '79 Camaro - Major surgery
« Reply #146 on: May 28, 2015, 12:54:31 pm »
A delivery of my new motorbike took my attention for the rest of the available time.


new thread and pics req ... :ORIG-pics:
This forum needs, ''YOU'' posting,Not just reading ! :moon:

Roadkill

  • Guest
Re: '79 Camaro - Major surgery
« Reply #147 on: May 28, 2015, 04:19:44 pm »
It's a bit naughty of the wheel-spacer seller to claim they're hub-centric . . . . Proper hub-centric wheel spacers are rare and f*cking expensive (and I've only seen them available for the 4th gens and over - Eibach do them I think).

And yes, new thread for the bike, please. :tongue:

Jamieg285

  • Pimp
  • *
  • Posts: 7356
    • View Profile
    • http://www.mfatw.com/WD
Re: '79 Camaro - Major surgery
« Reply #148 on: May 29, 2015, 11:19:00 am »
It's a bit naughty of the wheel-spacer seller to claim they're hub-centric . . . . Proper hub-centric wheel spacers are rare and f*cking expensive (and I've only seen them available for the 4th gens and over - Eibach do them I think).

Yes, but overall I'm up in more ways than one, so not fussed about it now.  I can use them to physically check the widths are right, rather than going on recommendations/guess work. I can then adjust the width if necesssary when I re-order.  Got a full refund, so I'm only down a little bit on the customs costs, which I should make back when I sell them on. 

I've got a couple of off-the-shelf options lined up in the current sizes, but if they are different, I may have to go the custom size route - at more than double the price.  At least they will be spot on though.


new thread and pics req
And yes, new thread for the bike, please.

Yes, yes. It's coming...

Jamieg285

  • Pimp
  • *
  • Posts: 7356
    • View Profile
    • http://www.mfatw.com/WD
Re: '79 Camaro - Major surgery
« Reply #149 on: June 15, 2015, 12:43:39 pm »
I didn't get time to write my updates from last week, so here is another double episode.

Not a lot of progress last week, as only a couple of hours were available (motor bikes still taking up a lot of spare time).  I continued stripping off the passenger quarter panel.  I was working carefully around the outer wheel house lip, with the intention of retaining as much of the original panel as possible. This involved drilling out the spot welds and then cutting strips of the panel every 2-3 holes.


Outer wheelhouse lip isn't as bad as I was expecting, but will need some patching.


Moving further round, onto the trunk drop off, things didn't go so well.  The front edge didn't take much encouragement to seperate at all, and revealed the trunk drop off was in a pretty poor state.  This wasn't at all visible until the outer panel was removed.


Looking at the state of this, I'm going to have to replace the panel.  Knowing that the outer side in this area on the drivers side looks worse, I know without having to look further that I will need that side too.


During the week plans changed once again. I'll not go into detail yet, as I don't want to jinx it, but I am now trying to sell the quarter panels to raise urgent funds.  This means that for now, focus moves again, this time back to the drivers rocker panels and torque box area.

With the door gap bracing checked, I figured it would be OK to start pulling out some more metal.  I wanted to get the end of the inner rocker out and patch prepared whilst there was still some of the stucture inside it to help with alignment.  I've marked where I want to cut and started drilling out the spot welds within that area, then cut around it.  It looks like someones had a go at it with a shotgun!


A suitable patch was cut and shaped, and will be epoxy primered before fitting.

I then started on the floor pan and torque box, concentrating on areas that won't affect the outer edge/fitting of the inner rocker.  Now I know how it all hangs together I'm not worried about getting it out in one piece, so just drilled and cut stategically to get things out as quickly as possible.


Having got this far, it looks like the brake line is going to be a problem, as I can't (currently) move it any more as it's trapped between the floor SFCs.  I'll have another look later, but I am close to just cutting it out and putting a new one in when the time comes.